Did you know that Halloween cookies can be more than just sweet treats? With a few simple tweaks, you can transform traditional recipes into healthier versions that still capture the festive spirit. Imagine crafting cookies that not only look spooky but are also made with whole ingredients. Curious about how to elevate your baking game this Halloween? Let's explore the steps to create these delightful cookies that friends and family will love.
Recipe Tips and Tricks
- Gather quality ingredients like whole wheat flour, almond milk, and festive decorations to create delicious Halloween cookies.
- Preheat your oven to 350°F (175°C) and bake cookies for 10-12 minutes for perfect results.
- Use Halloween-themed cookie cutters and bright frosting to create spooky designs that enhance the festive spirit.
- Bake cookies in advance and store them in airtight containers to keep them fresh for gatherings.
- Share your homemade cookies with friends and family to spread the Halloween spirit and enjoy festive traditions together.
How To Make It – Recipe
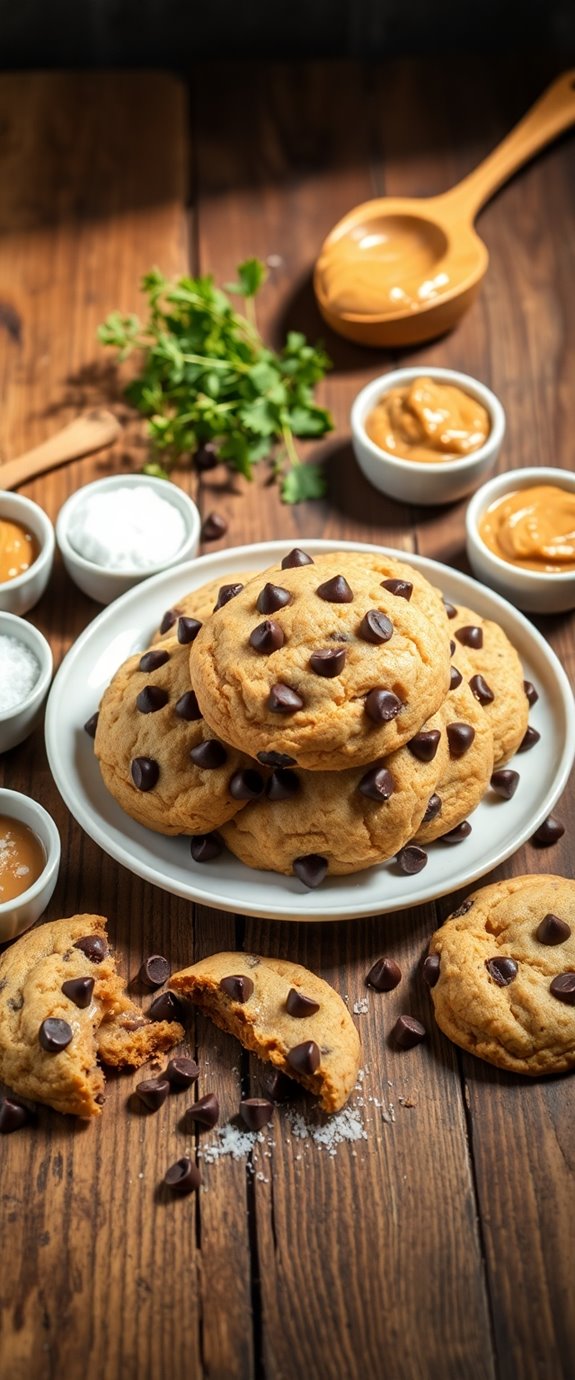
Get ready to celebrate Halloween with a delightful batch of spooky cookies that are perfect for sharing with friends and family. This Halloween cookie recipe isn't only easy to follow but will also fill your home with the sweet aroma of baked treats.
These cookies can be decorated in fun and festive ways, making them an excellent activity for kids and adults alike. Whether you're hosting a Halloween party or simply indulging in some seasonal treats, these cookies will surely impress.
To start your Halloween cookie adventure, gather all your ingredients and prepare your workspace. You can use cookie cutters in various Halloween shapes like bats, pumpkins, and ghosts or simply roll the dough into balls and decorate them with colorful icing and sprinkles.
The best part is that these cookies are versatile; feel free to experiment with flavors and decorations to suit your Halloween theme. Additionally, these cookies can be made using Christmas cookie recipes for a festive twist.
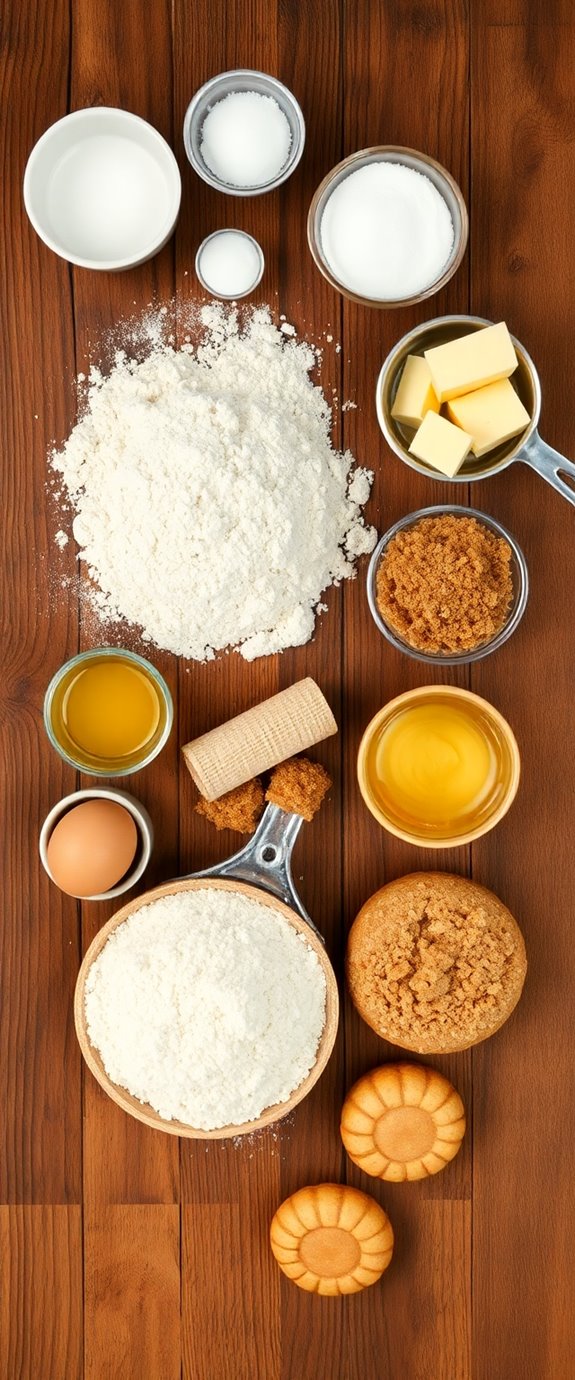
Ingredients:
- 2 ¾ cups all-purpose flour
- 1 teaspoon baking soda
- ½ teaspoon salt
- 1 cup unsalted butter, softened
- 1 ½ cups granulated sugar
- 1 cup brown sugar, packed
- 2 large eggs
- 2 teaspoons vanilla extract
- 1 teaspoon almond extract (optional)
- 1 cup chocolate chips or Halloween-themed candies
- Icing and sprinkles for decoration
In a large bowl, whisk together the flour, baking soda, and salt. In a separate bowl, cream the softened butter with granulated and brown sugars until light and fluffy.
Beat in the eggs one at a time, followed by the vanilla and almond extract. Gradually add the dry ingredients to the wet mixture, mixing until combined. Fold in the chocolate chips or Halloween candies.
Preheat your oven to 350°F (175°C). Scoop tablespoon-sized portions of dough onto a parchment-lined baking sheet, spacing them about 2 inches apart. Bake for 10-12 minutes, or until the edges are lightly golden.
Allow the cookies to cool on the baking sheet for a few minutes before transferring them to a wire rack to cool completely. Once cooled, decorate as desired.
For the best results, make sure your butter is at room temperature for easy creaming with the sugars. If you want your cookies to be soft and chewy, avoid overbaking them; they should be slightly underdone when you take them out of the oven.
Experiment with different decorations, such as using colored icing for spooky faces or adding edible glitter for a festive touch. Store your cookies in an airtight container to keep them fresh and enjoy them throughout the Halloween season!
Substitution Suggestions
While you may have all the ingredients on hand, there are plenty of substitution options to contemplate if you're looking to customize your Halloween cookies or accommodate dietary restrictions.
For those avoiding gluten, consider using almond flour or a gluten-free blend, which work wonderfully to maintain texture.
If you need dairy substitutions, almond milk or coconut oil can replace butter and milk without sacrificing flavor. You can even use applesauce for a healthier twist!
These alternatives not only cater to different diets but also add unique flavors and textures, making your Halloween treats even more exciting and delicious. Additionally, using gluten-free flour blends can enhance the moisture and chewiness of your cookies.
Enjoy experimenting!
Decorating Ideas
As you prepare to showcase your Halloween cookies, let your creativity run wild with fun decorating ideas that will enchant both kids and adults alike.
Consider using bright orange and black frosting for spooky designs, like jack-o'-lantern faces or ghostly figures. Experiment with various frosting techniques, such as piping outlines or flooding surfaces for a glossy finish.
Don't forget to add edible glitter or sprinkles to give your cookies an extra festive touch. You can even use candy eyes or chocolate chips to create eerie creatures. Additionally, incorporating homemade cookie recipes can elevate your cookie decorations and flavors.
With these ideas, your Halloween cookies will be the highlight of any spooky celebration!
Serving Suggestions
After your Halloween cookies are beautifully decorated, it's time to think about how to serve them for maximum impact.
Use spooky plates adorned with ghosts or cobwebs to create an eye-catching display that sets the mood. Arrange your cookies in festive displays, stacking some high and placing others at different angles to add visual interest.
Consider incorporating themed props like mini pumpkins or faux spiders to enhance the Halloween vibe. Don't forget to label your cookies with fun names like "Witch's Fingers" or "Monster Munchies" to engage your guests. Adding a selection of holiday cookie recipes can also provide variety and delight for your guests.
With these serving suggestions, your treats will be the highlight of any Halloween gathering!
Make-Ahead and Storage
If you want to get a head start on your Halloween festivities, making your cookies in advance is a smart move.
The make-ahead benefits are plentiful; you can save time and reduce stress when the day arrives.
After baking, allow your cookies to cool completely, then stack them between layers of parchment paper in an airtight container.
For longer storage, consider freezing them. Just wrap each cookie in plastic wrap and place them in a freezer bag.
When you're ready to enjoy, let them thaw at room temperature.
These storage tips guarantee your treats stay fresh and delicious for your celebration! Additionally, holiday cookies can be made in various flavors and decorated to fit the Halloween theme, adding a festive touch to your gatherings.
How to Store Leftovers
Once the Halloween festivities wind down and you find yourself with leftover cookies, storing them properly is essential to keep them fresh and tasty.
Start by letting the cookies cool completely. Then, place them in airtight storage containers to lock in moisture and flavor. For best results, choose easy cookie recipes that are designed to stay fresh longer.
If you have different types of cookies, consider layering them with parchment paper to prevent sticking.
For longer storage, pop the containers in the freezer—most cookies freeze beautifully! Just remember to thaw them at room temperature when you're ready to indulge again.
With these simple steps, your leftover cookies will remain delightful treats for days!
Nutrition Facts(per serving)
Enjoying your Halloween cookies is even better when you know what you're indulging in. Each serving typically contains around 150-200 calories, depending on the ingredient breakdown.
You'll find a delightful mix of flour, sugar, butter, and festive spices, which contribute to both flavor and caloric content. The sugars provide an instant energy boost, while the fats help create that desirable chewy texture. Additionally, incorporating ingredients like oats or nuts can enhance the nutritional value of your cookies.
If you're watching your intake, consider using alternatives like whole wheat flour or a sugar substitute. Knowing these nutrition facts lets you savor each bite without any guilt during this spooky season!
Final Thoughts
As Halloween approaches, the excitement of baking festive cookies can transform your kitchen into a delightful hub of creativity and flavor.
These spooky treats not only satisfy your sweet tooth but also bring joy to your festive gatherings. Whether you're decorating with vibrant icing or adding fun toppings, the process is as enjoyable as the end result.
Plus, sharing your homemade cookies with friends and family spreads the Halloween spirit. So, don't hesitate to release your inner baker!
Immerse yourself in this delicious tradition, and let your imagination run wild. Remember that Easter Cookie Recipe can also inspire some unique Halloween flavors. Happy baking, and may your Halloween be filled with sweet delights!
Recipe FAQs
Can I Use Gluten-Free Flour for This Cookie Recipe?
You can use gluten-free flour for your cookies, and it'll feel like magic. Just remember, gluten-free substitutes can behave differently, so follow these baking tips for the best results—your cookies will still be delicious!
What Is the Best Way to Roll Out Cookie Dough?
To roll out cookie dough effectively, use a lightly floured surface and a rolling pin. Aim for even dough thickness, applying gentle pressure with rolling techniques to guarantee uniformity and prevent sticking for perfect cookies.
How Long Does It Take for the Cookies to Bake?
Baking time typically ranges from 8 to 12 minutes, depending on your cookie thickness. You'll want to watch for a golden edge, as it'll help achieve that perfect chewy texture you're aiming for. Enjoy!
Can I Freeze the Cookie Dough Before Baking?
Yes, you can freeze cookie dough before baking! Use proper freezing methods, like wrapping it tightly in plastic wrap, to guarantee ideal dough storage. This way, you'll have fresh cookies ready whenever you want!
What Are Some Fun Themes for Halloween Cookie Decorating?
When it comes to Halloween cookie decorating, think of a haunted art gallery! You can create spooky shapes like bats and ghosts, or bring monster faces to life with vibrant colors and fun edible decorations.