


Did you know that cookie bars can cut baking time by nearly half compared to traditional cookies? This makes them a go-to option for busy bakers who still crave that homemade goodness. With just a few simple ingredients, you can whip up a batch that's perfect for sharing or enjoying yourself. But what makes these bars truly special? Let's explore how to create this delightful treat, along with some customization options to suit your taste.
Recipe Tips and Tricks
- Combine softened butter, sugars, eggs, and vanilla, then mix in flour, baking soda, and salt for a simple batter.
- Fold in chocolate chips (or preferred mix-ins) before spreading the batter in a greased 9×13-inch pan.
- Bake at 350°F (175°C) for 25-30 minutes until golden brown and set in the center.
- Customize flavors by adding nuts, dried fruits, or spices to suit your taste preferences.
- Store in airtight containers or freeze for longer freshness and easy access to delicious treats.
How To Make It – Recipe
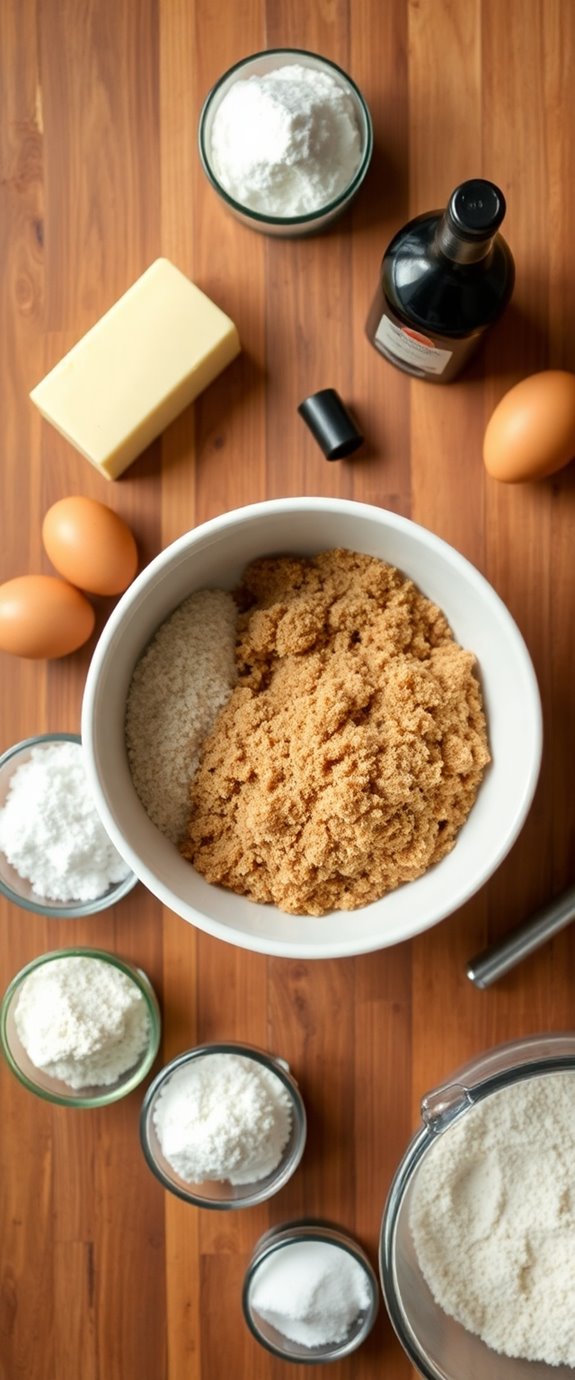
To make delicious and easy cookie bars, you'll need just a few simple ingredients that you probably already have in your pantry. This quick cookie bar recipe is perfect for those who crave a sweet treat but don't have a lot of time to spend in the kitchen.
Whether you're preparing for a party, a family gathering, or just looking to satisfy your sweet tooth, these cookie bars will surely do the trick. They're chewy, rich, and can be customized with your favorite mix-ins like chocolate chips, nuts, or dried fruit.
The beauty of this recipe lies in its simplicity. You can whip up the batter in one bowl, bake it in a single pan, and enjoy the results in no time. Once baked and cooled, these cookie bars can be cut into squares or rectangles, making them easy to serve and perfect for sharing.
Get ready to indulge in a delightful homemade treat that everyone will love! In fact, homemade cookies are a great way to create lasting memories with family and friends.
Ingredients:
- 1 cup unsalted butter, softened
- 1 cup brown sugar, packed
- 1 cup granulated sugar
- 2 large eggs
- 2 teaspoons vanilla extract
- 3 cups all-purpose flour
- 1 teaspoon baking soda
- 1/2 teaspoon salt
- 2 cups chocolate chips (or your favorite mix-ins)
Preheat your oven to 350°F (175°C) and grease a 9×13-inch baking pan. In a large bowl, cream together the softened butter, brown sugar, and granulated sugar until the mixture is light and fluffy.
Beat in the eggs one at a time, followed by the vanilla extract. In a separate bowl, whisk together the flour, baking soda, and salt. Gradually add the dry ingredients to the wet mixture, mixing until just combined.
Fold in the chocolate chips or your choice of mix-ins. Spread the batter evenly in the prepared baking pan and bake for 25-30 minutes, or until the edges are golden brown and a toothpick inserted in the center comes out clean. Allow to cool before slicing into bars.
For best results, make sure your butter is at room temperature for easier mixing, and consider chilling the dough for about 30 minutes before baking for a thicker bar.
You can also experiment with different mix-ins like nuts or dried fruit to create your own variations. Finally, store any leftover cookie bars in an airtight container to keep them fresh, or freeze them for a tasty treat later on!
Substitution Suggestions
While you mightn't have every ingredient on hand, there are plenty of easy substitutions that can make your cookie bars just as delicious.
If you're short on flour, try using almond or coconut flour for a gluten-free option. For sugar, consider alternative sweeteners like maple syrup or agave nectar; they'll add a unique flavor while keeping things sweet.
If your recipe calls for butter, coconut oil works wonders and adds a lovely tropical touch. Additionally, using gluten-free flour alternatives can enhance both the taste and texture of your cookie bars.
These substitutions not only maintain the integrity of your cookie bars but also cater to various dietary needs, ensuring everyone can enjoy a tasty treat!
Decorating Ideas
Once your cookie bars come out of the oven and have cooled, it's time to release your creativity with some fun decorating ideas.
Start by spreading a layer of frosting on top; you can use buttercream or cream cheese for a rich flavor.
Next, sprinkle on colorful cookie toppings like sprinkles, chopped nuts, or mini chocolate chips.
For festive themes, consider adding seasonal candies, like candy canes for winter or pastel M&Ms for spring.
Drizzle melted chocolate or caramel over the bars for an extra touch.
Incorporate Delicious Christmas Cookies for a delightful holiday treat that everyone will love.
Let your imagination run wild, and enjoy the process of making your cookie bars truly unique!
Serving Suggestions
As you prepare to serve your delicious cookie bars, think about how to elevate the experience for your guests.
Start with eye-catching presentation ideas: arrange the bars on a colorful platter or tiered stand for a delightful display.
Consider offering different serving sizes, cutting the bars into bite-sized pieces or larger squares, allowing guests to choose based on their cravings.
You could also complement the cookie bars with a selection of toppings like whipped cream, chocolate drizzle, or fresh berries. Including holiday cookie recipes can inspire your guests to recreate their favorites at home.
Finally, don't forget to provide napkins and fun plates, making the whole experience more enjoyable and interactive for everyone!
Make-Ahead and Storage
To keep the cookie bar experience effortless for your guests, making them ahead of time is a fantastic option. You can prepare the bars a day or two in advance, allowing the flavors to meld beautifully. Additionally, these cookie bars can be made using a 30 minute cookie recipe that ensures a quick and tasty treat.
If you want to extend their shelf life, consider freezing options. Wrap the cooled bars tightly in plastic wrap, then store them in an airtight container. They'll maintain their deliciousness for up to three months in the freezer!
How to Store Leftovers
Storing leftovers properly can make all the difference in keeping your cookie bars fresh and delicious.
Start by letting them cool completely, then slice them into individual portions for easy access. Use airtight container options like glass or plastic to maintain moisture. Additionally, be sure to store your treats in a gluten free environment to avoid cross-contamination.
If you're planning to store them longer, consider these freezer tips: wrap each bar in plastic wrap, then place them in a freezer-safe bag. This prevents freezer burn and keeps flavors intact.
When you're ready to enjoy, simply thaw at room temperature or pop them in the microwave for a few seconds. Enjoy your delightful treats!
Nutrition Facts(per serving)
When you indulge in a homemade cookie bar, it's not just about the delicious taste; it's also important to contemplate the nutrition packed into each serving.
Each bar typically contains around 200 calories, providing a balanced caloric breakdown that satisfies your sweet tooth without overindulgence. The oats offer fiber, promoting digestion, while the nut butter adds healthy fats and protein, keeping you full longer.
Chocolate chips, though sweet, contribute antioxidants, balancing the treat with some benefits. Additionally, incorporating low calories ingredients can further enhance the health benefits of your cookie bars. By knowing the ingredient benefits, you can enjoy your cookie bar guilt-free, savoring both the flavor and the nutrition it brings to your day!
Final Thoughts
As you savor the last bite of your homemade cookie bar, it's clear that this delightful treat offers more than just a moment of sweetness; it's a reminder of how simple ingredients can come together to create something truly enjoyable.
With a few baking tips, like ensuring your butter is softened and not overmixing, you can elevate your cookie bars to perfection. You might also consider incorporating chocolate chip cookies into your baking repertoire for a classic twist.
Don't hesitate to explore flavor variations—add chocolate chips, nuts, or dried fruits to customize each batch.
Whether you're sharing with friends or indulging solo, these cookie bars are sure to bring joy and satisfaction.
Happy baking!
Recipe FAQs
Can I Freeze the Cookie Bars for Later Use?
Freezing cookie bars is like tucking a warm blanket around them for later. For best results, wrap each bar tightly in plastic wrap, then store them in an airtight container. These freezing tips guarantee delicious treats await you!
What Type of Pan Is Best for Baking Cookie Bars?
For baking cookie bars, choose a light-colored metal pan for even cooking. A 9×13-inch size works best; it guarantees the bars rise nicely. Non-stick coatings help release them easily, making cleanup a breeze. Enjoy your baking!
How Long Do the Cookie Bars Take to Cool Before Cutting?
Did you know cookie bars cool faster than traditional cookies? For ideal texture, let them cool for about 20-30 minutes. Use a serrated knife for the best cutting technique, ensuring clean, delicious squares every time.
Can I Add Nuts or Chocolate Chips to the Recipe?
Absolutely, you can add a variety of nuts or chocolate chips to enhance flavor and texture. Experiment with different nut varieties like walnuts or pecans, and try dark, milk, or white chocolate types for delightful combinations.
Are There Gluten-Free Options for This Cookie Bar Recipe?
Imagine crafting a masterpiece without traditional ingredients. You can definitely use gluten-free substitutes like almond flour or oat flour. Remember, experimenting with textures and flavors is key—trust those baking tips to guide you!


