When it comes to baking, a simple cookie recipe can be your best friend. With just a few basic ingredients, you can create warm, aromatic treats that bring comfort and joy. Imagine the delightful aroma wafting through your kitchen as you mix butter, sugar, and flour. But there's more to it than just mixing and baking. Let's explore how to elevate your cookie experience and make these treats even more special.
Recipe Tips and Tricks
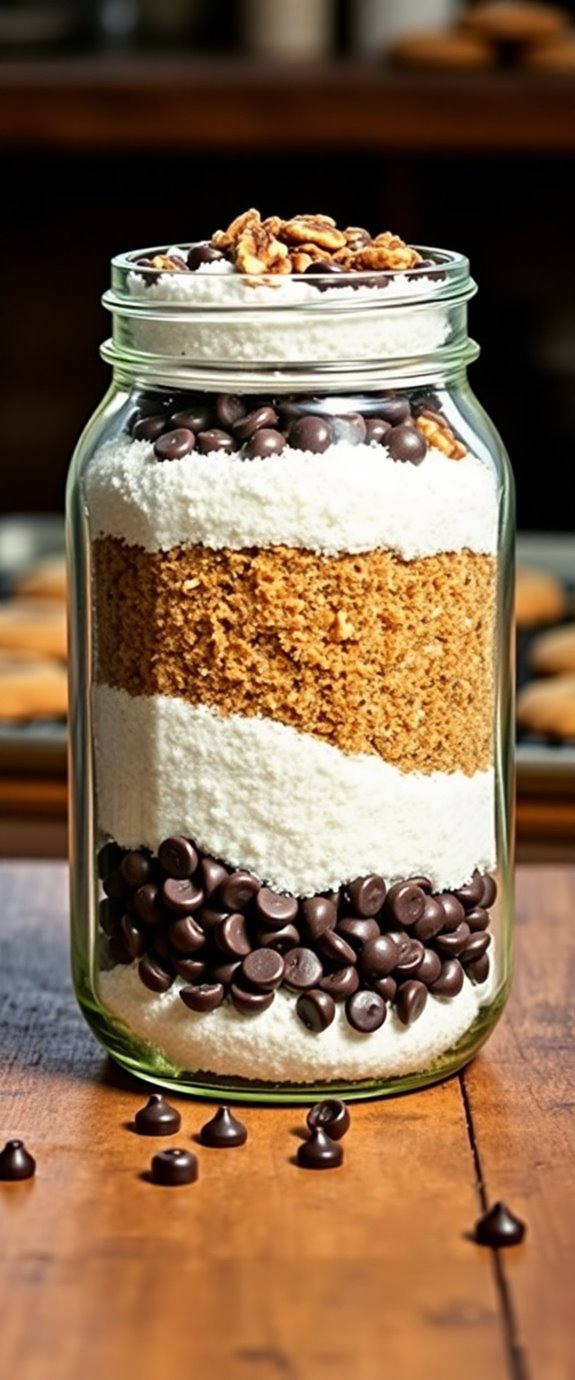
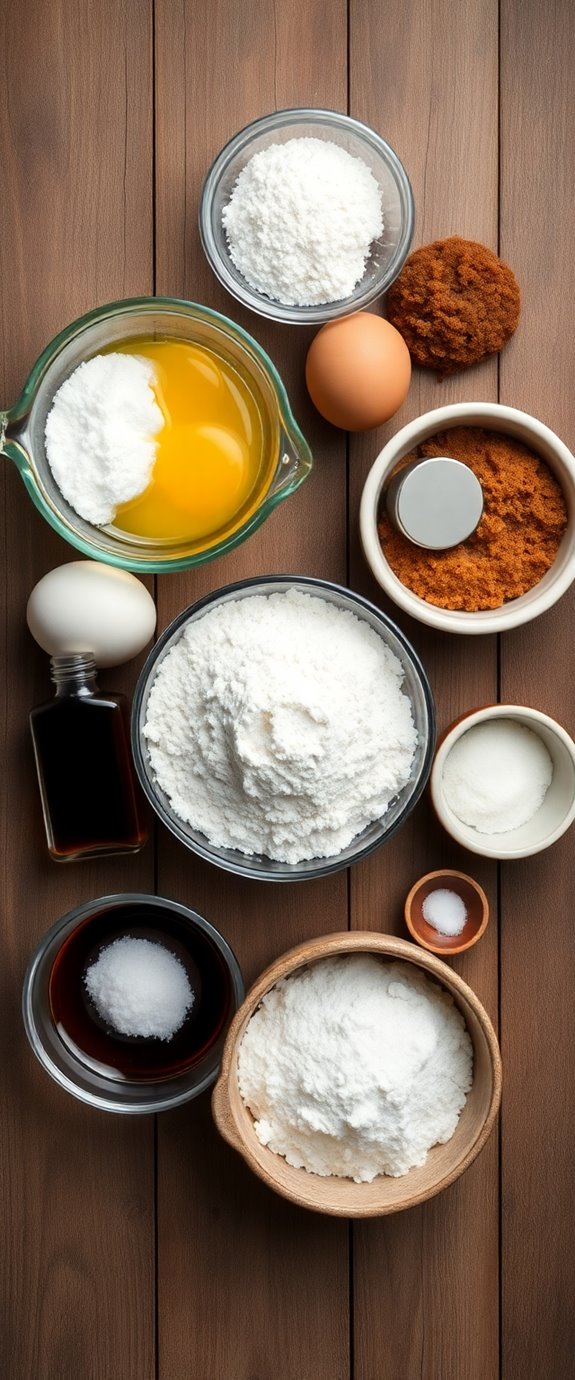
- Gather essential ingredients: butter, sugars, eggs, vanilla, flour, baking soda, and salt, with optional additions like chocolate chips or nuts.
- Preheat the oven to 350°F (175°C) for even baking.
- Cream butter and sugars, then mix in eggs and vanilla before combining with dry ingredients.
- Drop spoonfuls of dough onto a lined baking sheet and bake for 10-12 minutes until edges are golden.
- Allow cookies to cool on the baking sheet for optimal texture before transferring to a wire rack.
How To Make It – Recipe
Making cookies at home is a delightful experience that can fill your kitchen with a warm and inviting aroma. This simple cookie recipe is perfect for beginners and seasoned bakers alike. With just a few basic ingredients, you can whip up a batch of delicious cookies that are perfect for sharing with friends and family or enjoying as a sweet treat any time of day.
The beauty of this cookie recipe lies in its versatility. You can customize the flavors by adding chocolate chips, nuts, or dried fruits, allowing you to create a cookie that suits your taste preferences. Whether you enjoy chewy cookies or prefer a crispier texture, this recipe can be easily adjusted to meet your desired outcome.
Ingredients:
- 1 cup unsalted butter, softened
- 1 cup granulated sugar
- 1 cup brown sugar, packed
- 2 large eggs
- 2 teaspoons vanilla extract
- 3 cups all-purpose flour
- 1 teaspoon baking soda
- 1 teaspoon salt
- Optional: 1 cup chocolate chips or nuts
To make the cookies, start by preheating your oven to 350°F (175°C). In a large mixing bowl, cream together the softened butter, granulated sugar, and brown sugar until light and fluffy.
Add the eggs one at a time, followed by the vanilla extract, mixing well after each addition. In a separate bowl, whisk together the flour, baking soda, and salt. Gradually add the dry ingredients to the wet mixture, mixing until just combined. If desired, fold in the chocolate chips or nuts.
Drop spoonfuls of the dough onto a baking sheet lined with parchment paper, spacing them about two inches apart. Bake for 10-12 minutes or until the edges are golden brown. Allow the cookies to cool on the baking sheet for a few minutes before transferring them to a wire rack to cool completely.
When baking cookies, it's important to measure your ingredients accurately for the best results. Make sure your butter is softened but not melted, as this can affect the texture of the cookies. Additionally, using high-quality ingredients can significantly enhance the flavor of your cookies.
For a fun twist, try experimenting with different mix-ins like dried cranberries or coconut flakes. Finally, if you want your cookies to have a chewier texture, slightly underbake them and let them set on the baking sheet after removing them from the oven. Enjoy your baking!
Substitution Suggestions
Although you mightn't have all the ingredients on hand, there are plenty of simple substitutions that can help you create delicious cookies without sacrificing flavor.
If you're out of all-purpose flour, consider using almond flour or oat flour as great flour alternatives; they add unique textures and flavors. Almond flour, in particular, is known for its nutty flavor profile that enhances the overall taste of cookies.
For sweetener substitutes, maple syrup or agave nectar can replace granulated sugar, lending a delightful sweetness with added moisture. You can even try coconut sugar for a richer taste.
With these easy swaps, you can whip up a batch of scrumptious cookies that cater to your pantry's offerings and your taste buds!
Decorating Ideas
Transforming your cookies into visual delights is just as rewarding as baking them. Start with colorful cookie icing; it's the perfect base for your creativity. Pipe fun shapes or intricate designs on your cooled cookies, letting each creation reflect your personality.
For added flair, explore sprinkles options—choose from classic rainbow, festive holiday mixes, or even themed shapes to match any occasion. You can layer sprinkles on wet icing or add edible glitter for a shimmering effect. A simple drizzle of chocolate chip cookie dough can elevate the visual appeal of your treats even further.
With just a few simple techniques and your favorite toppings, each cookie becomes a delicious work of art that's sure to impress family and friends!
Serving Suggestions
Once your cookies are beautifully decorated, it's time to think about how to present them for maximum enjoyment.
Consider serving your cookies on a vibrant platter, arranging them with an assortment of cookie pairings. Think of pairing chocolate chip cookies with a scoop of vanilla ice cream or enjoying snickerdoodles with a warm cup of chai.
Don't forget creative toppings! Drizzle melted chocolate or sprinkle crushed nuts for added flair. You can even stack cookies and wrap them in cellophane as delightful gifts. For an extra touch, consider including Delicious Christmas Cookies that complement your homemade treats.
This thoughtful presentation elevates your cookies, making every bite a delicious experience to savor.
Happy serving!
Make-Ahead and Storage
If you're planning a cookie baking session but want to save time, making your dough ahead of time is a fantastic option.
You can easily freeze cookie dough in portions, allowing you to bake fresh cookies whenever the craving hits. Simply scoop the dough onto a baking sheet, freeze until solid, then transfer to a freezer bag.
When you're ready to bake, just pop the frozen cookies onto a tray and bake as usual.
For baked cookies, store them in airtight cookie jars at room temperature for up to a week, or freeze for longer freshness. Deliciously Simple Cookies can be enjoyed at any time, making them a perfect treat for any occasion.
Enjoy the convenience!
How to Store Leftovers
Storing leftover cookies properly can extend their deliciousness and freshness, ensuring that each bite remains as delightful as the first.
To keep your cookies in top shape, place them in airtight cookie containers. If you've got soft cookies, add a slice of bread to maintain moisture. For crunchy cookies, avoid adding anything extra, as it can make them soggy.
If you want to store them longer, consider refrigeration tips. Wrap the cookies in plastic wrap and place them in the fridge. Just remember to let them come to room temperature before enjoying, so they regain their delightful texture. Additionally, delicious cookies for diabetics can be stored similarly to ensure they remain a wholesome treat.
Nutrition Facts(per serving)
When indulging in a homemade cookie, it's essential to know what you're enjoying regarding nutrition. Each serving typically contains around 150-200 calories, depending on your ingredient choices.
The caloric content comes mainly from sugars and fats, but don't forget the ingredient benefits! For instance, oats can provide fiber, while dark chocolate chips offer antioxidants. Delicious and nutritious cookies can be made by incorporating healthier alternatives, leading to a more balanced treat.
Using whole grain flour boosts the nutritional profile, adding essential vitamins and minerals. By selecting wholesome ingredients, you'll not only satisfy your sweet tooth but also fuel your body with nutrients.
Final Thoughts
As you savor your homemade cookies, remember that baking isn't just about the end result but also the joy of the process. Each step, from mixing ingredients to the delightful aroma filling your kitchen, brings its own satisfaction.
Don't hesitate to experiment with cookie variations, like adding nuts, chocolate chips, or dried fruit. These small changes can elevate your treats to new heights. A simple recipe typically includes 5 ingredients, making it easy to whip up a batch in no time.
Keep these baking tips in mind: measure accurately, preheat your oven, and let your cookies cool properly. Enjoy the creativity involved, and share your delicious creations with friends and family—because homemade cookies are always best when shared.
Recipe FAQs
Can I Use Gluten-Free Flour for This Cookie Recipe?
Sure, you can use gluten-free flour for your cookie creation. Just remember, gluten-free options often require some finesse; flour substitutes might change the texture. Embrace the adventure and let your taste buds lead the way!
How Long Does It Take to Bake These Cookies?
Baking time usually ranges from 10 to 15 minutes, depending on your oven and desired cookie texture. Keep an eye on them; you want them golden but soft, ensuring a perfect treat every time!
What Is the Best Way to Soften Butter?
To soften butter quickly, you can cut it into small cubes or microwave it for a few seconds. Alternatively, consider butter alternatives like coconut oil, which softens easily and adds a unique flavor to your recipes.
Can I Freeze the Dough Before Baking?
Yes, you can freeze the dough before baking! Just wrap it tightly and store it. When you're ready to bake, allow it to thaw, then adjust your baking time slightly for perfect results. Enjoy your fresh cookies!
What Tools Do I Need to Make These Cookies?
To make these cookies, you'll need mixing bowls for combining ingredients and baking sheets for placing your dough. Grab a measuring cup and spatula too, ensuring you've got everything ready for delicious results!