

The Vintage Jello Cake is like a time capsule of flavors, transporting you to family gatherings filled with laughter and joy. It's not just a dessert; it's a celebration on a plate, with its bright colors and moist texture. If you're curious about how to bring this nostalgic treat to life, you'll want to explore the simple steps, creative variations, and tips for making it unforgettable. Let's uncover the secrets behind this timeless recipe.
Recipe Tips and Tricks
- Vintage Jello cakes often feature a classic yellow cake base, combined with colorful Jello flavors for a nostalgic treat.
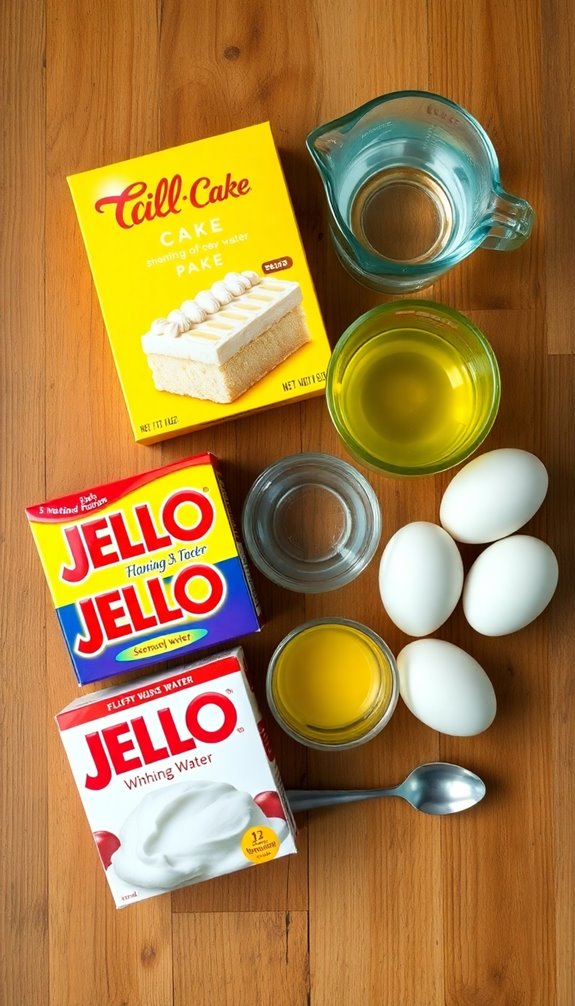
- A simple recipe includes yellow cake mix, water, vegetable oil, eggs, and your choice of Jello flavor.
- Preparation involves baking the cake, cooling it, poking holes, and pouring dissolved Jello for a vibrant finish.
- These cakes are perfect for family gatherings, evoking memories and encouraging shared experiences over dessert.
- Presentation can be enhanced with layers, bright colors, and garnishes like whipped cream and fruits for a festive look.
How To Make It – Recipe
To make a delightful Vintage Jello Cake, you'll need to embrace the nostalgic flavors that this dessert brings. This cake is perfect for gatherings, parties, or even just a special treat at home. With its vibrant colors and fruity flavors, it's not just a feast for the taste buds but also a feast for the eyes. The combination of cake and Jello creates a unique texture and experience that's sure to bring back fond memories. Additionally, this cake is a popular dessert that has been enjoyed by many over the years.
The beauty of this recipe lies in its simplicity and versatility. You can customize the flavors of Jello to suit your preferences or match the theme of your event. Whether you prefer classic strawberry, lemon, or even tropical flavors, the choice is yours. Let's explore the ingredients and instructions to create this retro classic that will surely impress your guests.
Ingredients:
- 1 box of yellow cake mix
- 1 cup water
- 1/3 cup vegetable oil
- 3 large eggs
- 1 box of Jello (any flavor)
- 2 cups boiling water
- 1 cup cold water
- 1 tub of whipped topping (optional for serving)
- Fresh fruit for garnish (optional)
To prepare the Vintage Jello Cake, start by preheating your oven to 350°F (175°C). In a mixing bowl, combine the yellow cake mix, 1 cup of water, vegetable oil, and eggs. Mix until well blended and pour the batter into a greased 9×13 inch baking pan. Bake for 25-30 minutes or until a toothpick inserted in the center comes out clean.
Once the cake is done, allow it to cool completely in the pan. Meanwhile, dissolve the Jello in 2 cups of boiling water and then stir in 1 cup of cold water. Once the cake is cooled, poke holes in the top using a fork and pour the prepared Jello evenly over the cake. Refrigerate for at least 4 hours or until the Jello sets. Serve chilled, topped with whipped topping and fresh fruit if desired.
For best results, make sure your cake is completely cooled before adding the Jello; otherwise, it may not set properly. You can experiment with different flavors of Jello and even layer multiple flavors for an eye-catching effect.
If you want to make the cake ahead of time, it can be stored in the refrigerator for a couple of days; just be sure to cover it to maintain freshness. Enjoy your Vintage Jello Cake as a sweet reminder of simpler times!
Substitution Suggestions
If you're looking to put your own spin on the Vintage Jello Cake, there are plenty of substitution suggestions that can add a personal touch.
Consider experimenting with fruit alternatives like fresh berries, peaches, or even tropical fruits for a unique flavor burst. You can also switch up the gelatin types; try using flavored agar-agar for a vegan option or explore different brands for varied sweetness levels. Additionally, you might want to try incorporating different gelatin types to see how they affect the texture and flavor of your cake.
Decorating Ideas
Transforming your Vintage Jello Cake into a visual masterpiece can be both fun and rewarding.
Start by embracing vintage themes, like lace doilies or retro cake stands, to set the stage. Use a vibrant array of colorful toppings, such as whipped cream, fresh fruit, and edible flowers, to create eye-catching layers.
Drizzle a fruity glaze for added flair and shine. Consider adding nostalgic elements like mini flags or old-fashioned sprinkles for that authentic touch.
Don't forget to play with textures—crunchy nuts or smooth chocolate can elevate your cake's appearance. Incorporating a vibrant array of toppings will enhance both the flavor and aesthetic appeal of your cake.
Let your creativity flow, and enjoy the delightful results!
Serving Suggestions
While serving your Vintage Jello Cake, consider the occasion and your guests' preferences to create a memorable experience.
Choose vibrant jello flavors that resonate with your party themes—think bright orange for a summer picnic or deep red for a festive holiday gathering.
Cut the cake into fun shapes using cookie cutters to match the theme, and serve it on colorful platters for added flair.
Don't forget to pair it with complementary toppings like whipped cream or fresh fruit.
Offering a selection of jello flavors can also create a delightful surprise, encouraging guests to share their favorites and making the event even more enjoyable. For a festive touch, consider making a 4th of July Jello Poke Cake that incorporates seasonal colors and flavors.
Make-Ahead and Storage
To make your Vintage Jello Cake even easier to enjoy, consider preparing it in advance.
One of the best make-ahead tips is to bake the cake a day or two before your event. Once cooled, wrap it tightly in plastic wrap and store it in a storage container to keep it fresh.
You can also prepare the Jello topping ahead of time; just refrigerate it until you're ready to assemble.
When you're ready to serve, simply layer the Jello on top. This way, you'll have a delightful dessert ready to impress your guests without the last-minute rush! Additionally, you can enhance the flavor by incorporating deliciously simple Jello cake recipes that complement your cake base, making it even more appealing.
How to Store Leftovers
Leftovers from your Vintage Jello Cake can be just as delightful as the first serving, so it's important to store them properly.
For ideal leftover preservation, cover the cake tightly with plastic wrap or place it in an airtight container, ensuring it stays moist and flavorful. Adding a layer of whipped cream topping can also enhance the cake's taste and texture during storage.
If you're not finishing it within a few days, consider cake freezing. Slice the cake, wrap each piece in plastic wrap, and then seal it in a freezer bag.
This way, you can enjoy a sweet treat later without sacrificing taste or texture. Just thaw the slices in the fridge before serving!
Nutrition Facts(per serving)
Indulging in a slice of Vintage Jello Cake not only satisfies your sweet tooth but also brings a burst of nostalgia. Each serving typically contains around 200 calories, making it a delightful treat without too much guilt.
The ingredient breakdown reveals a harmonious blend of cake mix, Jello, and whipped topping, contributing to its moist texture and vibrant flavor. You'll find sugar, flour, and gelatin as key players, enhancing both taste and color. The cake is often celebrated for its irresistible flavor, which comes from the perfect combination of flavors in the Jello used.
While it's sweet, remember to enjoy it in moderation, as the caloric content can add up if you can't resist going back for seconds!
Final Thoughts
Although it's easy to get lost in the delightful layers of flavor and texture, the Vintage Jello Cake is more than just a treat; it's a nostalgic experience that takes you back to simpler times.
Each bite bursts with nostalgic flavors that remind you of family gatherings and cherished dessert traditions.
This cake isn't just about taste; it's about creating memories that linger long after the last slice is gone. Plus, the best Jello cake recipe showcases how versatile and fun this dessert can be, bringing a splash of color and joy to any occasion.
So, when you whip up this delightful dessert, you're not just following a recipe; you're honoring a piece of culinary history that connects generations through shared joy and sweetness.
Enjoy every moment!
Recipe FAQs
Can I Use Sugar-Free Jello for This Recipe?
You can definitely use sugar-free Jello! It offers great sugar-free benefits, reducing calories while still delivering delicious flavor variations. Experiment with different colors and tastes to create a delightful treat that suits your preferences.
What Type of Cake Mix Works Best for Jello Cakes?
For Jello cakes, vanilla cake is a classic choice, but chocolate cake adds a rich twist. Lemon cake offers a zesty flavor, while red velvet brings a vibrant touch. Choose based on your taste preference!
How Long Does the Cake Need to Chill Before Serving?
Imagine a summer picnic, where the sweet aroma calls you. For perfect chilling time, let your cake rest in the fridge for at least two hours. This guarantees delightful flavors and invigorating serving suggestions that everyone will love!
Can I Add Fruit to the Jello Mix?
Absolutely, you can add fruit to the Jello mix! Experiment with various fruit combinations to enhance flavors. Whether it's berries with strawberry Jello or pineapple with orange, you'll create a delightful, colorful treat everyone will enjoy.
Is There a Gluten-Free Option for This Cake?
If life hands you gluten-free needs, don't fret! You can use gluten-free substitutions like almond or coconut flour. These alternative flours keep your cake deliciously moist and satisfying, ensuring everyone can enjoy a slice.


