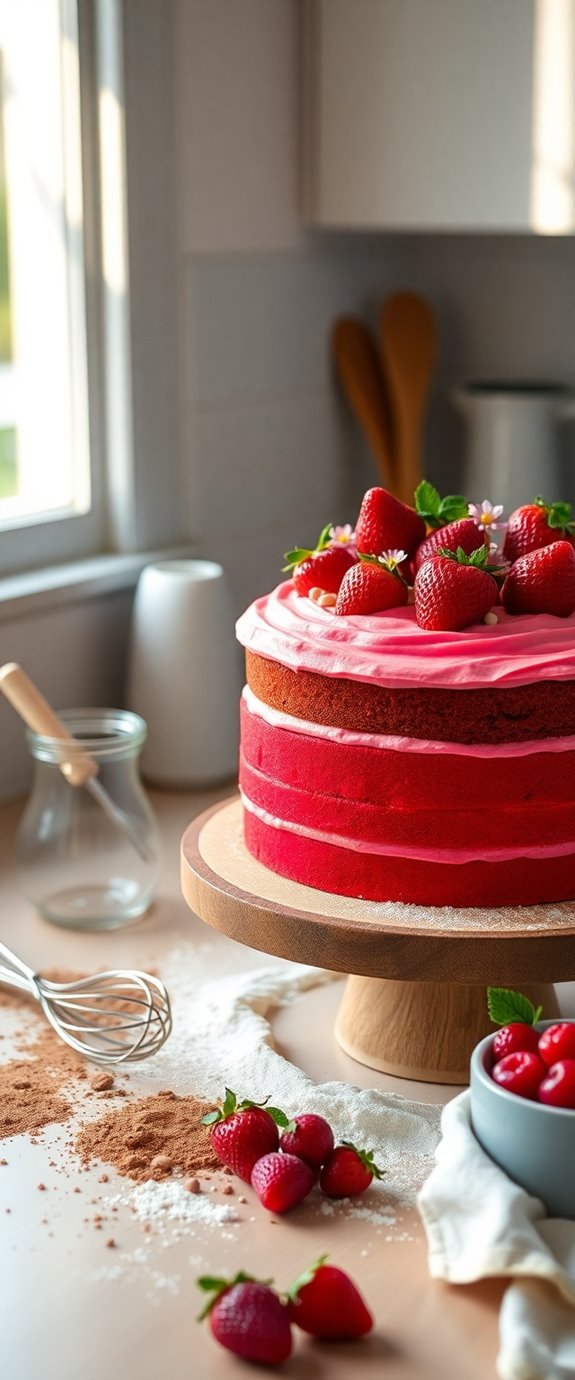
If you're looking for a dessert that's both simple and satisfying, the Easy Dora Cake Recipe is just what you need. This cake combines basic ingredients to create a soft, fluffy base that's perfect for any occasion. With the option to customize it with colorful frostings or fresh fruits, you'll find it's not just a treat but a canvas for your creativity. Ready to explore how to make this delightful cake? Let's get started.
Recipe Tips and Tricks
- Combine 1 cup flour, 1/2 cup sugar, baking powder, and salt, then mix with beaten eggs, milk, butter, and vanilla for the batter.
- Pour the batter into a preheated skillet or baking pan and cook over low heat until bubbles form.
- Customize the cake with optional toppings like purple frosting, fresh fruit, or edible glitter for a fun presentation.
- Serve the cake with whipped cream, fresh berries, or ice cream to enhance flavor and texture.
- Ideal for birthdays and celebrations, this cake encourages sharing and creates a delightful dessert experience.
How To Make It – Recipe
To make a delightful Dora Cake, you'll need to prepare a soft sponge cake that's filled with a sweet and creamy filling. This Japanese treat isn't only delicious but also visually appealing, making it perfect for parties or as a snack. The key to a successful Dora Cake lies in achieving the right texture for the cake and the perfect balance of sweetness in the filling.
Begin by gathering all the necessary ingredients to guarantee a smooth cooking process. The preparation is quite simple and can be done in under an hour, making it a great choice for both beginners and seasoned bakers. Once you've mastered this recipe, feel free to experiment with different fillings, such as red bean paste or chocolate spread, to add your own twist to this classic dessert.
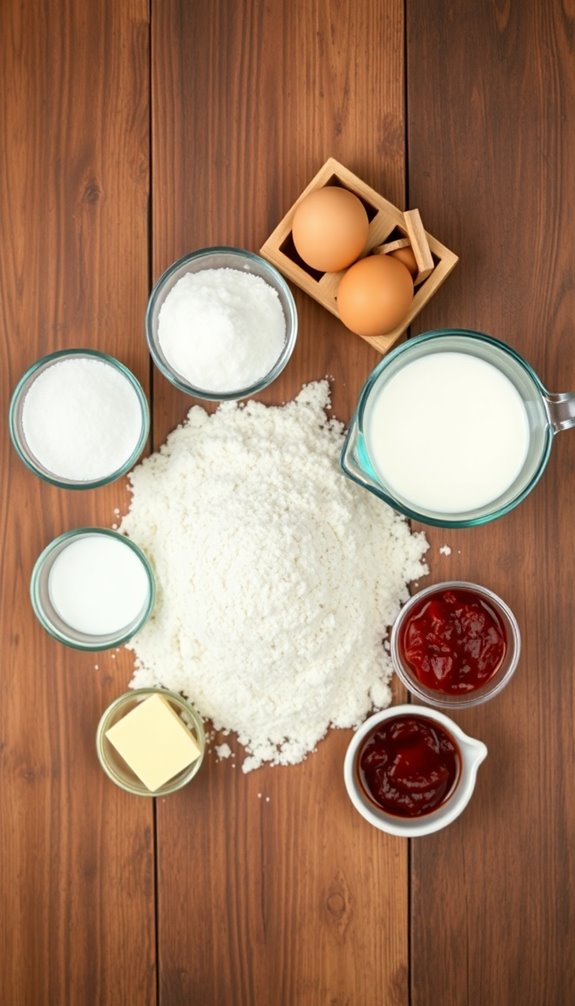
Ingredients:
- 1 cup all-purpose flour
- 1/2 cup granulated sugar
- 1/2 teaspoon baking powder
- 1/4 teaspoon salt
- 3 large eggs
- 1/4 cup milk
- 1/4 cup unsalted butter, melted
- 1 teaspoon vanilla extract
- 1 cup sweet red bean paste (or filling of your choice)
To make the Dora Cake, start by preheating your skillet over low heat. In a mixing bowl, whisk together the flour, sugar, baking powder, and salt.
In a separate bowl, beat the eggs and then add the milk, melted butter, and vanilla extract. Combine the wet ingredients with the dry ingredients until just mixed.
Lightly grease the skillet with a bit of butter or oil, then pour a small amount of batter into the skillet to form a circle about 3 inches in diameter. Cook for about 2-3 minutes or until bubbles form on the surface, then flip and cook for an additional 1-2 minutes.
Repeat the process until all the batter is used. Once cooled, spread a layer of sweet red bean paste on one cake, top with another cake, and gently press together.
When making Dora Cake, it's crucial to keep the heat low to prevent the cakes from browning too quickly. If you find that your cakes are too thick, you can add a little more milk to the batter for a thinner consistency. Additionally, using soft sponge cake as the base will enhance the overall texture and flavor of the dessert.
Also, feel free to make the cakes smaller or larger depending on your preference, and experiment with various fillings to suit your taste. Enjoy your homemade Dora Cake with a cup of tea or coffee for a delightful treat!
Substitution Suggestions
While the classic Dora Cake recipe calls for specific ingredients, you can easily make substitutions to cater to your taste or dietary needs.
For a gluten-free option, try using almond or coconut flour instead of all-purpose flour. If you're dairy-free, almond or oat milk can be great substitutes for regular milk.
Want to add some excitement? Experiment with flavor variations by incorporating vanilla or almond extract to enhance the cake's taste.
You can also swap out sugar for honey or maple syrup for a natural sweetness. These simple changes let you customize your Dora Cake just the way you like it! Additionally, using almond flour can enhance the cake's nutritional profile while keeping it moist.
Decorating Ideas
Transforming your Dora Cake into a visual masterpiece is just as fun as baking it! Start with a smooth layer of purple or pink frosting to match the Dora theme.
Use edible decorations like fondant to create Dora's face, adding bright eyes and her iconic hairstyle. You can also sprinkle colorful edible glitter for a magical touch. Baking a cake using Dora Cake With Egg Recipe will ensure a moist and delicious base.
Don't forget to place tiny toy figurines of Dora and her friends around the cake for extra flair. Fresh fruit like strawberries or blueberries can add vibrant color and a revitalizing taste.
Let your creativity shine, and enjoy the process of decorating!
Serving Suggestions
As you prepare to serve your delightful Dora Cake, consider the occasion and the crowd to make the experience even more enjoyable.
For smaller gatherings, cut the cake into modest serving sizes that encourage second helpings. If you're hosting a larger party, create a stunning dessert table with generous slices that invite everyone to indulge.
Pair your cake with complementary flavors like fresh berries, whipped cream, or a drizzle of chocolate sauce to elevate the taste. You might even add a scoop of vanilla ice cream for extra decadence. Additionally, incorporating classic dessert elements like nuts or spices can enhance the cake's flavor profile.
These thoughtful choices will surely make your Dora Cake the star of the event!
Make-Ahead and Storage
If you want to enjoy your Dora Cake without the last-minute rush, making it ahead of time is a fantastic option.
Start by baking your cake a day or two in advance; it actually tastes better as it sits. For make-ahead tips, let the cake cool completely, then wrap it tightly in plastic wrap. Use sturdy storage containers to keep it fresh. You can also freeze the layers if you need an even longer shelf life, just remember to thaw it in the fridge overnight before decorating. Additionally, storing cakes properly ensures they maintain their flavor and moisture. This way, you'll have a delightful dessert ready to impress!
How to Store Leftovers
Once you've savored your delicious Dora Cake, you'll want to make certain those leftovers stay just as delightful for later enjoyment.
For ideal leftover storage, wrap individual slices in plastic wrap or foil to lock in moisture. Place them in an airtight container to protect against any unwanted odors.
If you're planning to store the cake for more than a few days, consider freezing it. Just remember to label the container with the date for easy tracking. Eggless plum cake is another delightful treat that can also be preserved well using similar methods.
This method guarantees excellent cake preservation, allowing you to relish that sweet taste long after the first bite. Enjoy your treats whenever you crave!
Nutrition Facts(per serving)
When you indulge in a slice of Dora Cake, you might be curious about what's in it and how it fits into your daily diet. Each serving contains around 250 calories, making it a delightful treat without overwhelming your caloric content.
The ingredient breakdown reveals a balance of flour, sugar, eggs, and a hint of cocoa, contributing to its rich flavor and satisfying texture. You'll also find a touch of butter, which adds moisture. Additionally, this recipe can be made without eggs, ensuring that everyone can enjoy a slice.
While it's not a health food, enjoying it in moderation can certainly brighten your day. So, savor that slice and appreciate the delightful flavors!
Final Thoughts
Though a slice of Dora Cake may seem like just another dessert, it truly embodies the joy of baking and sharing. This delightful treat invites you to explore tantalizing flavor combinations, from rich chocolate to zesty citrus.
As you whip up this cake, remember a few baking tips: measure accurately, use fresh ingredients, and don't rush the mixing process. Each step enhances the cake's texture and taste, ensuring a perfect outcome. The addition of Oreo Dora Cake can elevate your dessert experience with its unique twist.
Whether you're celebrating a special occasion or just treating yourself, Dora Cake offers a burst of happiness with every bite. So, gather your loved ones and enjoy this sweet creation together!
Recipe FAQs
Can I Use Gluten-Free Flour for This Recipe?
"Where there's a will, there's a way." You can absolutely use gluten-free flour in your recipe! Just remember to adjust the baking powder for the best results, and enjoy your delicious creation without gluten!
What Type of Cake Pan Is Best for a Dora Cake?
For a Dora cake, you can't go wrong with a Bundt pan for its decorative shape, or a round pan for classic layers. Both options yield delicious results, so choose based on your presentation preference!
How Long Does It Take to Bake the Dora Cake?
To achieve the perfect cake texture, you'll typically need to bake it for about 25 to 30 minutes. Keep an eye on it, as baking time can vary slightly based on your oven's temperature.
Can I Freeze the Dora Cake After Baking?
Imagine preserving a slice of happiness! Yes, you can freeze the cake after baking. For best results, use these freezing tips: wrap it tightly in plastic and store it in an airtight container. Your cake will thank you!
What Are Some Common Mistakes to Avoid While Making This Cake?
When making this cake, avoid overmixing the batter, as it can lead to a tough texture. Also, check your oven temperature; baking at the wrong heat can result in uneven cooking and disappointing results.