Imagine hosting a dinner party and serving a Baked Oreo Cheesecake that leaves your guests raving about the dessert for days. This rich and creamy treat, with its buttery Oreo crust and smooth filling, is sure to impress. But what if you could personalize it even further? Explore the various ways to make this cheesecake your own, from substitutions to decorating ideas, and discover how to elevate your dessert game.
Recipe Tips and Tricks
- Preheat the oven to 325°F (160°C) and prepare the crust with crushed Oreos and melted butter in a springform pan.
- Beat cream cheese with sugar and vanilla, adding eggs one at a time for a smooth filling.
- Fold in sour cream and flour before pouring the mixture over the crust and smoothing the top.
- Bake for 50-60 minutes until edges are set and center has a slight jiggle; cool before refrigerating.
- Garnish with extra crushed Oreos before serving for added flavor and presentation.
How To Make It – Recipe

To create a delicious Baked Oreo Cheesecake, you'll need a few simple ingredients and some basic baking skills. This creamy dessert combines the rich, smooth texture of cheesecake with the delightful crunch of Oreos, making it a perfect treat for any occasion. Whether you're celebrating a special event or just want to satisfy your sweet tooth, this recipe is sure to impress family and friends alike. The process is straightforward, and with a little patience, you'll have a stunning cheesecake that boasts both flavor and presentation.
It's important to use room temperature cream cheese to achieve a smooth filling, and don't forget to reserve some Oreos for garnish. Prepping your ingredients ahead of time will make the process even smoother, ensuring that you can enjoy the baking experience without feeling rushed. Additionally, for an even more indulgent experience, consider adding a layer of Creamy Oreo Cheesecake Delight to enhance the overall flavor profile.
Ingredients:
- 24 Oreo cookies (plus extra for garnish)
- 4 tablespoons unsalted butter, melted
- 16 oz cream cheese, room temperature
- 1 cup granulated sugar
- 1 teaspoon vanilla extract
- 3 large eggs
- 1 cup sour cream
- 1/4 cup all-purpose flour
To make the Baked Oreo Cheesecake, start by preheating your oven to 325°F (160°C). Crush the 24 Oreo cookies in a food processor until they become fine crumbs.
In a mixing bowl, combine the cookie crumbs with the melted butter and press the mixture firmly into the bottom of a 9-inch springform pan to create the crust. In another large bowl, beat the room temperature cream cheese with the granulated sugar until smooth.
Add in the vanilla extract, and then incorporate the eggs one at a time, mixing well after each addition. Carefully fold in the sour cream and flour until just combined. Pour the cheesecake filling over the crust and smooth the top.
Bake for about 50-60 minutes, or until the edges are set and the center has a slight jiggle. Allow the cheesecake to cool in the pan for about an hour before refrigerating it for at least 4 hours or overnight.
When ready to serve, garnish with extra crushed Oreos on top. For the best results, make sure to allow your cream cheese to come to room temperature before mixing; this will help prevent lumps in your filling.
Additionally, it's crucial to let the cheesecake cool completely before refrigerating, as this helps to set it properly. If you want a smoother texture, consider using a water bath while baking by placing your springform pan in a larger pan filled with hot water.
Finally, remember that cheesecakes often taste better the next day, so prepare it in advance if you can!
Substitution Suggestions
If you're looking to customize your Baked Oreo Cheesecake, there are plenty of substitution options that can cater to dietary preferences or enhance flavors.
For a creamier texture, consider using vegan alternatives like cashew cream or coconut cream instead of traditional cream cheese.
If you need gluten free options, swap out regular Oreos for gluten free cookies, and use almond or gluten free flour for the crust.
You can also substitute regular sugar with coconut sugar or maple syrup for a unique twist.
These simple changes can make your cheesecake suitable for everyone while still keeping it delicious! Additionally, incorporating Biscoff spread into your cheesecake mixture can add a delightful flavor dimension.
Decorating Ideas
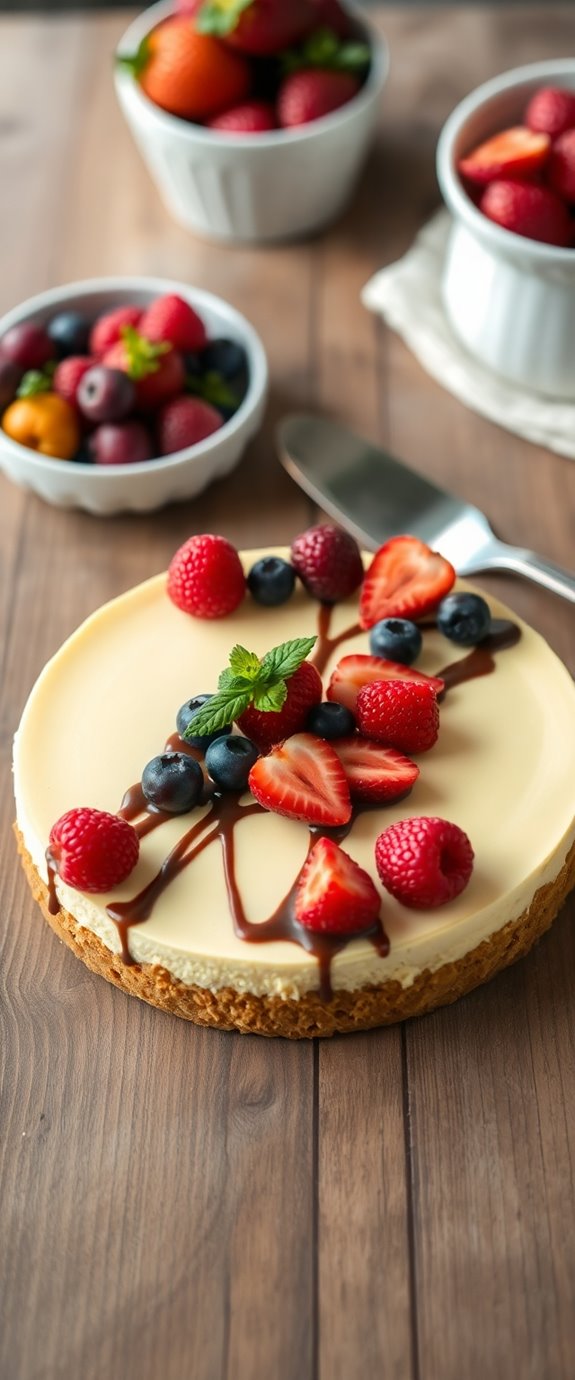
Wondering how to elevate your Baked Oreo Cheesecake to the next level? Start by drizzling chocolate ganache over the top for a glossy finish.
Add crushed Oreos as a decadent layer of Oreo toppings, sprinkling them generously for that crunch. Consider using whipped cream dollops around the edges, creating a beautiful contrast against the rich cheesecake.
For a pop of color, toss on fresh berries or mint leaves as cheesecake embellishments. Finally, a sprinkle of powdered sugar can add a touch of elegance.
To take your cheesecake experience even further, you can incorporate decadent peanut butter into the filling for a rich, nutty flavor.
These simple decorations not only enhance the visual appeal but also elevate the overall flavor experience!
Serving Suggestions
Serving your Baked Oreo Cheesecake is just as important as making it, as the right presentation can elevate the entire experience.
Start by slicing your cheesecake into generous portion sizes, ensuring everyone gets a satisfying piece.
For garnish options, consider drizzling chocolate or caramel sauce for that extra indulgence. Fresh berries add a pop of color and a invigorating contrast to the rich cheesecake.
You can also sprinkle crushed Oreos on top for a fun touch. Serve chilled with a dollop of whipped cream on the side, and watch your guests delight in each creamy, chocolatey bite! Additionally, pairing your cheesecake with a side of Oreo cheesecake recipe can enhance the overall dessert experience.
Make-Ahead and Storage
Enjoying your Baked Oreo Cheesecake doesn't have to be a last-minute affair. With a few make-ahead tips, you can whip up this delicious dessert in advance.
Prepare the cheesecake a day or two ahead, letting it cool completely before wrapping it tightly with plastic wrap. For ideal freshness, place it in an airtight storage container.
If you'd like to freeze it, slice individual portions and store them in freezer-safe containers. This way, you can enjoy a delightful slice anytime!
Just remember to thaw it in the fridge overnight before serving for the best texture and flavor. Additionally, using a no bake option can help you save time on prep if you're in a hurry. Happy baking!
How to Store Leftovers
Once you've savored your Baked Oreo Cheesecake, you'll want to guarantee those delicious leftovers stay fresh for your next indulgence.
For ideal leftover storage, cover your cheesecake tightly with plastic wrap or transfer it to an airtight container. This will help maintain its creamy texture and rich flavor, ensuring proper cheesecake preservation. Additionally, you can enhance your storage method by using a no bake option which keeps the cheesecake's consistency intact.
If you plan to store it for more than a few days, consider freezing individual slices wrapped in foil for up to three months. Just remember to let it thaw in the fridge overnight before enjoying your decadent treat again.
Your taste buds will thank you!
Nutrition Facts(per serving)
When indulging in a slice of Baked Oreo Cheesecake, it's good to know what you're treating yourself to. Each serving, typically around 1/12 of the pie, packs a delightful punch with approximately 350 calories.
You'll also find about 22 grams of fat, which contributes to that creamy texture you love. On the sweeter side, it contains around 25 grams of sugar, perfect for satisfying your sweet tooth. Additionally, this dessert features a cookie crust, enhancing its rich flavor profile.
With a serving size that feels just right, you can enjoy this decadent dessert while being mindful of its caloric content. So, savor every bite, and relish in this delicious treat!
Final Thoughts
As you take a moment to reflect on your experience with the Baked Oreo Cheesecake, it's clear that this dessert offers more than just a sweet treat; it brings together rich flavors and a creamy texture that can elevate any occasion.
Whether you stick to this classic recipe or explore cheesecake variations like adding fruit or chocolate, the possibilities are endless. Additionally, the incorporation of Oreo cookies in this cheesecake adds a delightful crunch and enhances the overall flavor profile.
Keep in mind some baking tips, such as ensuring your cream cheese is at room temperature and not overmixing to achieve that perfect consistency.
This cheesecake is bound to impress, making it a must-try for your next gathering!
Recipe FAQs
Can I Use Gluten-Free Oreos for This Recipe?
Oh, the tragedy of gluten! Fear not, you can absolutely use gluten-free Oreos. They'll mimic that classic Oreo texture, ensuring your dessert remains delightful and indulgent, without sacrificing flavor for those gluten-free alternatives. Enjoy!
What Tools Do I Need to Make This Cheesecake?
To make this cheesecake, you'll need mixing bowls for blending the ingredients and baking pans to shape it perfectly. Gather these essential tools, and you'll be ready to create a delicious dessert that everyone will love!
How Long Does the Cheesecake Take to Bake?
Baking a cheesecake is like waiting for a glorious sunrise. It usually takes about 60 to 70 minutes. You'll know it's done when the texture is firm yet slightly jiggly—just perfect for a delightful indulgence!
Can I Add Other Flavors to the Cheesecake?
You can explore flavor variations like chocolate, caramel, or fruit. Get creative with toppings too—think crushed cookies, fresh berries, or a drizzle of chocolate sauce. Your cheesecake will be uniquely delicious!
Is It Possible to Freeze This Cheesecake?
Yes, you can freeze cheesecake! While fresh is delightful, freezing extends its shelf life. For best results, use proper storage guidelines and follow freezing tips like wrapping tightly to maintain texture and flavor. Enjoy later!