If you're looking for a dessert that's both indulgent and easy to whip up, a cheesecake in a cup might just be your answer. This no-bake treat offers a creamy filling with a satisfying crunch, all in a convenient single-serving format. Perfect for gatherings or a cozy night in, you can customize it to suit any taste. Curious about how to create this delightful dessert? Let's explore the steps and ideas that will elevate your cheesecake experience.
Recipe Tips and Tricks
- Cheesecake in a cup is a no-bake dessert that is easy to prepare and suitable for all baking skill levels.
- The main ingredients include graham cracker crumbs, cream cheese, powdered sugar, and heavy whipping cream for a creamy texture.
- Customizable toppings like fruits or chocolate can enhance flavor and presentation for any occasion.
- Prepare cheesecake cups in advance and store them in airtight containers for up to three days in the fridge.
- These individual servings are visually appealing and perfect for portion control at gatherings or events.
How To Make It – Recipe

Cheesecake in a cup is a delightful and convenient dessert that brings the classic flavors of cheesecake into a fun and portable format. Perfect for parties, gatherings, or simply satisfying your sweet tooth, this recipe allows you to enjoy a creamy, rich cheesecake topped with your favorite flavors, all served in individual cups.
The beauty of this dessert is that it requires minimal baking, making it an ideal choice for both novice and experienced bakers. Additionally, this no-bake cheesecake option is a great way to enjoy cheesecake without the hassle of traditional baking methods.
To make your cheesecake in a cup, you'll start with a simple crust made from crushed graham crackers, which adds a crunchy texture to complement the smooth cheesecake filling. The filling itself is a luscious combination of cream cheese, sugar, and vanilla, creating a silky texture that melts in your mouth.
With the option to customize your toppings—be it fresh fruit, chocolate, or caramel—this recipe allows you to get creative with flavors while keeping the process easy and enjoyable.
Ingredients:
- 1 cup graham cracker crumbs
- 4 tablespoons unsalted butter, melted
- 1 cup cream cheese, softened
- 1/2 cup powdered sugar
- 1 teaspoon vanilla extract
- 1 cup heavy whipping cream
- Toppings of your choice (fruits, chocolate, caramel, etc.)
Instructions:
In a medium bowl, combine the graham cracker crumbs and melted butter until well mixed. Spoon about 2 tablespoons of the mixture into the bottom of each cup to form the crust.
In another bowl, beat together the cream cheese, powdered sugar, and vanilla extract until smooth and creamy. In a separate bowl, whip the heavy cream until stiff peaks form, then gently fold it into the cream cheese mixture until fully combined.
Layer the cheesecake filling on top of the crust in each cup, then refrigerate for at least 2 hours to set. Before serving, add your desired toppings for an extra burst of flavor.
Extra Tips:
For the best results, confirm that your cream cheese is at room temperature to avoid lumps in the filling.
You can also experiment with different flavored extracts or incorporate lemon or lime juice for a tangy twist. If you're short on time, consider using store-bought whipped cream for convenience, but making your own will add a touch of freshness.
Finally, these cheesecake cups can be made a day in advance, making them a perfect make-ahead dessert!
Substitution Suggestions
When you're whipping up your cheesecake in a cup, there are plenty of easy substitutions you can make to suit your taste or dietary needs.
For a creamy texture without dairy, try coconut cream or silken tofu as vegan alternatives. If you're watching your carbs, opt for almond flour or crushed nuts for the crust, and use a sugar substitute like erythritol.
You can also swap regular cream cheese for a low-carb cream cheese spread. Additionally, consider using dairy-free cream cheese for an even more authentic cheesecake flavor without the dairy.
These substitutions not only cater to different diets but also add unique flavors, making your cheesecake in a cup a delightful treat tailored just for you!
Decorating Ideas
Now that you've got your cheesecake in a cup ready with delicious substitutions, it's time to think about how to make it visually irresistible.
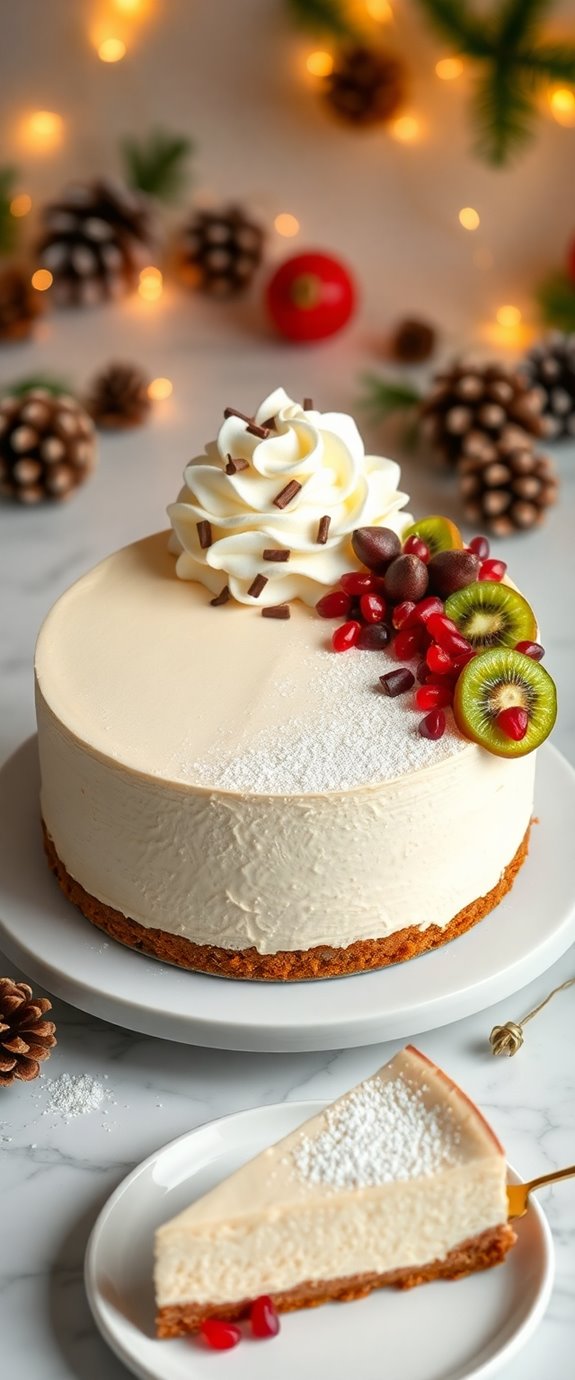
Start by topping your cheesecake with a generous dollop of whipped cream; this adds a fluffy texture that invites a spoonful. For an extra touch, drizzle rich, melted chocolate over the whipped cream, creating a stunning contrast against the creamy cheesecake.
You can also sprinkle crushed cookies or fresh berries around the edges for color and crunch. A mint leaf on top can provide a fresh pop, making your dessert not just tasty but a feast for the eyes! Additionally, using a no bake method ensures a creamy cheesecake without the need for an oven, making it easier and quicker to prepare.
Serving Suggestions
For a delightful serving experience, consider presenting your cheesecake in a cup at gatherings or special occasions.
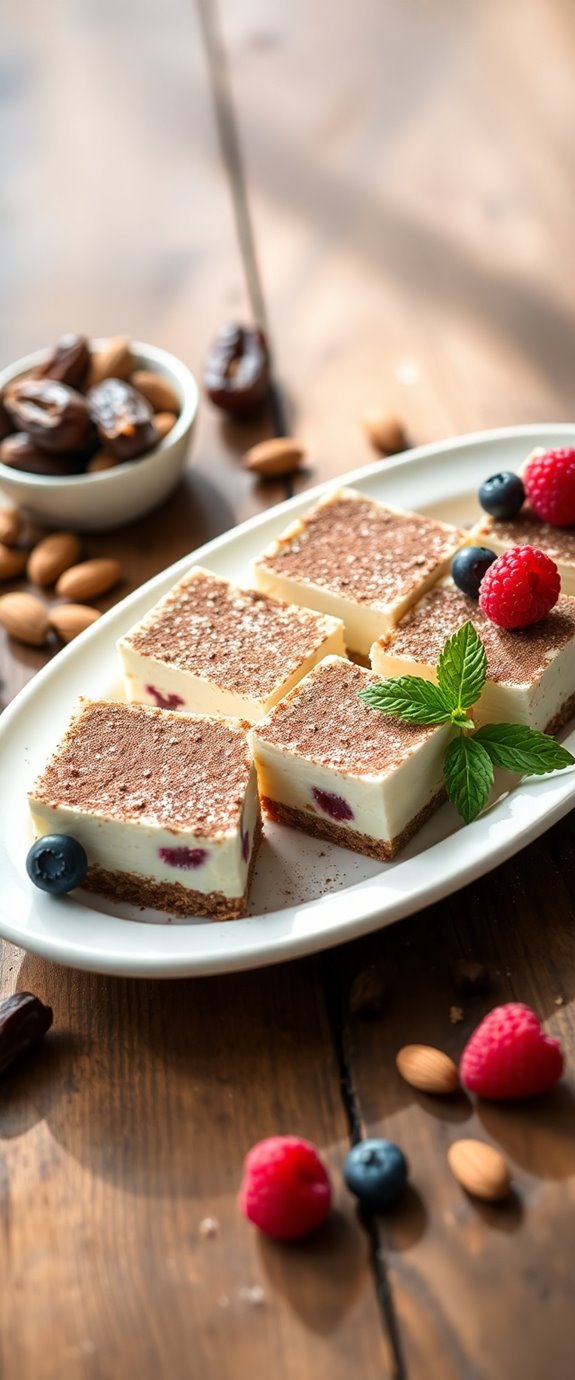
These charming cup variations not only look appealing but also make it easy for guests to indulge. Enhance each cup with a variety of cheesecake toppings like fresh berries, chocolate shavings, or caramel drizzle to suit different tastes. You might even create a toppings bar, allowing everyone to customize their treat. For added flair, use decorative cups or jars to elevate the presentation. Additionally, serving it as a Cheesecake Dip will provide a fun and interactive way for guests to enjoy the dessert.
With these serving suggestions, your cheesecake in a cup will certainly be the highlight of any event!
Make-Ahead and Storage
If you want to enjoy your cheesecake cups without the last-minute fuss, making them ahead of time is a smart choice.
The make-ahead benefits are plentiful; you can whip them up a day or two in advance, allowing the flavors to meld beautifully.
Once prepared, simply transfer them to airtight storage containers. This keeps your cheesecake fresh and ready when you are.
Plus, it makes serving a breeze—just grab a cup and go!
Storing them in the fridge guarantees they maintain their creamy texture, so you can indulge in a delightful treat anytime without the rush.
Additionally, no-bake cheesecakes are particularly forgiving, making them perfect for this make-ahead approach.
Enjoy your sweet creation!
How to Store Leftovers
Storing leftovers of your delicious cheesecake cups is a breeze, ensuring you can savor every last bite.
Start by placing the cups in an airtight container to maintain freshness. If you used larger cup sizes, consider separating them with parchment paper to prevent sticking.
Label the container with the date, so you know when to enjoy them by. For ideal leftover storage, refrigerate your cheesecake cups for up to three days.
If you want to keep them longer, freeze them for up to a month. Just remember to thaw them in the fridge before indulging in your creamy treat again! Additionally, you can enhance the flavor of your cheesecake cups by using no-bake cheesecake methods that keep the texture light and fluffy.
Nutrition Facts(per serving)
While indulging in your cheesecake cup, it's essential to be mindful of its nutrition facts. Each serving typically packs around 250-300 calories, depending on your ingredient choices.
The caloric content mainly comes from cream cheese, sugar, and the crust. For a healthier twist, consider using Greek yogurt or a sugar substitute. Incorporating sugar-free options can help reduce the overall calorie count significantly.
The ingredient breakdown reveals a delightful mix of rich flavors, but it's important to enjoy in moderation. Pairing with fresh fruit can enhance the taste while adding fiber and vitamins.
Always check labels to stay informed about what you're savoring in each delicious bite!
Final Thoughts
As you savor your cheesecake cup, it's clear that these delightful treats offer a perfect balance of indulgence and practicality.
Each cup delivers creamy goodness, making it an ideal dessert for any occasion. You can easily explore numerous cheesecake variations, from fruity toppings to decadent chocolate layers, ensuring there's something for everyone.
These cup desserts aren't only visually appealing but also convenient for portion control. Additionally, preparing Deliciously Easy Philadelphia Cheesecake Bars allows you to create a crowd-pleasing dessert in no time. Whether you're hosting a gathering or treating yourself, cheesecake cups are a foolproof way to impress.
Recipe FAQs
Can I Use Low-Fat Cream Cheese for This Recipe?
You can swap in low-fat cream cheese for a lighter touch. These low-fat substitutions keep your dessert delicious while still satisfying those cravings. Cream cheese alternatives can also work well if you're feeling adventurous!
What Kinds of Cups Are Best for Serving Cheesecake?
When serving cheesecake, glass cups or elegant dessert cups are perfect choices. They showcase the layers beautifully while providing a chic touch. Plus, their sturdy design guarantees your delicious creation remains intact and visually appealing.
How Long Does It Take to Chill the Cheesecake in a Cup?
Chilling time's essential for a perfect dessert. You'll want to chill your cheesecake cups for at least two hours. For serving tips, consider topping them just before serving to keep flavors fresh and vibrant!
Can I Add Fruit or Toppings Before Serving?
Absolutely, you can add fruit options like strawberries or blueberries before serving! Topping suggestions such as chocolate sauce or crushed nuts enhance the flavor, making your dessert visually appealing and delicious. Enjoy experimenting with different combinations!
Is This Recipe Suitable for Gluten-Free Diets?
Imagine a garden where every flower blooms harmoniously. Yes, this recipe can flourish in gluten-free diets! You can easily swap regular ingredients for gluten-free substitutes, ensuring it meets dietary restrictions without sacrificing flavor. Enjoy!