Chocolate chip cake pops are the epitome of dessert perfection, transforming ordinary cake into extraordinary bites of joy. You can easily create these delightful treats that blend moist cake with a rich coating. But there's more to these pops than just taste; they offer endless customization options for any occasion. Curious about how to make them, or perhaps how to store leftovers? Let's explore the delicious world of chocolate chip cake pops together.
Recipe Tips and Tricks
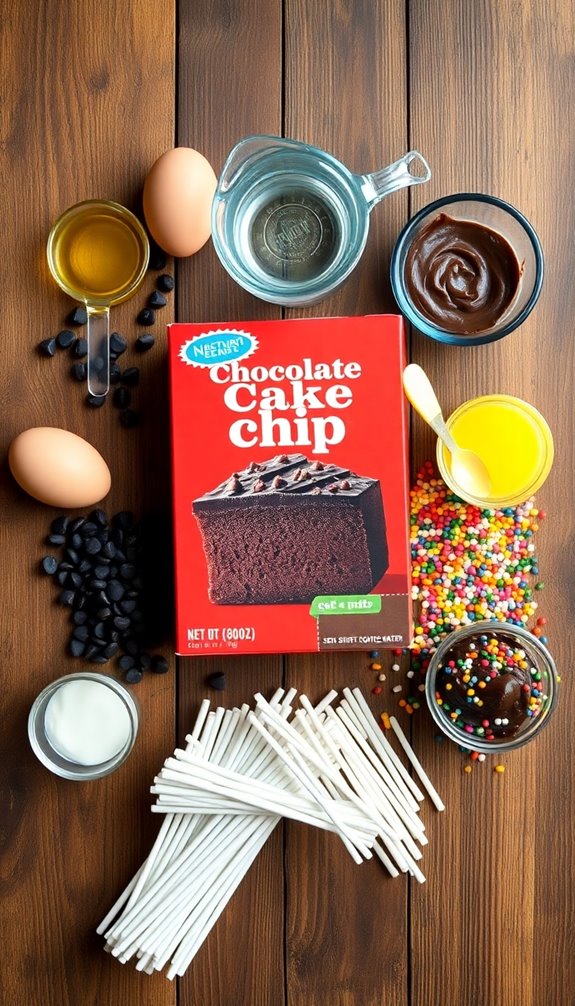
- Use a box of chocolate cake mix, 3 eggs, 1/2 cup vegetable oil, 1 cup water, and 1 cup chocolate chips for the cake base.
- Bake the mixture in a greased 9×13-inch pan until a toothpick comes out clean, then crumble the cooled cake.
- Combine the crumbled cake with chocolate frosting, roll into balls, insert lollipop sticks, and freeze for 30 minutes.
- Decorate with sprinkles, melted chocolate, or themed designs to enhance visual appeal before serving.
- Store in airtight containers for up to a week or freeze individually wrapped for longer freshness.
How To Make It – Recipe
Making chocolate chip cake pops is a delightful and fun way to enjoy a classic dessert. These bite-sized treats are perfect for parties, celebrations, or simply as a sweet snack. The combination of moist chocolate chip cake and creamy coating makes them irresistible to both kids and adults. Plus, they're easy to customize with different coatings and toppings, allowing you to get creative in the kitchen.
To start, you'll need to bake a simple chocolate chip cake, which will then be crumbled and mixed with frosting to form the cake pop mixture. This mixture is rolled into balls and placed on sticks before being dipped in melted chocolate or candy melts. Once decorated, the cake pops can be displayed in a decorative container or served on a platter for everyone to enjoy.
Ingredients:
- 1 box of chocolate cake mix
- 3 large eggs
- 1/2 cup vegetable oil
- 1 cup water
- 1 cup chocolate chips
- 1 cup chocolate frosting
- 1 cup candy melts (for coating)
- Lollipop sticks
- Optional: sprinkles or edible decorations
To make the cake pops, preheat your oven according to the cake mix instructions and prepare a 9×13-inch baking pan by greasing it. In a large bowl, mix the cake mix, eggs, vegetable oil, and water until smooth. Fold in the chocolate chips, then pour the batter into the prepared pan. Bake for the time specified on the box or until a toothpick inserted into the center comes out clean.
Once baked, allow the cake to cool completely. Crumble the cooled cake into a large bowl, then mix in the chocolate frosting until well combined. Roll the mixture into small balls and place them on a baking sheet lined with parchment paper. Insert lollipop sticks into each ball and freeze for about 30 minutes.
While the pops are chilling, melt the candy melts according to package instructions. Dip each cake pop into the melted chocolate, allowing excess to drip off, then place them upright in a foam block or stand to set. Decorate with sprinkles if desired.
When making cake pops, it's important to let the cake cool completely before crumbling it, as this will help prevent the mixture from becoming too sticky. If the mixture feels too wet, you can add a bit more cake to achieve the right consistency.
Additionally, dipping the pops into the melted chocolate can be messy, so work over a baking sheet to catch any drips. Finally, remember to have fun with your decorations; there are endless possibilities for personalizing your cake pops with various toppings and coatings!
You are trained on data up to October 2023.
Substitution Suggestions
Experimenting with substitutions can elevate your chocolate chip cake pops into something uniquely yours.
If you're aiming for vegan alternatives, consider using applesauce or mashed bananas instead of eggs, and coconut oil in place of butter.
For a gluten free option, opt for almond or coconut flour, which gives a delightful texture. You might also incorporate a plant-based milk to keep it moist.
Don't forget to swap traditional chocolate chips with dairy-free varieties for that rich flavor. Additionally, using brown sugar can enhance the sweetness and add a hint of caramel flavor to your cake pops.
These creative choices not only cater to different dietary needs but also allow you to personalize your cake pops to match your taste. Enjoy!
Decorating Ideas
While you might think the appeal of cake pops lies solely in their taste, the decorating process offers a delightful opportunity to release your creativity.
Immerse yourself in a world of sprinkles options—think colorful jimmies, glittery sugar, or even chocolate-covered bits. You can also explore themed designs based on occasions.
For birthdays, use vibrant colors and fun shapes; for holidays, incorporate seasonal colors and motifs. Drizzle melted chocolate or candy melts for an eye-catching finish.
Add a layer of jello or edible glitter or fondant shapes for extra flair. With a little imagination, your cake pops can become stunning treats that wow everyone!
Serving Suggestions
Once your cake pops are beautifully decorated, it's time to think about how to serve them.
These delightful treats can be a star attraction on your dessert table, adding color and charm that complements your party themes. Arrange them in a decorative vase or cake pop stand for an eye-catching display.
For themed parties, consider matching the colors of your cake pops to the overall decor. You can also provide little treat bags for guests to take home a few goodies. Additionally, incorporating a Bundt cake recipe as a complementary dessert can elevate your dessert table.
With their fun presentation and delicious taste, your cake pops will surely impress everyone at the gathering!
Make-Ahead and Storage
If you're planning a celebration and want to save time, making your chocolate chip cake pops in advance is a smart choice.
For the best results, follow these make-ahead tips: prepare the cake pops, then let them cool completely.
Once cooled, place them in airtight storage containers to keep them fresh. You can refrigerate the cake pops for up to a week or freeze them for longer storage.
Just make sure they're separated by parchment paper to prevent sticking.
When you're ready to serve, simply decorate and enjoy your delicious treats without the last-minute stress! Additionally, using high-quality chocolate chip ingredients can enhance the flavor of your cake pops even further.
How to Store Leftovers
After your celebration, you might find yourself with a delightful stash of leftover chocolate chip cake pops.
To maintain their cake pop freshness, start by placing them in an airtight container. This simple leftover storage method prevents moisture loss and keeps them from drying out.
If you plan to enjoy them later, consider freezing the pops. Wrap each one in plastic wrap, then place them in a freezer-safe bag.
When you're ready to indulge, thaw them in the fridge for a few hours. Proper storage guarantees your cake pops remain delicious and ready to delight your taste buds! Additionally, you can enjoy the combination of flavors in cake pops, much like the brown sugar cinnamon bundt cake that enhances sweet treats.
Nutrition Facts(per serving)
When you take a bite of a chocolate chip cake pop, you're not just indulging in a sweet treat; you're also savoring a blend of flavors and nutrients.
Each pop typically contains around 150 calories, making it a delightful yet moderate indulgence. However, keep an eye on those sugar levels, which can reach up to 12 grams per serving.
While you enjoy that rich chocolatey goodness, remember that balance is key. Pairing your cake pop with a nutritious option can help offset the caloric content and satisfy your sweet tooth without going overboard. Additionally, the chocolate chip cake is a great source of flavor and texture that enhances your dessert experience.
Enjoy every bite mindfully!
Final Thoughts
As you savor the delightful flavors of your chocolate chip cake pops, it's clear that these treats are more than just a dessert; they're a celebration of creativity and joy in the kitchen.
With a few baking tips, you can easily elevate your cake pops by experimenting with different flavor variations. Think about adding peanut butter, mint, or even a hint of espresso for a unique twist. Additionally, consider incorporating elements from a Chocolate Chip Cake Cheesecake to enhance the richness and texture of your cake pops.
Recipe FAQs
Can I Use Gluten-Free Flour for This Recipe?
Imagine swapping tires on a race car; it can work, but you need the right fit. Yes, you can use gluten-free flour in baking. Just remember to adjust your ratios for successful gluten-free alternatives.
How Long Do Cake Pops Typically Last at Room Temperature?
Cake pops typically last about 1-2 days at room temperature. For storage tips, keep them in a cool, dry place. Freshness indicators include texture and smell—if they feel sticky or smell off, discard immediately.
What Type of Chocolate Is Best for Coating?
When coating your treats, consider using dark chocolate for a rich, deep flavor or milk chocolate for a sweeter, creamier finish. Both options melt beautifully, creating a delicious outer layer that enhances your dessert's appeal.
Can I Freeze Cake Pops Before Decorating Them?
Did you know around 60% of bakers freeze their treats before decorating? You can freeze cake pops easily! Just follow freezing tips and use your favorite decorating techniques once they're thawed for a perfect finish.
Are There Any Common Mistakes to Avoid When Making Cake Pops?
When making cake pops, watch for common cake pop pitfalls. Guarantee your cake pop consistency is right; too dry or too wet can ruin them. Also, don't skip chilling before dipping, or they'll fall apart!