

Imagine a Saturday afternoon where you and your child decide to bake cookies together. The kitchen fills with the warm aroma of butter and sugar, creating a cozy atmosphere. As you measure and mix the ingredients, you're not just making treats; you're building memories. But what if you could elevate this experience with fun decorating ideas and smart storage tips? Let's explore the perfect cookie recipe that makes baking both enjoyable and rewarding.
Recipe Tips and Tricks
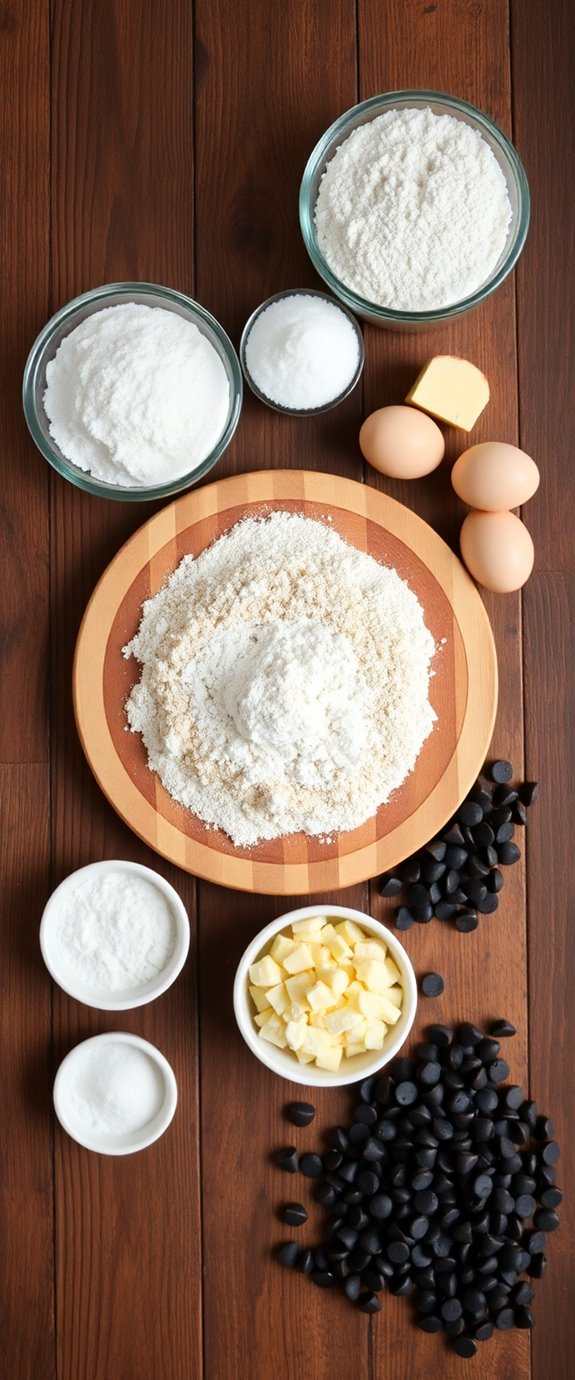
- Use simple ingredients like butter, sugar, eggs, and chocolate chips to make the recipe kid-friendly and easy to follow.
- Teach kids essential baking skills such as measuring, mixing, and following instructions while having fun in the kitchen.
- Encourage creativity through decorating with colorful icing, edible glitter, and cookie cutters for different shapes and themes.
- Promote teamwork by assigning roles and collaborating, enhancing communication skills and building trust among participants.
- Create lasting memories by sharing the final cookies and enjoying the sweet results of your collective efforts.
How To Make It – Recipe
Making cookies with kids is a fun and rewarding experience that not only fills the house with delightful aromas but also creates lasting memories. With simple ingredients and easy-to-follow steps, this cookie recipe is perfect for little hands to help out in the kitchen. Kids can learn about measuring, mixing, and the joy of baking while they create delicious treats that everyone will love.
This recipe is designed to be both fun and approachable, ensuring that even the youngest bakers can participate. As they mix the ingredients and watch the cookies rise in the oven, children will develop a sense of accomplishment and pride in their work. So, gather your little ones, grab your aprons, and let's get started on making some scrumptious cookies!
Ingredients:
- 1 cup unsalted butter, softened
- 1 cup granulated sugar
- 1 cup brown sugar, packed
- 2 large eggs
- 2 teaspoons vanilla extract
- 3 cups all-purpose flour
- 1 teaspoon baking soda
- 1 teaspoon salt
- 2 cups chocolate chips
To make the cookies, start by preheating your oven to 350°F (175°C). In a large mixing bowl, cream together the softened butter, granulated sugar, and brown sugar until light and fluffy.
Next, add the eggs one at a time, mixing well after each addition, followed by the vanilla extract. In a separate bowl, combine the flour, baking soda, and salt. Gradually add the dry ingredients to the wet mixture, stirring until just combined.
Finally, fold in the chocolate chips. Drop spoonfuls of dough onto ungreased baking sheets and bake for 10-12 minutes or until the edges are golden brown. Allow them to cool slightly before transferring to a wire rack to cool completely.
When baking cookies, remember to keep an eye on the time to prevent over-baking, as each oven can vary in temperature. For added fun, let the kids decorate the cookies with sprinkles or icing once they've cooled.
You can also experiment by adding nuts, dried fruits, or different types of chocolate chips for a unique twist. Always make sure to have everything measured out in advance to keep things organized and efficient, making the baking experience more enjoyable for everyone involved! Additionally, using high-quality chocolate chips can significantly enhance the flavor of your cookies.
Substitution Suggestions
While you might've all the classic ingredients on hand, there are plenty of tasty substitutions you can use to customize your cookie recipe.
For those with allergies, try using almond flour instead of regular flour for a nutty twist, or applesauce in place of eggs for a vegan option.
Craving flavor variations? Swap chocolate chips for dried fruit or nuts, adding a delightful crunch.
You can also experiment with spices like cinnamon or nutmeg to elevate the taste. Additionally, using almond flour cookies can provide a delightful texture and flavor that everyone will love.
With these allergy alternatives and flavor variations, you'll create cookies that everyone can enjoy, making baking even more fun and inclusive!
Decorating Ideas
After you've whipped up your delicious cookies, the fun doesn't stop there! Immerse yourself in creative decorating ideas that bring your treats to life.
Think of exciting cookie themes like holidays, animals, or even your favorite cartoons. Use colorful icing to pipe fun designs or sprinkle edible glitter for a magical touch. You can even draw inspiration from Delicious Independence Day Cookies to create festive, themed treats.
Try out decorating techniques like marbling with food coloring or creating fun shapes with cookie cutters. Don't forget to add toppings like mini chocolate chips or candy pieces!
Let your imagination run wild, and soon your cookies will be as delightful to look at as they're to eat!
Serving Suggestions
When you're ready to share your beautifully decorated cookies, consider presenting them in a way that enhances their appeal.
Arrange your cookies on colorful platters, mixing various shapes and sizes for a lively display. Pair your cookies with a tall glass of milk or hot chocolate for a delightful treat.
You can even create fun presentations by stacking cookies in a jar or using cupcake stands for an eye-catching effect. Add some fruit or nuts for cookie pairings that complement the flavors. Making delicious Christmas cookies can also add a festive touch to your presentation.
These thoughtful touches will make your cookie gathering even more enjoyable and memorable for everyone involved!
Make-Ahead and Storage
To keep the cookie fun going, you can prepare your treats ahead of time and store them properly for later enjoyment.
Use these make-ahead tips: Mix your dough, then chill it in the fridge for up to 48 hours before baking. You can also scoop and freeze cookie dough balls, allowing you to bake fresh cookies anytime! Additionally, homemade cookies are best enjoyed when baked fresh, highlighting the joy of sharing them warm with loved ones.
For storage, use airtight storage containers to keep your baked cookies soft and chewy. Label them with the date, so you know when to enjoy them at their best.
With these simple tricks, you'll always have delicious cookies ready to share and savor!
How to Store Leftovers
Storing leftover cookies is essential for keeping their delightful flavor and texture intact. To guarantee peak cookie freshness, let them cool completely before storing.
Place your cookies in an airtight container; this prevents moisture and air from ruining their deliciousness. If you've got different types, layer parchment paper between them to avoid sticking.
For longer storage, consider freezing them. Just wrap each cookie in plastic wrap and pop them into a freezer bag. Deliciously simple cookies can be enjoyed for weeks if stored properly.
When you're ready to enjoy, thaw them at room temperature. With proper leftover storage, you'll savor those sweet bites long after baking day!
Nutrition Facts(per serving)
Cookies are a delightful treat, but it's important to know what's in them, especially when cooking with kids. Each serving typically contains around 150 calories, making it a fun, sweet snack without going overboard.
You'll find essential nutrients like calcium and iron, offering some nutritional benefits while satisfying your sweet tooth. The serving size is usually one cookie, so it's easy to keep track of how much you're enjoying. Additionally, these cookies can be made with healthy ingredients that boost their nutritional value.
Final Thoughts
While baking together can be a joyful bonding experience, remember that the journey is just as important as the final cookie.
As you mix, measure, and decorate, you're creating baking memories that'll last a lifetime. The laughter, the occasional flour fight, and those little moments of teamwork are what make family fun truly special. Plus, you can enjoy making egg-free cookies that everyone can savor without dietary restrictions.
Don't focus solely on perfecting the cookies; instead, savor the time spent together. When you take that first bite, it'll taste even sweeter knowing you made it as a team.
Recipe FAQs
What Kitchen Tools Do I Need for This Cookie Recipe?
For this recipe, you'll need measuring cups to get precise ingredient amounts and mixing bowls for combining everything. These tools make the process smoother, ensuring your creation turns out delicious and delightful every time!
Can I Use Gluten-Free Flour for This Recipe?
Absolutely, you can use gluten-free flour! Just remember, gluten-free options may alter the baking texture slightly. Experimenting with blends can enhance flavor and consistency, so don't hesitate to try different types until you find your favorite.
How Can I Involve Kids in the Baking Process?
You can involve kids by letting them measure ingredients and mix dough. Encourage them to scoop flour, pour sugar, and stir everything together. It's a fun way to teach them about baking while creating lasting memories!
What Age Is Appropriate for Kids to Bake Cookies?
When you think of a young baker, remember that age recommendations suggest starting around five. At this age, kids can grasp baking safety basics while helping with simple tasks, igniting their love for culinary adventures.
Are There Any Allergy-Friendly Alternatives for Common Ingredients?
When baking, you can easily swap common ingredients for allergy-friendly alternatives. Try nut-free alternatives like sunflower seed butter and explore dairy-free options such as almond milk or coconut oil to create delicious treats everyone can enjoy!


