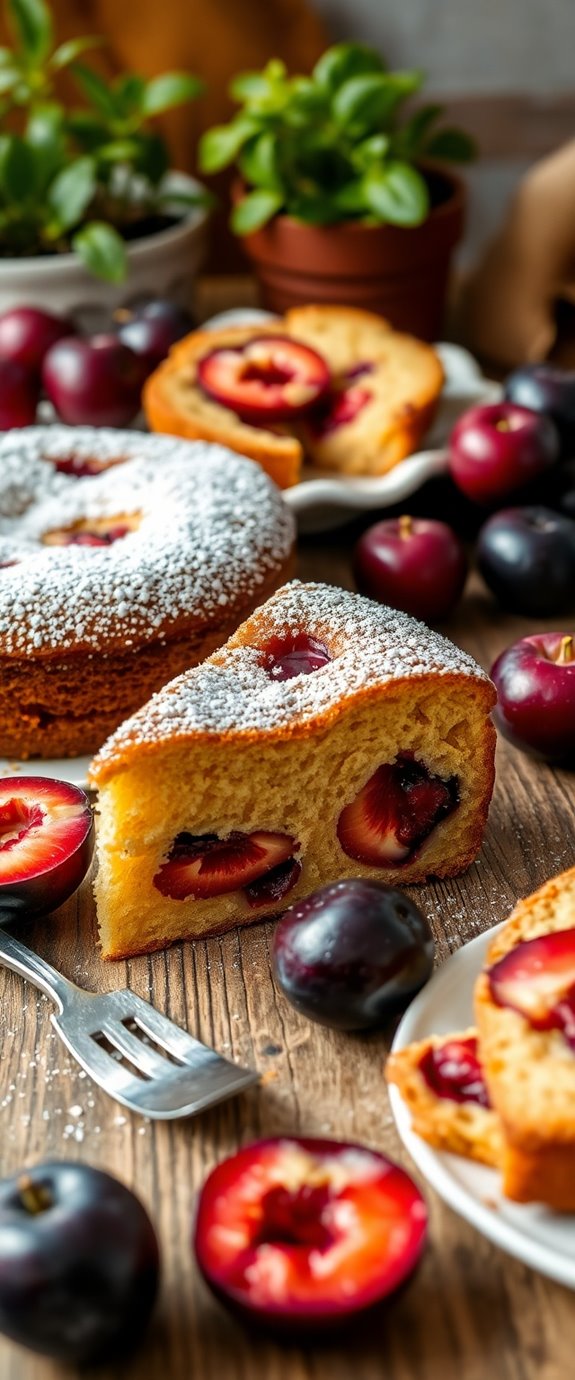
When you think about a cake that's both delightful and versatile, the Dora Cake comes to mind. With its fluffy texture and simple ingredients, it's an ideal choice for various occasions. You can easily customize it to fit dietary needs or flavor preferences, making it a true crowd-pleaser. Curious about how to make this charming treat? Let's explore the recipe and all the creative possibilities it offers.
Recipe Tips and Tricks
- Prepare a basic cake batter using flour, sugar, baking powder, salt, and an egg, following standard mixing techniques.
- For a themed Dora cake, use vibrant decorations like colorful sprinkles and themed cake toppers.
- Consider flavor variations, such as chocolate or fruit-infused fillings, to enhance the cake's taste.
- Store leftovers properly in an airtight container at room temperature for up to 3-4 days for freshness.
- Engage creativity in decorating and personalizing the cake, encouraging a fun baking experience.
How To Make It – Recipe
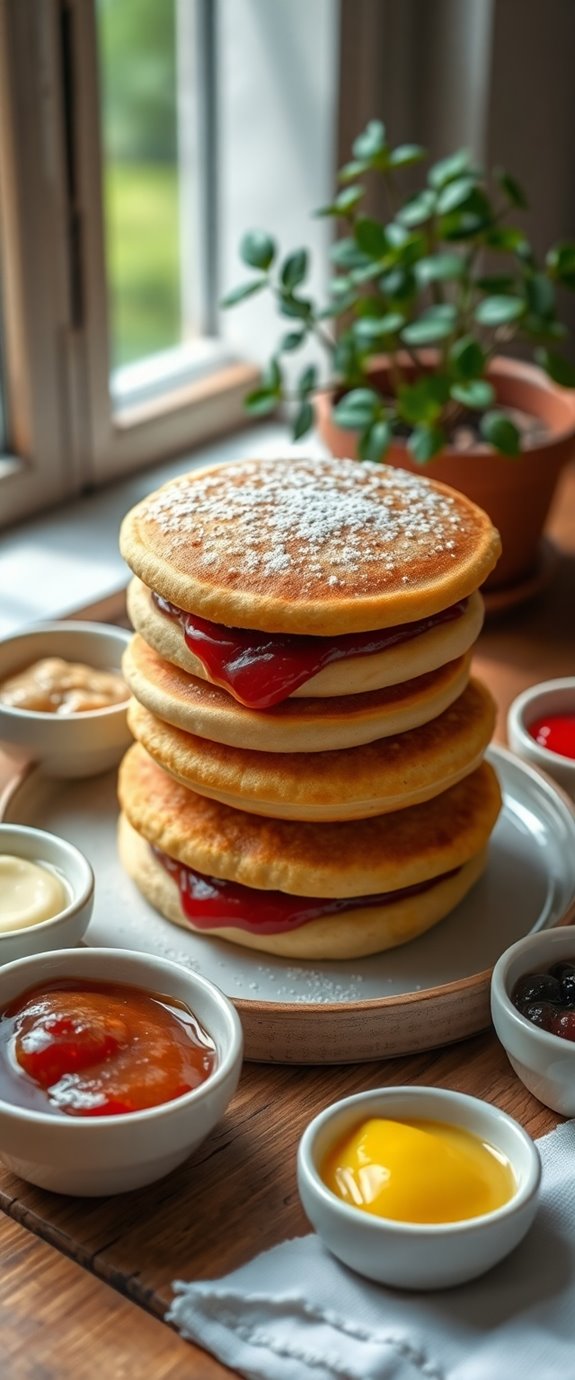
To make a delicious Dora Cake, you'll want to start with the right ingredients and a clear understanding of the steps involved. This delightful treat is a popular snack originating from Japan, consisting of two fluffy pancake-like cakes filled with sweet red bean paste. The texture is soft, and the flavor is subtly sweet, making it a perfect dessert or snack for any time of the day. Additionally, for a unique twist on this classic, you can consider using dairy-free alternatives in your batter to cater to different dietary preferences.
To achieve the best results, it's important to measure your ingredients accurately and follow the cooking instructions carefully. The key to a perfect Dora Cake lies in the balance of the batter and the filling, so be certain to choose high-quality ingredients. Once you have everything ready, you'll be well on your way to creating this delightful dessert that will impress friends and family alike.
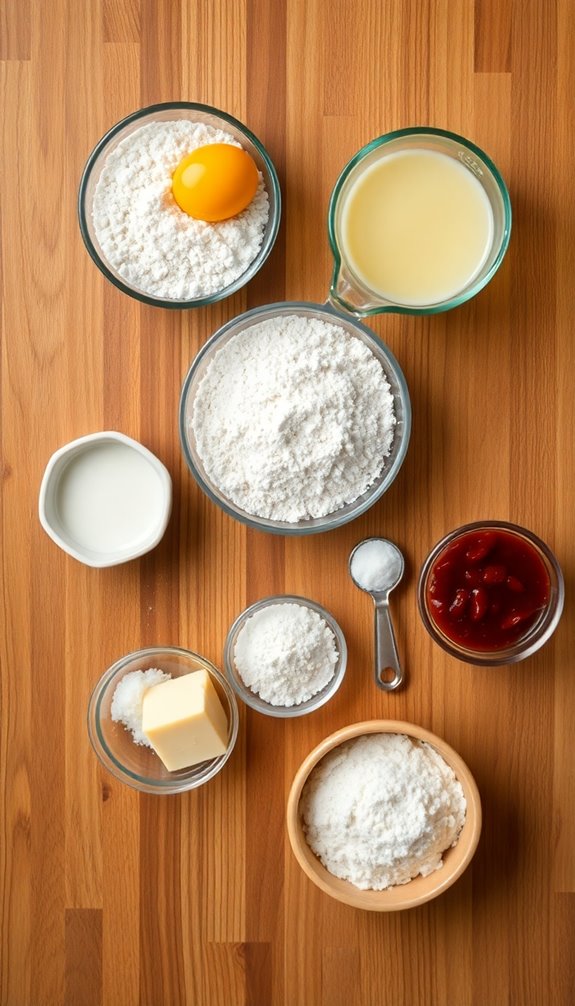
Ingredients:
- 1 cup all-purpose flour
- 1/2 cup granulated sugar
- 1 teaspoon baking powder
- 1/4 teaspoon salt
- 1 large egg
- 3/4 cup milk
- 2 tablespoons unsalted butter, melted
- 1 cup red bean paste (or your preferred filling)
To prepare the Dora Cakes, start by whisking together the flour, sugar, baking powder, and salt in a mixing bowl. In a separate bowl, combine the egg, milk, and melted butter, then mix well. Gradually add the wet ingredients to the dry ingredients, stirring until just combined.
Heat a non-stick skillet over medium heat and pour a small ladleful of batter onto the skillet, forming a round cake. Cook until bubbles form on the surface, then flip and cook for another minute until golden brown. Repeat this process until all the batter is used.
Once you have your cakes, spread a generous amount of red bean paste onto one cake and top it with another, gently pressing down to seal the filling inside.
For best results, verify your skillet is evenly heated before cooking each Dora Cake, as this will help achieve a uniform color and texture. Additionally, you can experiment with different fillings such as custard, chocolate, or fruit preserves to suit your taste preferences.
Store any leftover Dora Cakes in an airtight container at room temperature, and enjoy them within a couple of days for the best flavor.
Substitution Suggestions
If you're looking to customize your Dora Cake or accommodate dietary restrictions, there are plenty of substitution options that can elevate your creation.
For flour alternatives, consider using almond or coconut flour for a gluten-free twist, or even oat flour for a heartier texture.
When it comes to sugar substitutes, you can swap out granulated sugar for coconut sugar or honey, both of which add unique flavors.
If you want to cut calories, try stevia or monk fruit sweetener.
These substitutions not only cater to your needs but also enhance the cake's flavor profile, making it deliciously versatile. Enjoy experimenting! Additionally, funnel cake recipes often utilize similar substitution techniques that can inspire your baking adventure.
Decorating Ideas
How can you transform your Dora Cake into a stunning centerpiece? Start by choosing vibrant cake toppings that reflect Dora's adventurous spirit—think colorful sprinkles, edible glitter, or fruit slices.
For frosting techniques, consider a smooth buttercream finish or a fun swirl of pastel-colored frosting to mimic Dora's outfit. You could even create a 3D effect with fondant to shape her iconic backpack or map.
Don't forget to add themed cake toppers, like Dora herself or her friends, for an extra touch. These details won't only enhance the cake's appearance but also delight your guests! Additionally, using cream cheese frosting can add a rich flavor that complements the sweetness of the cake.
Serving Suggestions
When serving your delightful Dora Cake, consider the atmosphere and theme of the occasion to really impress your guests.
For a vibrant celebration, pair your cake with fresh berries and a dollop of whipped cream for a burst of flavor and color. Alternatively, a scoop of vanilla ice cream adds a delightful contrast.
Presentation tips are key; use a decorative cake stand and garnish with edible flowers or chocolate shavings for visual appeal. It's also great to remember that a smash cake can be a fun addition for little ones celebrating their first birthday.
Don't forget to slice the cake elegantly, revealing its beautiful layers.
These thoughtful cake pairings and stunning presentations will elevate your dessert experience and wow everyone at the table.
Make-Ahead and Storage
To guarantee your Dora Cake stays fresh and delicious, planning ahead for storage can be a game changer.
Start by slicing your cake into individual portions—this not only helps with portion control but also makes it easier to grab a slice whenever you crave one.
If you want to save some for later, follow these freezing tips: wrap each portion tightly in plastic wrap, then place them in an airtight container or freezer bag. A well-stored cake can maintain its moist and flavorful quality for weeks.
When you're ready to enjoy, simply thaw in the refrigerator overnight.
With these simple steps, your Dora Cake remains a delightful treat for days to come!
How to Store Leftovers
Although you might be tempted to leave leftover Dora Cake out on the counter, proper storage is essential to maintaining its moist texture and rich flavor.
For ideal leftover storage, wrap individual slices tightly in plastic wrap or place them in an airtight container. This prevents them from drying out.
When using your refrigerator, remember to keep it set at 40°F or below. To enjoy the cake at its best, consume it within three to four days. A moist texture is crucial for a delightful dessert experience.
If you want to extend its life, consider freezing slices; just make sure they're well-wrapped to prevent freezer burn.
Happy storing!
Nutrition Facts(per serving)
Keeping your Dora Cake fresh is just the beginning; understanding its nutrition can enhance your enjoyment even more. Each serving typically contains around 250 calories, making it a delightful treat without excessive guilt.
The ingredient breakdown reveals a balance of flour, sugar, and eggs, providing carbohydrates and protein that fuel your day. You'll also find a touch of butter, adding richness and flavor, while contributing healthy fats.
With a hint of cocoa or vanilla, you're savoring not just a dessert, but a well-rounded snack that can fit into your lifestyle. Additionally, this recipe offers a unique twist as it can be made without eggs, appealing to those following an eggless diet. So, indulge wisely, knowing what's in each bite!
Final Thoughts
While you might think of Dora Cake as just another dessert, it truly offers a delightful experience that can brighten any occasion.
With its fluffy layers and rich fillings, this cake invites creativity in the kitchen. Don't hesitate to experiment with flavor variations—think chocolate, matcha, or even fruit-infused fillings. Adding fun elements like gummy worms can elevate the presentation and enjoyment of the dessert.
To guarantee your baking adventure is a success, remember some key baking tips: measure ingredients accurately, preheat your oven, and let your cake cool completely before frosting.
Recipe FAQs
What Is the Origin of Dora Cake?
You'll find that the origin of dora cake lies in Japan, where it's cherished as a traditional sweet. This delightful Japanese dessert, resembling pancakes, combines fluffy texture with sweet fillings, creating a beloved treat.
Can I Use Gluten-Free Flour for This Recipe?
You can use gluten-free alternatives, but be prepared for a baking texture that might dance differently than traditional flour. Experiment a little, and you'll uncover delicious possibilities that'll delight your taste buds beyond imagination!
How Long Does It Take to Bake a Dora Cake?
Baking a Dora cake typically takes about 20 to 30 minutes at 350°F. You'll notice the cake texture is perfect when it's golden brown and a toothpick comes out clean. Enjoy the delightful aroma!
Are There Any Common Mistakes to Avoid?
When baking, you're not just baking; you're crafting magic! Avoid common mistakes like improper mixing and ingredient substitutions that can ruin flavors. Stick to the recipe, and your creation will surely delight everyone who tastes it.
What Drinks Pair Well With Dora Cake?
When enjoying your cake, consider pairing it with a fragrant tea or a rich coffee. A delicate herbal tea complements its sweetness, while a bold espresso enhances the flavors, creating a delightful tasting experience.