Imagine a dark, velvety cake adorned with swirls of orange and black, beckoning from the center of your Halloween celebration. This Halloween cake recipe blends rich flavors with festive decorations, making it a showstopper at any spooky gathering. You'll discover the secrets to achieving that perfect moist texture and learn how to elevate your cake with creative toppings. Get ready to impress your guests and create lasting memories.
Recipe Tips and Tricks
- Use a base recipe of flour, sugar, cocoa powder, butter, eggs, and spices to create a delicious Halloween cake.
- Decorate the cake with spooky designs using black and orange fondant, adding candy corn or gummy worms for a festive touch.
- Bake the cake at 350°F for 25-30 minutes, allowing it to cool before frosting to avoid melting.
- Serve the cake on a themed cake stand with seasonal beverages and complementary treats like ghost-shaped cookies or chocolate cupcakes.
- Store leftover cake wrapped in plastic in a cool place or refrigerate for up to a week to maintain freshness.
How To Make It – Recipe

Creating a Halloween cake is a delightful way to celebrate the spooky season and impress friends and family with your baking skills. This festive cake can be decorated with fun and eerie designs, making it the centerpiece of your Halloween party. The recipe below combines rich flavors with vibrant colors, guaranteeing that it not only looks amazing but tastes delicious too. Get ready to release your creativity and bake a cake that will be the talk of the town!
Before you start, gather all your ingredients and tools. This cake can be made in a couple of hours, but it's important to allow ample time for cooling and decorating. The following recipe will guide you through the process of creating a moist and flavorful cake that can be customized to fit any Halloween theme. Whether you prefer a classic chocolate flavor or a vibrant orange vanilla sponge, this cake will serve as the perfect base for all your spooky decorations.
Ingredients:
- 2 cups all-purpose flour
- 1 ½ cups granulated sugar
- ½ cup unsweetened cocoa powder (if making chocolate cake)
- 1 cup unsalted butter, softened
- 4 large eggs
- 1 cup milk
- 2 teaspoons baking powder
- 1 teaspoon baking soda
- 1 teaspoon vanilla extract
- ½ teaspoon salt
- Food coloring (orange, purple, black, etc.)
- Frosting (buttercream or cream cheese)
- Decorations (candy eyes, sprinkles, edible glitter, etc.)
To make the Halloween cake, preheat your oven to 350°F (175°C). In a large mixing bowl, cream together the softened butter and sugar until light and fluffy. Add the eggs one at a time, mixing well after each addition, then stir in the vanilla extract.
In another bowl, combine the flour, baking powder, baking soda, cocoa powder (if using), and salt. Gradually add the dry ingredients to the wet mixture, alternating with the milk, and mix until smooth. If desired, divide the batter into separate bowls and add food coloring to create different colored layers.
Pour the batter into greased cake pans and bake for 25-30 minutes or until a toothpick inserted in the center comes out clean. Once baked, allow the cakes to cool completely before frosting and decorating.
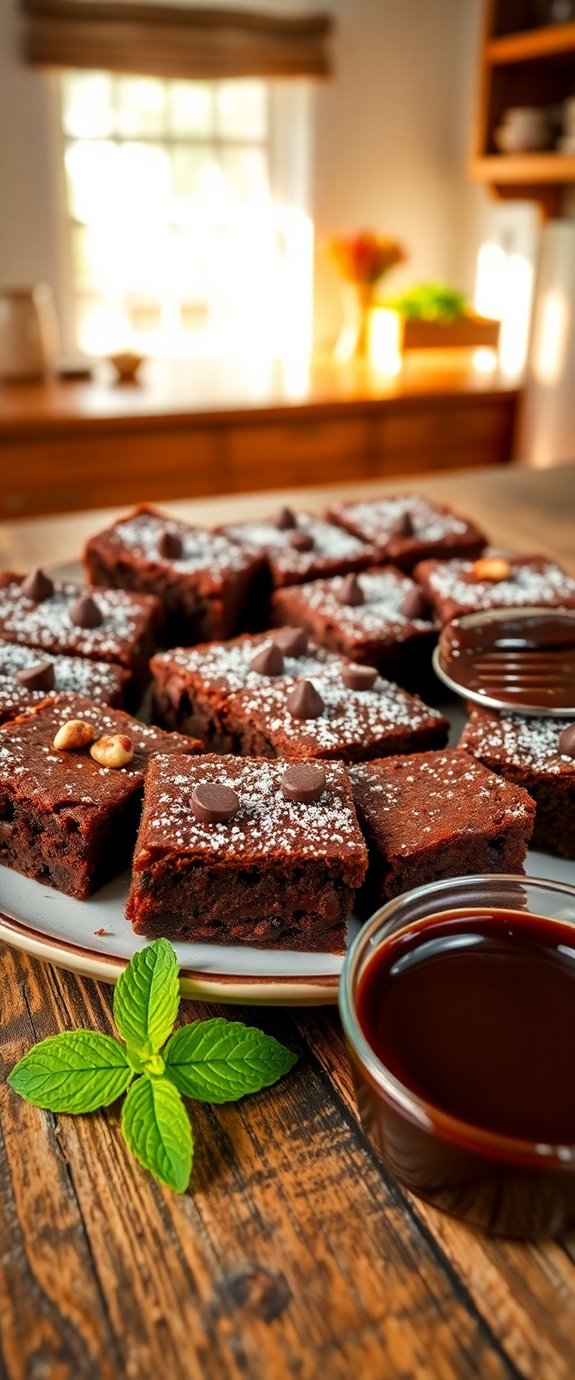
When decorating your Halloween cake, let your imagination run wild! Consider using colored frosting to create fun designs, such as spider webs or jack-o'-lanterns. You can also add edible decorations like candy spiders, ghosts, or ghouls. Remember, a decadent cake can elevate any celebration, and Halloween is no exception!
To make it even more festive, consider using themed cake toppers or edible glitter for a spooky shine. Remember, the more colorful and creative, the better!
Extra Tips:
For a moist cake, be careful not to overmix the batter once the dry ingredients are added. Always verify your ingredients are at room temperature for better incorporation.
If you're short on time, you can use store-bought frosting, but homemade frosting often yields better flavor. Finally, don't forget to have fun with the decorating process; it's the perfect opportunity to get creative and let your Halloween spirit shine!
Substitution Suggestions
If you find yourself missing a key ingredient for your Halloween cake, don't worry—there are plenty of easy substitutions that can save the day.
For those avoiding gluten, try almond flour or coconut flour as excellent gluten alternatives. If you need a dairy substitute, consider using almond milk or coconut cream for a rich flavor without the lactose.
Applesauce can replace eggs for moisture and sweetness, while a mixture of ground flaxseed and water works as a binding agent. Additionally, using a dairy-free cake recipe ensures that your cake is not only delicious but also suitable for those with dietary restrictions.
With these simple swaps, you can whip up a delicious Halloween cake that everyone can enjoy, regardless of dietary restrictions!
Decorating Ideas
As you plunge into the fun of Halloween cake decorating, let your imagination run wild with spooky themes and vibrant colors.
Consider creating spooky designs like haunted houses or creepy graveyards using dark chocolate and vibrant icing. You can craft edible decorations such as ghost-shaped meringues or candy corn sprinkles to add a festive touch.
Use black fondant to cover your cake, then roll out orange fondant for accents. Don't forget to add playful touches like gummy worms or bat-shaped chocolates. Adding a drizzle of rich chocolate ganache over the top will enhance both the flavor and the appearance of your Halloween cake.
Your Halloween cake will be a delightful centerpiece, enchanting your guests and filling their taste buds with frightful joy!
Serving Suggestions
After crafting your Halloween masterpiece, serving it up can be just as fun as decorating. Embrace spooky themes by placing your cake on a creepy cake stand or surrounded by faux cobwebs and plastic spiders.
For party pairings, consider offering rich chocolate cupcakes or ghost-shaped cookies alongside your cake to create a delightful dessert spread. You might also want to include some deliciously fun chocolate cake pops to add variety to your dessert table.
Don't forget to keep your drinks festive—serve up some pumpkin spice lattes or eerie green punch. Add a few themed plates and napkins to complete the atmosphere.
Your guests will love the immersive experience, making your Halloween celebration unforgettable!
Make-Ahead and Storage
To guarantee your Halloween cake is both delicious and stress-free, consider making it a day or two in advance.
One of the best make-ahead tips is to bake the cake and let it cool completely. Once cooled, wrap it tightly in plastic wrap before placing it in storage containers. This prevents it from drying out and helps retain moisture, keeping your cake fresh. You can also use a cake recipe at home that doesn't require an oven for added convenience.
You can also frost it the day of serving to maintain that perfect texture. If you plan to decorate, store the cake in a cool, dry place, away from direct sunlight, for best results.
Enjoy your spooky creation!
How to Store Leftovers
Leftover Halloween cake can be a delightful treat, so it's important to store it properly to keep it fresh and tasty.
For ideal leftover storage, wrap each slice tightly in plastic wrap or aluminum foil, ensuring no air touches the cake. You can also place the slices in an airtight container. This method enhances cake preservation, preventing it from drying out or absorbing unwanted odors.
Keep your cake in the fridge for up to a week for the best flavor, or freeze it for longer storage. Just remember to thaw it in the fridge before enjoying your spooky sweet creation! Additionally, homemade cakes often taste better when stored properly, as they retain their moisture and flavor.
Nutrition Facts(per serving)
When you savor a slice of Halloween cake, it's not just about the festive flavors; it's also good to know what you're indulging in. Each serving typically contains around 350 calories, making it a delightful treat without overindulging.
The blend of whole grains and pumpkin puree offers fiber and vitamins, while the added spices like cinnamon deliver antioxidant benefits. The frosting, though rich, provides a touch of sweetness with a hint of creaminess. Additionally, the use of whole grains in the cake contributes to a more balanced treat that can satisfy your sweet cravings.
Final Thoughts
As you gather around the table to enjoy your Halloween cake, remember that this festive dessert isn't just a treat; it's a celebration of flavors and traditions.
Embrace the spooky flavors that dance on your palate, from rich chocolate to tangy pumpkin, each bite echoing the spirit of the season. The vibrant colors and festive themes bring an enchanting atmosphere to your gathering.
Sharing this cake with friends and family creates lasting memories, making Halloween even more special. Additionally, consider incorporating elements of decadent caramel cake to elevate your dessert experience.
Recipe FAQs
Can I Use Gluten-Free Flour for This Halloween Cake?
Yes, you can definitely use gluten-free flour as a flour substitute. It'll provide delicious gluten-free options while maintaining the cake's texture and flavor. Just make sure to follow the right measurements for best results!
What Type of Frosting Pairs Best With This Cake?
You'll find that cream cheese frosting is a match made in dessert heaven, perfectly balancing sweetness with tang. Alternatively, buttercream adds a dreamy, velvety touch, making your cake irresistible for any occasion. Enjoy the flavors!
How Can I Make the Cake Vegan-Friendly?
To make your cake vegan-friendly, substitute eggs with flaxseed meal or applesauce. Use almond milk instead of dairy, and choose plant-based options for butter and sugar. These vegan substitutes keep your cake delicious and satisfying!
How Long Will the Cake Stay Fresh After Baking?
Like a fleeting autumn breeze, your cake's freshness fades over time. For ideal cake storage, wrap it tightly and keep it in the fridge, where it'll stay fresh for about a week. Enjoy those delicious moments!
Can I Freeze the Cake After Decorating It?
Yes, you can freeze a decorated cake! Use freezing tips like wrapping it tightly in plastic wrap and aluminum foil. For decorating strategies, wait until the frosting sets, ensuring it doesn't smudge during freezing.