Imagine transforming simple ingredients into delightful, eye-catching kawaii cookies that not only taste amazing but also brighten any occasion. With a few basic supplies, you can create dough that easily morphs into charming shapes, just waiting for your artistic touch. As you explore vibrant decorations and playful designs, you'll find endless possibilities to express your creativity. But before you start, let's take a closer look at the essential steps needed to perfect your kawaii cookie-making skills.
Recipe Tips and Tricks
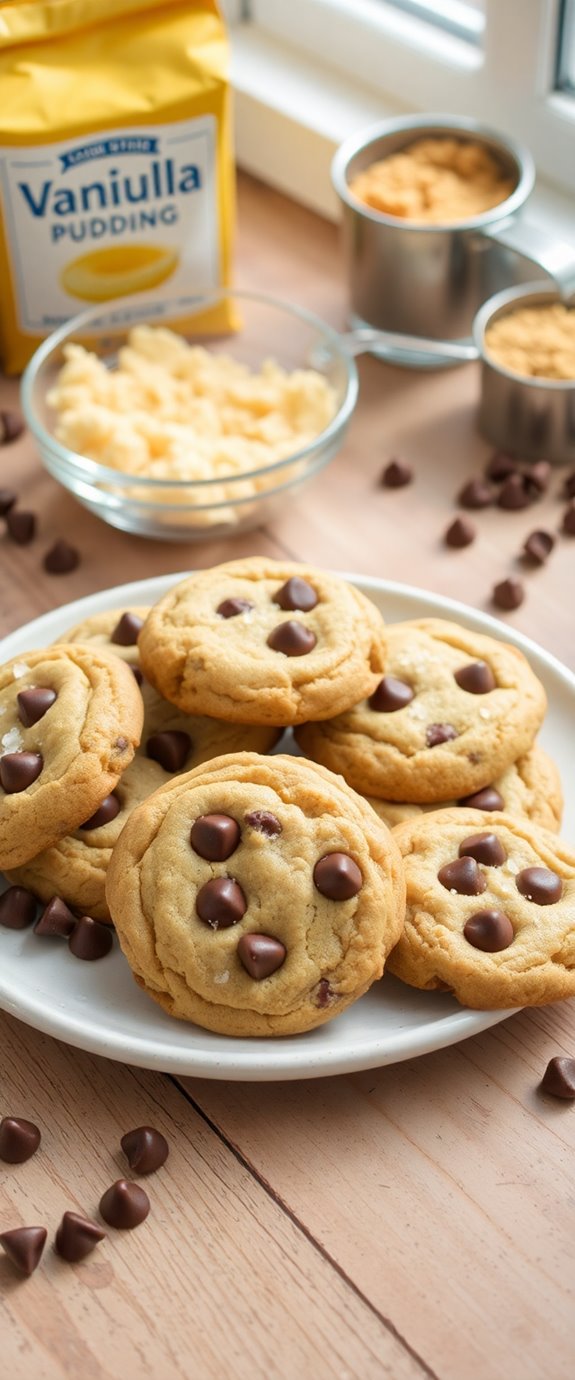
- Use a basic cookie dough recipe with all-purpose flour, butter, and sugar as the foundation for your kawaii cookies.
- Incorporate vibrant royal icing and food coloring to decorate cookies in cute, whimsical designs.
- Add fun sprinkles and edible markers to enhance the kawaii theme and create detailed characters or animals.
- Consider vegan or gluten-free substitutions to accommodate various dietary preferences while maintaining flavor.
- Present decorated cookies in cute packaging or on a tiered stand for an appealing display at parties or events.
How To Make It – Recipe
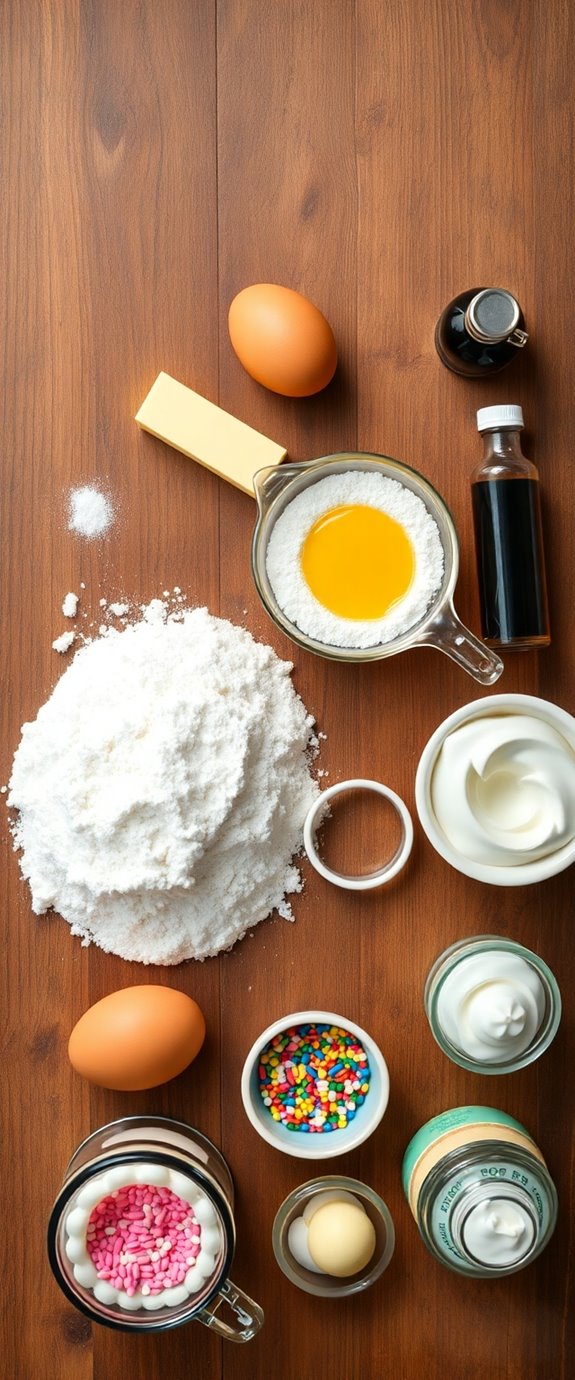
Ingredients:
- 2 ¾ cups all-purpose flour
- 1 teaspoon baking powder
- ½ teaspoon salt
- 1 cup unsalted butter, softened
- 1 ½ cups granulated sugar
- 1 large egg
- 2 teaspoons vanilla extract
- Food coloring (various colors)
- Royal icing or fondant for decoration
- Assorted sprinkles and edible decorations
Instructions:
Begin by preheating your oven to 350°F (175°C).
In a bowl, whisk together the flour, baking powder, and salt; set aside.
In a separate large bowl, cream the softened butter and granulated sugar until light and fluffy.
Beat in the egg and vanilla extract until well combined.
Gradually add the flour mixture to the wet ingredients, mixing until a dough forms.
Roll the dough into small balls and place them on a baking sheet lined with parchment paper, flattening them slightly.
Bake for 10-12 minutes or until the edges are golden.
Allow the cookies to cool completely before decorating with your royal icing, food coloring, and assorted sprinkles to create your kawaii designs.
Additionally, you can draw inspiration from decadent brownie cookies to add a rich flavor twist to your kawaii cookies.
Extra Tips:
When decorating your kawaii cookies, consider using different piping techniques to achieve various textures and designs.
A small round tip is great for creating fine details, while a larger tip works well for filling in larger areas.
If your icing is too runny, add a bit more powdered sugar until it reaches a thicker consistency.
Additionally, experimenting with different shapes, such as animals or cute characters, can make your cookies even more fun and personalized.
Have fun and let your creativity shine!
Substitution Suggestions
If you find yourself missing an ingredient or two for your kawaii cookie recipe, don't worry—you can easily make substitutions without sacrificing flavor or fun!
For butter, consider coconut oil for a vegan alternative that adds a hint of tropical goodness. If you need flour, almond or oat flour can serve as excellent gluten substitutes, creating a delightful texture.
Swap out eggs for applesauce or flaxseed meal mixed with water; they work wonders in binding your ingredients together. Additionally, using egg-free cookie recipes can inspire variations you might not have considered.
Each substitution not only keeps your cookies delicious but also guarantees you can whip up your kawaii treats no matter your pantry situation!
Decorating Ideas
As you plunge into decorating your kawaii cookies, let your creativity run wild! Embrace adorable kawaii themes like cute animals, smiling fruits, or whimsical characters.
Use vibrant icing and edible markers to bring your designs to life. Try piping techniques for delicate details like tiny eyes and rosy cheeks. Sprinkle colorful confetti or edible glitter for that extra sparkle.
Consider layering fondant for a smooth finish and a pop of color. Don't forget to use cookie cutters shaped like hearts and stars to enhance the charm. Remember that using homemade cookie recipes can help you create the perfect base for your decorations.
With these decorating techniques, your kawaii cookies will be irresistibly cute and delightful!
Serving Suggestions
After you've adorned your kawaii cookies with playful designs, it's time to think about how to serve them in a way that keeps the cuteness factor alive.
Consider a whimsical cookie presentation by stacking your cookies in a tiered stand, showcasing their vibrant colors and cheerful shapes. Add a sprinkle of edible glitter for an extra pop!
For take-home treats, use cute packaging like pastel-colored boxes or clear bags tied with colorful ribbons. You could even slip in a charming thank-you note to sweeten the gesture.
Additionally, consider including a selection of delicious Christmas cookies that complement your kawaii designs for a festive touch.
Your guests will adore the delightful presentation, making each bite even more special!
Make-Ahead and Storage
To enjoy your kawaii cookies at their freshest, you can easily make them ahead of time and store them properly.
The make-ahead benefits are endless; you can whip up a batch for a special occasion or simply to satisfy your sweet tooth later.
Once baked and cooled, pack your adorable cookies in airtight storage containers, layering them with parchment paper to prevent sticking.
Choose colorful containers to match their charm!
When you're ready to indulge, just grab a cookie and relish the delightful flavors, knowing you've got a stash ready to brighten any day. Additionally, these cookies can last up to two weeks when stored correctly, making them perfect for any planned event or spontaneous cravings.
Enjoy the sweetness!
How to Store Leftovers
Once you've savored your kawaii cookies, you'll want to preserve their delightful charm for later enjoyment.
To store your leftover cookies, grab some airtight storage containers that seal in freshness. Layer your cookies carefully, placing parchment paper between them to prevent sticking.
Keep them at room temperature for up to a week, or pop them in the fridge for a longer shelf life. If you want to freeze them, wrap each cookie tightly in plastic wrap before placing them in a container.
For best results, consider using airtight storage containers to ensure your cookies remain soft and delicious. This way, your kawaii treats stay soft, cute, and ready to bring smiles whenever you crave a sweet bite!
Nutrition Facts(per serving)
Each delightful cookie comes with a caloric content of around 150 calories, making it a sweet treat without overwhelming guilt. The rich butter provides essential fats, while the sugar adds a touch of energy to your day.
Plus, using whole grain flour boosts fiber content, aiding digestion. With colorful sprinkles, you not only get a festive look but also a dash of fun and flavor. Additionally, these cookies can be made even more nutritious by incorporating ingredients like oats, which enhance their health benefits.
Enjoy these whimsical bites, knowing they offer a blend of taste and nutritional perks!
Final Thoughts
As you savor each kawaii cookie, it's easy to appreciate not just its sweet flavor but also the joy it brings to any occasion.
The delightful shapes and vibrant colors add a playful touch to your baking repertoire.
Remember, cookie enjoyment goes beyond taste; it's about sharing smiles and creating memories.
With the baking tips you've gathered, you're equipped to impress friends and family with your adorable treats.
So, gather your ingredients, release your creativity, and let the magic of kawaii cookies shine.
Each bite is a reminder that happiness can be baked into every moment, one cookie at a time. Kitchenaid cookie recipes can elevate your cookie-making experience even further, ensuring that every batch is a hit!
Recipe FAQs
Can I Use Gluten-Free Flour for This Recipe?
Sure, you can use gluten-free flour! Just swap regular flour with a gluten-free blend, like Bob's Red Mill. Remember to add a bit more moisture; it helps with texture. Enjoy your baking adventure!
How Long Do These Cookies Take to Bake?
Your cookies typically need about 10-12 minutes of baking time. Keep an eye on them; you'll want that perfect golden edge while the center remains soft, ensuring a delightful cookie texture that melts in your mouth.
What Is the Best Way to Soften Butter Quickly?
To soften butter quickly, try the microwave method for a few seconds or leave it at room temperature for about 30 minutes. Both methods yield creamy, spreadable butter, perfect for your baking adventures.
Can I Freeze the Dough Before Baking?
Absolutely, you can freeze the dough before baking! Just wrap it tightly in plastic wrap for ideal dough storage. When you're ready to bake, let it thaw in the fridge overnight for best results. Enjoy!
Are There Any Vegan Alternatives for This Recipe?
Did you know nearly 9.7 million Americans identify as vegan? You can easily swap traditional ingredients with vegan substitutes like flaxseed, almond milk, or coconut oil, creating delicious plant-based options that satisfy your sweet tooth beautifully.