If you're looking for a dessert that combines the indulgent taste of chocolate cake with the satisfying crunch of Oreo cookies, you've found the right recipe. The Oreo Cake is not only simple to make but also versatile enough for any occasion. With just a few ingredients, you can create a dessert that delights both kids and adults alike. Curious about how to elevate this delicious cake even further? Let's explore the details.
Recipe Tips and Tricks
- Start with a chocolate cake mix, adding eggs, water, and vegetable oil for a quick and easy base.
- Fold in 1 cup of crushed Oreo cookies for a delicious flavor infusion.
- Bake in preheated oven at 350°F (175°C) for 25-30 minutes, then cool before serving.
- Enhance your cake by using chocolate ganache or crushed Oreos as decorative toppings.
- Experiment with flavors like mint or peanut butter to personalize your Oreo cake.
How To Make It – Recipe
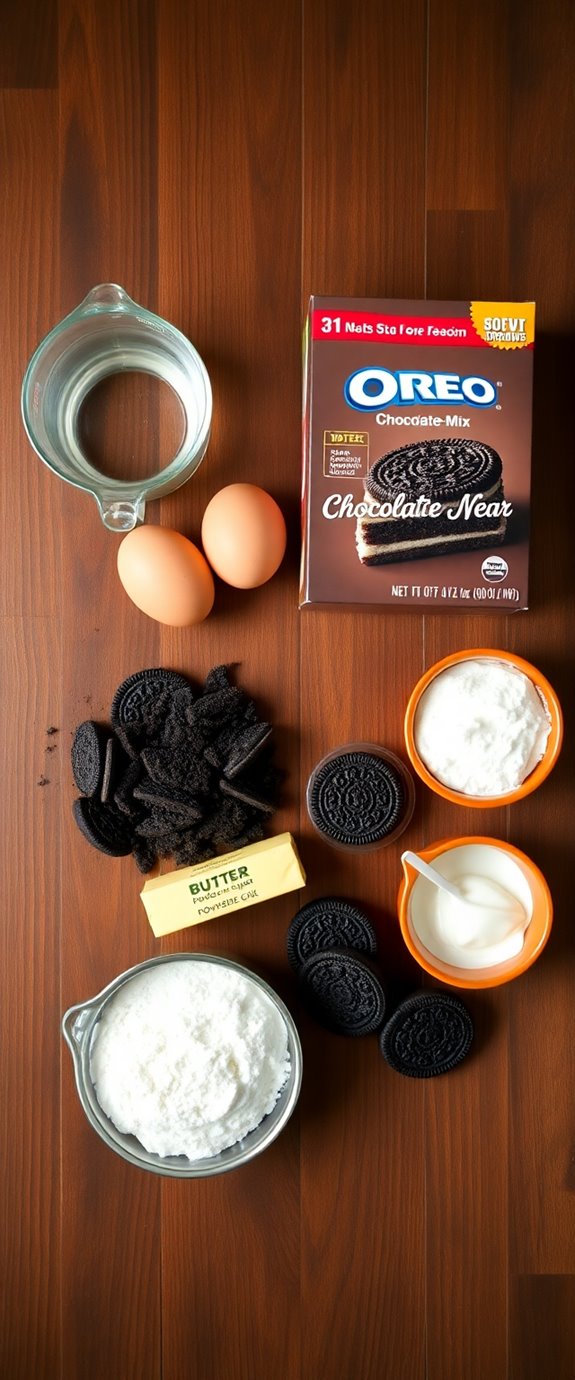
To make a delicious Oreo cake, you'll need to gather your ingredients and prepare for a delightful baking experience. This rich and indulgent cake is perfect for any occasion, whether it's a birthday celebration, a family gathering, or simply a treat for yourself. The combination of chocolate cake and creamy Oreo frosting creates a dessert that's sure to impress and satisfy any sweet tooth.
The process of making this Oreo cake is straightforward, allowing even novice bakers to create a masterpiece. By using crushed Oreos in the batter and frosting, you infuse the cake with that beloved cookie flavor. As you bake and assemble the layers, the aroma of chocolate will fill your kitchen, enticing everyone around you. So, let's get started!
Ingredients:
- 1 box chocolate cake mix
- 3 large eggs
- 1 cup water
- 1/2 cup vegetable oil
- 1 cup crushed Oreo cookies
- 1 cup unsalted butter, softened
- 4 cups powdered sugar
- 1/4 cup heavy cream
- 1 teaspoon vanilla extract
- Whole Oreos for decoration
For the cooking instructions, preheat your oven to 350°F (175°C). Grease and flour two 9-inch round cake pans. In a large mixing bowl, combine the chocolate cake mix, eggs, water, and vegetable oil, and mix until smooth.
Fold in the crushed Oreos, then pour the batter evenly into the prepared cake pans. Bake for 25-30 minutes, or until a toothpick inserted in the center comes out clean. Allow the cakes to cool in the pans for 10 minutes before transferring them to wire racks to cool completely.
Meanwhile, prepare the frosting by beating the softened butter in a bowl until creamy. Gradually add the powdered sugar, heavy cream, and vanilla extract, mixing until smooth. Once the cakes have cooled, spread frosting between the layers and on the top and sides of the cake. Decorate with whole Oreos as desired.
When cooking this Oreo cake, it's crucial to verify your ingredients are at room temperature for a smoother batter. If you want to enhance the Oreo flavor, consider adding more crushed Oreos to the frosting or even incorporating some into the cake layers. Additionally, using crushed Oreos in your frosting can elevate the flavor even further.
If you prefer a denser cake, you can replace the water with milk. Finally, for a fun twist, try adding chocolate chips or a drizzle of chocolate ganache on top for an extra layer of decadence. Enjoy your baking adventure!
Substitution Suggestions
As you prepare to create your Oreo cake, you might be wondering how to customize the recipe to better suit your taste or dietary needs.
For a vegan alternative, swap eggs with flaxseed meal mixed with water, and use plant-based milk instead of dairy. To make it gluten-free, replace regular flour with a gluten-free blend or almond flour.
You can also use gluten-free Oreos for that classic flavor without the gluten. These substitutions allow you to enjoy a delicious cake while accommodating different dietary preferences. Additionally, consider incorporating eggless cake recipes as they offer various methods to achieve a moist texture without using eggs.
Experiment and find the perfect combination that satisfies your cravings!
Decorating Ideas
While you might be tempted to keep your Oreo cake simple, enhancing its appearance can turn it into a showstopper for any occasion.
Consider using rich chocolate ganache as a frosting variation for a decadent touch. Then, get creative with Oreo toppings: crushed cookies, mini Oreos, or even chocolate shavings can add texture and flair.
Drizzling some caramel or white chocolate over the top can elevate its visual appeal even further. Don't forget to scatter some colorful sprinkles for a fun finish. Additionally, incorporating Oreo cookie crumbs into the layers of your cake can add both flavor and visual interest.
With these decorating ideas, your Oreo cake won't only taste amazing but also look irresistible!
Serving Suggestions
Once your beautifully decorated Oreo cake is ready, it's time to think about how to serve it. For the perfect dessert presentation, slice it into generous pieces, showcasing those delicious layers.
Consider pairing your Oreo cake with a scoop of vanilla ice cream or a dollop of whipped cream, which beautifully complements the rich chocolate flavor. Fresh berries add a vibrant touch and a hint of acidity that balances sweetness.
For extra flair, drizzle chocolate or caramel sauce on the plate. These Oreo cake pairings will elevate your dessert and leave your guests craving more, ensuring a memorable experience! Additionally, serving it alongside a deliciously simple chocolate cake can provide a delightful contrast in flavors and textures.
Make-Ahead and Storage
If you're planning ahead for a special occasion, making your Oreo cake in advance can save you time and stress.
This delectable treat can easily be prepared up to two days prior. Just bake, cool, and frost the cake, then store it in an airtight container at room temperature.
For longer storage, wrap individual slices in plastic wrap and place them in the freezer. Using this method, you can also ensure that your cake remains moist and flavorful, thanks to cake storage techniques.
When you're ready to serve, let the cake thaw in the fridge for a few hours.
Follow these storage tips, and you'll guarantee your Oreo cake tastes just as fresh and delicious as the day you made it!
How to Store Leftovers
To keep your leftover Oreo cake tasting fresh for days, follow a few simple storage tips.
First, slice the cake and wrap each piece tightly in plastic wrap; this helps with leftover storage. Alternatively, place it in an airtight container to guarantee proper cake preservation.
If you want to extend its life, consider freezing individual slices. Just be sure to wrap them well and use them within three months for the best taste. Chocolate cake can also be enjoyed without frosting, enhancing its rich flavor.
When you're ready to enjoy, simply thaw it in the fridge overnight.
With these methods, your delicious Oreo cake will remain irresistible for days!
Nutrition Facts(per serving)
After savoring your last bite of Oreo cake, you might be curious about what's in each delicious slice. This indulgent treat typically clocks in at around 350 calories per serving.
The ingredient breakdown reveals a delightful mix of crushed Oreos, sugar, cream cheese, and butter, contributing to its rich flavor and creamy texture. Each slice offers a sweet balance of carbohydrates and fats, making it a satisfying dessert. Additionally, this cake can be a spooktacular Halloween treat for festive celebrations, adding a fun twist to your dessert table.
While it's a treat best enjoyed in moderation, knowing the caloric content helps you appreciate each bite even more. Enjoy your cake while being mindful of its deliciously decadent nature!
Final Thoughts
As you take a moment to reflect on your Oreo cake experience, it's clear that this dessert is more than just a sweet treat—it's a celebration of flavors and textures that brings joy to any occasion.
With a few baking tips, you can elevate this cake to new heights, whether you're adding a dash of mint or swirling in peanut butter for delightful flavor variations. Remember that delicious homemade cakes require quality ingredients to truly shine.
Don't hesitate to experiment; each tweak can transform your creation into something uniquely yours.
Recipe FAQs
Can I Use Gluten-Free Oreos for This Recipe?
Imagine a rainbow of Oreo flavors dancing in your kitchen. You can absolutely use gluten-free Oreos for this recipe; they'll bring that delicious crunch while ensuring your baking remains friendly for all diet preferences. Enjoy!
How Long Does the Cake Take to Bake?
The baking time typically ranges from 25 to 35 minutes. You'll want to check for a golden top and a toothpick coming out clean, ensuring a moist, fluffy cake texture that's simply irresistible.
What Type of Cocoa Powder Should I Use?
Choosing the right cocoa powder can make or break your dessert. You'll want to use dark cocoa for a richer flavor, preferably Dutch process. It adds depth, creating a luscious treat you won't soon forget.
Can I Make This Cake in Advance?
Yes, you can definitely make ahead! Bake the cake, let it cool completely, then wrap it tightly in plastic wrap. Store it in the fridge for up to three days for ideal freshness. Enjoy those storage tips!
Is There a Vegan Version of This Oreo Cake?
Yes, you can definitely create a vegan version! Use dairy alternatives like almond milk and coconut cream, plus vegan substitutes for eggs and butter. This way, you'll enjoy a delicious, plant-based cake without sacrificing flavor!