If you're looking to elevate your dessert game, a Red Velvet Brownie might just be what you need. This recipe combines the rich, velvety texture of traditional brownies with the striking color and flavor of red velvet. It's an easy-to-follow method that results in a fudgy treat topped with cream cheese frosting. Curious about how to perfect these brownies or perhaps explore some creative twists? Let's uncover the secrets behind this delightful dessert.
Recipe Tips and Tricks
- This Red Velvet Brownie recipe combines cocoa, buttermilk, and cream cheese frosting for a unique twist on traditional brownies.
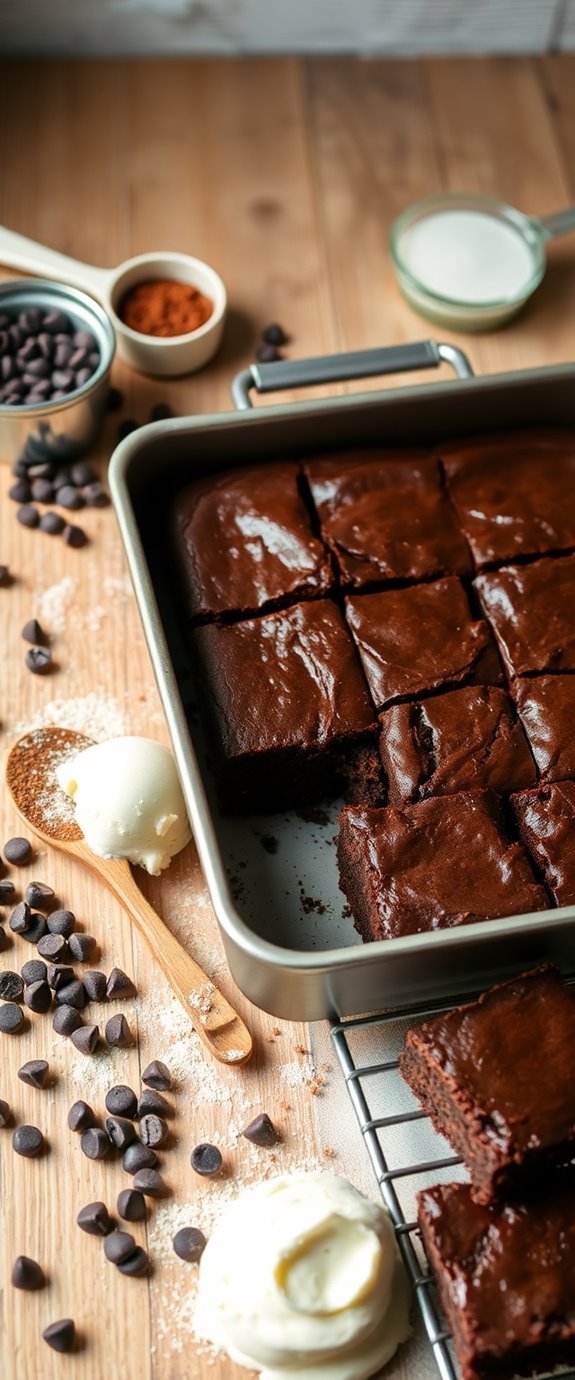
- Preheat the oven to 350°F and prepare a greased 9×13 inch baking pan for even baking.
- Mix melted butter and sugar, then add eggs, vanilla, and red food coloring for a rich flavor.
- Alternate adding dry ingredients and buttermilk to create a smooth batter, then bake for 30-35 minutes.
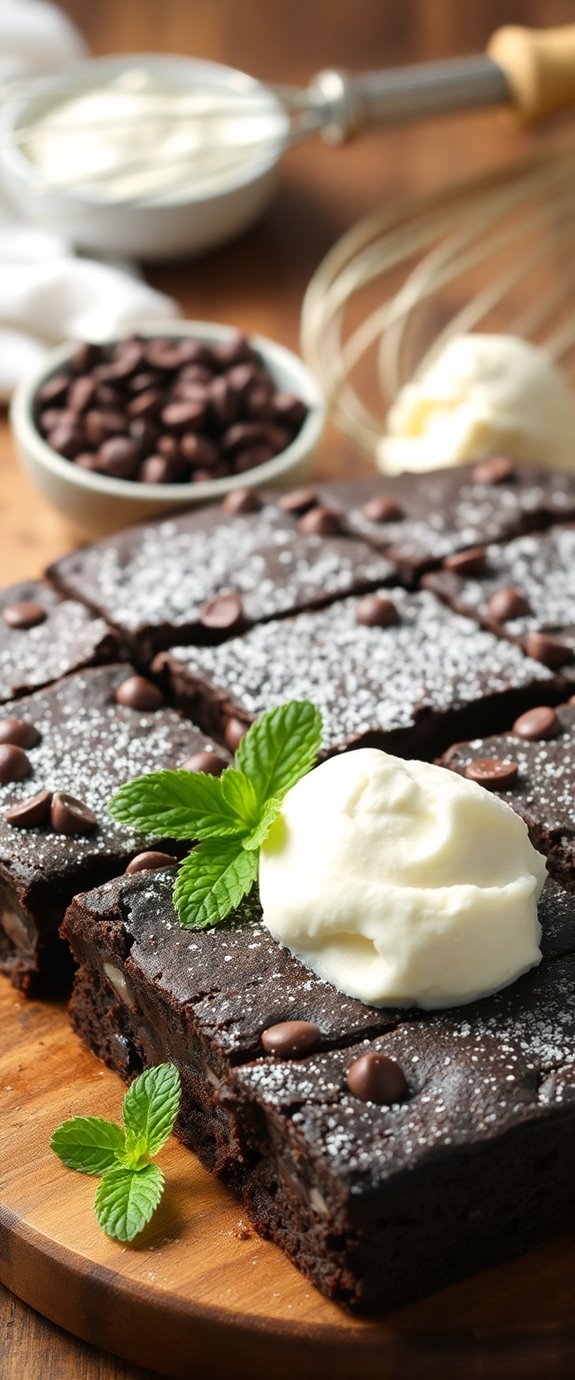
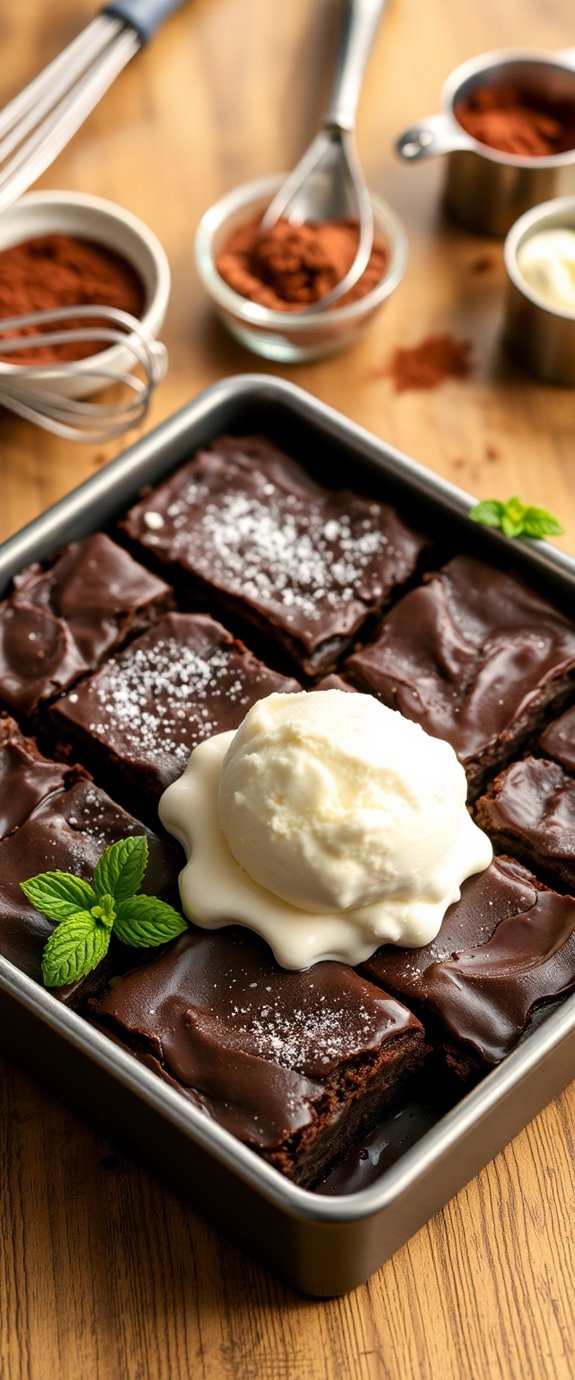
- Enhance presentation by dusting with powdered sugar or serving with ice cream for a delightful treat.
How To Make It – Recipe

Indulging in the rich and decadent flavors of red velvet brownies is a delightful way to elevate a classic dessert. With their vibrant red hue and velvety texture, these brownies offer a unique twist on traditional chocolate brownies. Perfect for parties, celebrations, or simply as a sweet treat for yourself, red velvet brownies are sure to impress with both their appearance and taste. The blend of cocoa, buttermilk, and cream cheese frosting creates a mouthwatering experience that you won't want to miss.
To make these scrumptious red velvet brownies, you'll need to gather all the necessary ingredients and follow the simple steps outlined below. The recipe combines the richness of chocolate with the subtle tang of buttermilk, resulting in a brownie that's both moist and fudgy. Decadent red velvet brownies are a creative way to celebrate any occasion or satisfy your sweet tooth.
Whether you're a seasoned baker or just getting started in the kitchen, this recipe is approachable and yields delicious results every time.
Ingredients:
- 1 cup unsalted butter
- 2 cups granulated sugar
- 4 large eggs
- 1 teaspoon vanilla extract
- 1 tablespoon red food coloring
- 1 ½ cups all-purpose flour
- ½ cup unsweetened cocoa powder
- 1 teaspoon baking powder
- ½ teaspoon salt
- 1 cup buttermilk
- 1 cup cream cheese frosting (store-bought or homemade)
Instructions:
Preheat your oven to 350°F (175°C) and grease a 9×13 inch baking pan. In a large mixing bowl, melt the butter and then stir in the granulated sugar until well combined.
Add the eggs one at a time, mixing well after each addition, followed by the vanilla extract and red food coloring. In a separate bowl, whisk together the flour, cocoa powder, baking powder, and salt. Gradually add the dry ingredients to the wet mixture, alternating with the buttermilk until just combined.
Pour the batter into the prepared pan and bake for 30-35 minutes, or until a toothpick inserted in the center comes out clean. Allow the brownies to cool completely before spreading the cream cheese frosting on top.
Extra Tips:
For an extra touch of flavor, consider adding a teaspoon of almond extract along with the vanilla. You can also customize your red velvet brownies by folding in chocolate chips or nuts for added texture.
If you want a deeper red color, feel free to increase the amount of red food coloring, but be cautious not to overdo it. Finally, for an elegant presentation, sprinkle some cocoa powder or powdered sugar on top of the frosted brownies before serving. Enjoy your delicious creation!
Substitution Suggestions
When you're ready to make these red velvet brownies but find yourself missing an ingredient or two, don't worry—there are plenty of substitutions that can work just as well.
If you're out of cocoa powder, try using carob powder as a chocolate alternative for a unique twist. For the vibrant red color, beet juice or pomegranate juice can replace traditional food coloring, giving your brownies a natural hue.
If you need a gluten-free option, swap all-purpose flour for almond flour or a gluten-free blend. Additionally, using almond flour can enhance the texture and flavor of your brownies, making them even more delicious.
These simple changes can help you whip up delicious brownies without a hitch!
Decorating Ideas
How can you take your red velvet brownies from delicious to dazzling? Start by choosing frosting options like cream cheese or a rich chocolate ganache to create a luscious layer on top.
For a pop of color, sprinkle crushed pistachios or vibrant edible flowers as garnish ideas. You could also drizzle white chocolate or caramel for a beautiful finish.
If you're feeling playful, use cookie cutters to create fun shapes from the brownies, which you can then decorate with colorful sprinkles.
These simple touches elevate your brownies, making them not just a treat, but a stunning centerpiece for any occasion! Additionally, incorporating decadent frosting options can further enhance both the flavor and presentation of your brownies.
Serving Suggestions
For a delightful brownie pairing, top each piece with a dollop of cream cheese frosting and a sprinkle of crushed nuts or white chocolate shavings. This adds texture and flavor that complements the red velvet beautifully. Additionally, serving delicious homemade brownies warm with a scoop of vanilla ice cream on the side allows the heat to slightly melt the ice cream—pure indulgence! Don't forget some fresh berries for a pop of color and an invigorating contrast. Enjoy every bite!
Make-Ahead and Storage
Red velvet brownies are a treat you can easily prepare in advance, making them perfect for gatherings or special occasions.
To maximize flavor, consider using these make-ahead tips: bake your brownies a day or two before the event, allowing the flavors to meld beautifully.
Once cooled, slice them into squares and store them in airtight storage containers. This keeps them fresh and moist.
If you want to freeze them, wrap each piece individually in plastic wrap before placing them in a freezer-safe container.
When you're ready to serve, simply thaw at room temperature for delicious, ready-to-enjoy brownies! Additionally, these brownies benefit from no-bake techniques, which can further enhance their taste and texture.
How to Store Leftovers
Leftover red velvet brownies can be just as delightful as when they were freshly baked, and storing them properly guarantees they maintain their rich flavor and moist texture.
For best leftover storage, wrap each brownie individually in plastic wrap to keep them fresh and prevent them from drying out. Place them in an airtight container and store in the fridge.
When you're ready to enjoy them again, simply let them sit at room temperature for a few minutes or warm them slightly in the microwave. You can also make delicious brownies without an oven for a quick treat.
These fridge tips guarantee every bite remains a decadent treat that rivals the original!
Nutrition Facts(per serving)
Indulging in a rich, velvety brownie comes with the responsibility of knowing what you're savoring. Each serving of this red velvet brownie packs about 250 calories, making it a delightful treat for special occasions.
The cocoa powder provides antioxidants, while the buttermilk adds a tangy flavor and aids digestion. You'll also benefit from the protein in the eggs, helping to keep you satisfied. Additionally, these brownies can be enhanced by using cocoa powder, which contributes to their rich flavor and texture.
While it's important to enjoy these brownies in moderation, understanding their caloric content and ingredient benefits allows you to relish every bite guilt-free. So, go ahead, treat yourself to this scrumptious delight!
Final Thoughts
While you might be tempted to rush through the preparation of these delightful red velvet brownies, taking your time can truly enhance your baking experience.
Embrace the process; it's where the magic happens! Remember to follow essential baking tips, like measuring ingredients accurately and incorporating them in the right order.
For those seeking flavor enhancements, consider adding a hint of espresso or a splash of vanilla extract to elevate the taste. Additionally, using high-quality cocoa powder can significantly improve the depth of flavor in your brownies.
Once baked, allow your brownies to cool before cutting them for that perfect fudgy texture.
Enjoy each bite, knowing you've created something special that's sure to impress!
Recipe FAQs
Can I Use a Gluten-Free Flour for This Recipe?
Why not explore gluten-free options? You can definitely use gluten-free flour for this recipe. Just guarantee you choose a suitable blend, and you'll enjoy delicious results with perfect texture and flavor. Flour substitutions can work wonders!
How Can I Make These Brownies Dairy-Free?
You can make these brownies dairy-free by using dairy alternatives like almond milk or coconut milk. For a richer taste, opt for vegan substitutes like coconut oil or nut butters instead of traditional butter. Enjoy your delicious creation!
What Is the Origin of Red Velvet Desserts?
Imagine a lavish banquet where red velvet desserts stole the spotlight! The history exploration reveals these treats' origins in the 1920s, evolving through dessert variations, enchanting taste buds with their rich, luscious, and visually stunning appeal.
Can I Add Nuts to the Brownie Batter?
Yes, you can add nuts to the brownie batter! Chopped walnuts or pecans enhance flavor and texture beautifully. Just make sure to chop them finely so they mix well and don't overwhelm the deliciousness.
What Type of Cocoa Powder Should I Use?
When choosing cocoa powder, you've got options! Dutch process cocoa gives a rich, smooth flavor, while natural cocoa adds a lighter, more intense taste. Decide based on your desired brownie texture and flavor profile!