Imagine sinking your teeth into a rich, velvety brownie that surprises you with a creamy Oreo truffle center. This dessert isn't just a treat; it's an experience that elevates any occasion. If you've ever wanted to impress your friends or indulge in something truly special, this recipe might just be what you need. Let's explore how to create these stunning Red Velvet Oreo Truffle Brownies that will leave everyone craving more.
Recipe Tips and Tricks
- Combine melted butter, sugar, eggs, and vanilla to create a rich brownie batter for the base of the dessert.
- Layer half of the brownie batter, followed by an Oreo truffle mixture, and top with the remaining batter before baking.
- Preheat your oven to 350°F (175°C) and bake for 30-35 minutes until a toothpick inserted comes out clean.
- Store brownies in an airtight container for up to a week or freeze for three months for later enjoyment.
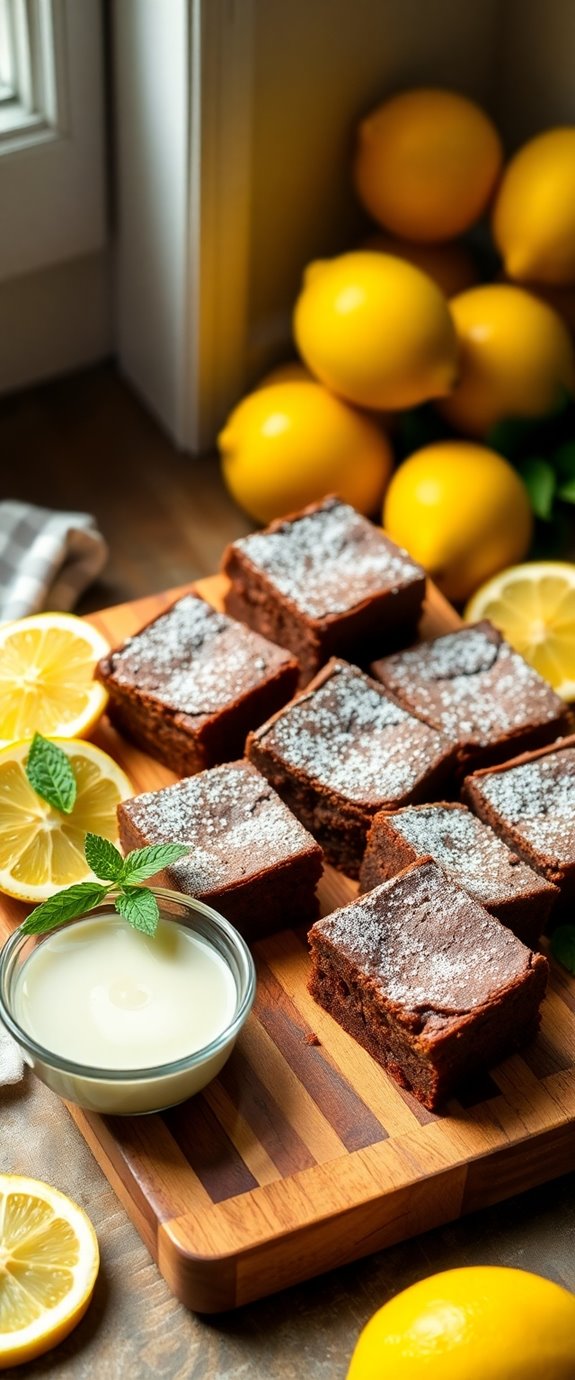
- Serve warm with vanilla ice cream or whipped cream, and enhance with crushed Oreos or fresh berries for added texture.
How To Make It – Recipe
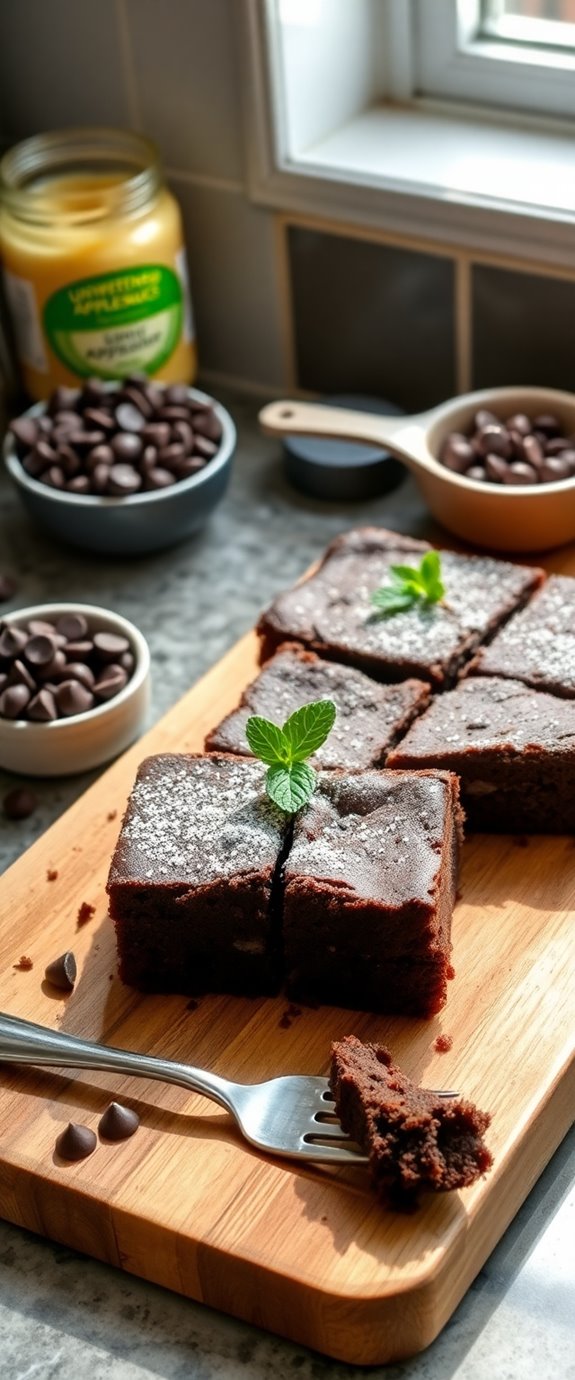
Indulging in the rich and decadent flavors of Red Velvet Oreo Truffle Brownies is a delightful experience that you can create in your kitchen. These brownies combine the classic red velvet cake flavor with the crunchiness of Oreo cookies and a creamy truffle filling, creating a layered dessert that's both visually stunning and utterly delicious.
Perfect for special occasions or just a sweet treat for yourself, this recipe will guide you through each step to guarantee that your brownies turn out perfectly. Decadent Peanut Butter Oreo Brownies are another great option if you're looking to mix up your dessert repertoire.
To make these brownies, you'll start by preparing a rich red velvet brownie base, topped with a luscious Oreo truffle filling, and finished with a drizzle of chocolate. The contrasting textures of the fudgy brownies and the creamy truffle make each bite an exciting experience.
Whether you're baking for a party, a gathering, or simply to satisfy a craving, these brownies are sure to impress with their vibrant color and delightful flavors.
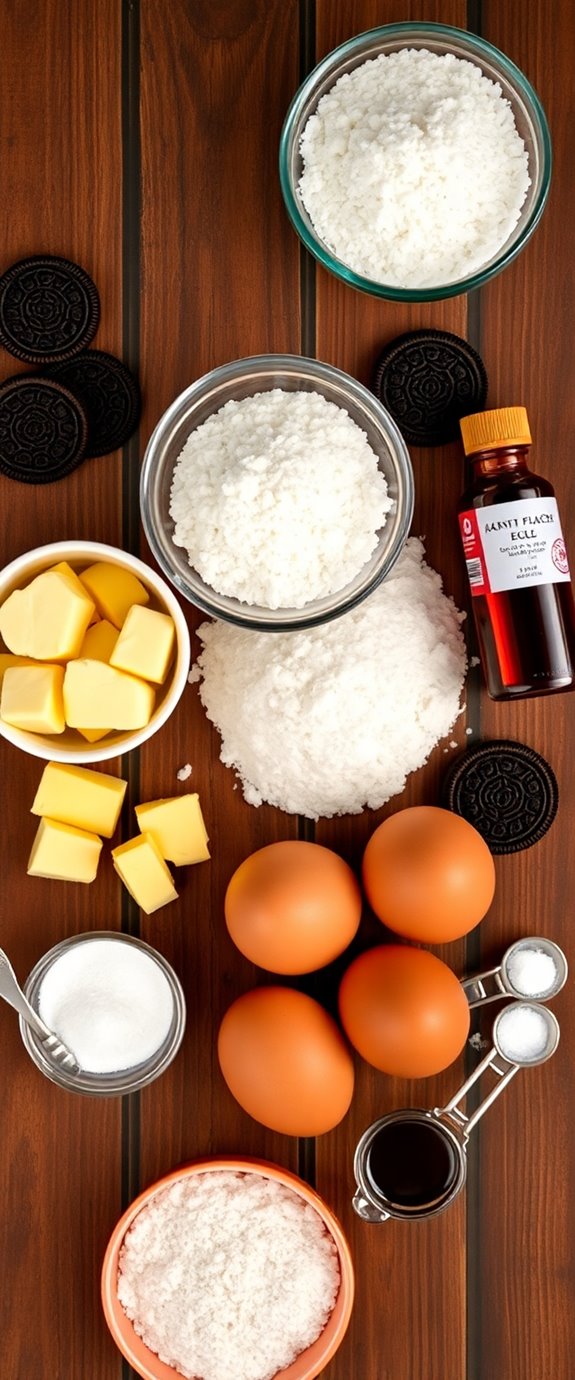
Ingredients:
- 1 cup unsalted butter
- 2 cups granulated sugar
- 4 large eggs
- 1 tablespoon vanilla extract
- 2 cups all-purpose flour
- 1 tablespoon cocoa powder
- 1 teaspoon baking soda
- 1 teaspoon salt
- 1 teaspoon red food coloring
- 1 package (15.35 oz) Oreo cookies
- 8 oz cream cheese, softened
- 1 cup powdered sugar
- 1 cup semi-sweet chocolate chips
Instructions:
Begin by preheating your oven to 350°F (175°C) and greasing a 9×13-inch baking pan.
In a large mixing bowl, melt the unsalted butter and stir in the granulated sugar until well combined. Add the eggs, one at a time, followed by the vanilla extract, red food coloring, and mix until fully combined.
In a separate bowl, whisk together the flour, cocoa powder, baking soda, and salt. Gradually add the dry ingredients to the wet mixture, mixing until just combined.
Pour half of the brownie batter into the prepared baking pan and spread evenly. In another bowl, crush the Oreo cookies and mix with softened cream cheese and powdered sugar until smooth.
Spread this Oreo truffle mixture over the brownie layer, then spoon the remaining brownie batter on top. Bake for 30-35 minutes, or until a toothpick inserted in the center comes out clean.
Allow to cool before drizzling with melted chocolate.
Extra Tips:
When making these brownies, be sure to let them cool completely before cutting to avoid any mess.
You can enhance the flavor by adding a pinch of espresso powder to the brownie batter, which will deepen the chocolate flavor.
Experiment with different types of Oreos, such as mint or peanut butter, to create unique variations of this recipe.
For a decorative touch, sprinkle crushed Oreo cookies on top of the melted chocolate drizzle before it sets. Enjoy your delicious creation!
Substitution Suggestions
While you mightn't have every ingredient on hand, don't worry—there are plenty of substitutions that can help you create delicious Red Velvet Oreo Truffle Brownies without sacrificing flavor.
For instance, if you're out of buttermilk, mix milk with vinegar or lemon juice as a quick alternative. Craving a gluten-free version? Substitute regular flour with almond or coconut flour. Additionally, using gluten-free flour can help achieve a similar texture while keeping your brownies deliciously rich.
Don't have red food coloring? Beet juice can add a lovely hue. If you're short on Oreos, any chocolate sandwich cookie works wonders.
These substitution ideas guarantee your brownies remain indulgent while using ingredient alternatives that fit your pantry perfectly. Enjoy!
Decorating Ideas
As you prepare to serve your Red Velvet Oreo Truffle Brownies, think about how a few simple decorations can elevate their presentation and make them truly unforgettable.
Consider using sprinkle options like gold or silver to add a touch of elegance. You can also match your sprinkle colors to your chosen color themes, like a festive red and white for a holiday party or vibrant pink and gold for a birthday celebration.
Drizzling white chocolate over the top gives a finishing touch, while fresh raspberries or mint leaves can add a pop of color and freshness, enhancing your delicious treats even more. Additionally, incorporating Nutella brownies into your dessert spread can create a delightful combination of flavors that will impress your guests.
Serving Suggestions
When serving your Red Velvet Oreo Truffle Brownies, consider pairing them with a scoop of creamy vanilla ice cream or a dollop of whipped cream to enhance the rich flavors.
For an eye-catching presentation, cut the brownies into generous squares, and arrange them on a colorful plate. You might sprinkle some crushed Oreos on top for added texture.
Keep in mind the serving sizes; one or two brownies per person is usually perfect. To elevate the experience, serve with fresh berries or a drizzle of chocolate sauce. Additionally, using unsweetened chocolate in your brownie recipe can provide a deeper, more complex flavor profile.
Your guests will be impressed by both the taste and the presentation!
Make-Ahead and Storage
If you want to enjoy your Red Velvet Oreo Truffle Brownies at their best, making them ahead of time is a fantastic option.
Prepare these decadent treats a day or two in advance, allowing the flavors to meld beautifully.
If you need to store them longer, consider freezing options. Simply wrap each brownie tightly in plastic wrap and place them in an airtight container.
This way, they can last up to three months! When you're ready to indulge, just thaw them in the fridge overnight.
With proper storage, you'll maintain their delightful texture and flavor for a satisfying treat anytime. Additionally, you can also bake other delicious treats like Banana Bread Brownies for variety in your dessert offerings.
How to Store Leftovers
To keep your Red Velvet Oreo Truffle Brownies fresh and delicious, it's important to know how to store any leftovers properly.
For ideal leftover storage, place the brownies in an airtight container, layering parchment paper between them to prevent sticking. Keep them in the refrigerator to maintain that rich, decadent flavor.
These truffles can last up to a week, but trust me, they won't last that long! If you need extra time, you can freeze them for up to three months. Just remember to thaw them in the fridge before indulging in their delightful taste once again! Additionally, you could consider using black beans as a healthier alternative in your brownie recipes for added benefits.
Nutrition Facts(per serving)
You might be surprised to learn just how indulgent yet surprisingly manageable the nutrition facts are for each serving of these Red Velvet Oreo Truffle Brownies.
With a caloric content of around 250 calories, you can enjoy a rich treat without going overboard.
The ingredient breakdown reveals a delightful mix of creamy cream cheese, chocolatey Oreos, and vibrant red velvet, which adds to the overall flavor.
Each bite gives you that luscious sweetness while still being a special occasion treat. Additionally, the use of red velvet ingredients contributes to the unique taste and visual appeal of these brownies.
Final Thoughts
As you take a moment to reflect on these Red Velvet Oreo Truffle Brownies, it's clear that they're more than just a dessert; they're an experience.
Each bite bursts with rich flavors and creamy textures, enchanting your taste buds. You've mastered a delightful treat that's perfect for any occasion, and with a few baking tips, you can elevate your skills even further. The combination of red velvet flavor and Oreo creates a decadent dessert that will leave everyone wanting more.
Whether you share them with friends or enjoy them solo, these delicious desserts are sure to impress.
So go ahead, indulge yourself and relish the joy of creating something truly special in your kitchen.
Happy baking!
Recipe FAQs
Can I Use Regular Oreos Instead of Red Velvet Oreos?
Did you know that over 40 different Oreo flavors exist? You can definitely use regular Oreos for flavor substitution, but expect a slightly different brownie texture, as red velvet adds a unique richness you'll miss!
How Long Do the Brownies Take to Bake?
Your brownies typically bake for about 25 to 30 minutes. Once they're done, let them cool for at least 20 minutes before slicing. This cooling period enhances their texture and flavor, making every bite irresistible!
What Type of Cream Cheese Should I Use?
When it comes to cream cheese, you're diving into a world of flavors. Opt for a classic brand, like Philadelphia or mascarpone, to elevate your dish. Each cream cheese type brings its unique charm to the table.
Are There Gluten-Free Options for This Recipe?
Absolutely, you can use gluten-free substitutes like almond flour or coconut flour! These alternative flours can create a delicious texture while keeping your treats gluten-free. Just make sure to adjust the measurements for the best results!
Can I Freeze the Truffle Brownies?
Absolutely, you can freeze those truffle brownies! Just wrap them tightly in plastic wrap, then foil. They'll stay fresh for up to three months. Follow these freezing tips, and you'll savor that indulgence later!