No-bake desserts offer a simple yet satisfying way to enjoy sweet treats, and strawberry cheesecake is no exception. This luscious dessert combines the rich creaminess of cream cheese with the invigorating taste of fresh strawberries, all atop a buttery graham cracker crust. Curious about how to whip up this easy delight? Let's explore the steps and tips to create a strawberry cheesecake that's not only delicious but also perfect for any occasion.
Recipe Tips and Tricks
- Combine 1 ½ cups of graham cracker crumbs, ½ cup melted butter, and 2 tablespoons sugar for the crust, pressing it into a pan.
- Mix 16 oz softened cream cheese with 1 cup sugar and vanilla extract until smooth to create the cheesecake filling.
- Fold in fresh strawberries for a fruity flavor, adjusting the quantity based on preference.
- Pour the cheesecake mixture into the prepared crust and refrigerate for at least 4 hours until set.
- Serve chilled, garnished with fresh strawberries or whipped cream for an added touch.
How To Make It – Recipe

Making a delicious strawberry cheesecake is a delightful way to impress your family and friends with a homemade dessert that combines the creamy texture of cheesecake with the sweet and tangy flavor of fresh strawberries. This recipe isn't only simple but also allows you to customize it to suit your taste preferences. The buttery graham cracker crust provides a perfect base, while the smooth filling is enriched with cream cheese and fresh strawberries, creating a beautiful and mouthwatering treat.
To achieve the best flavor and texture, it's essential to use room temperature ingredients, particularly the cream cheese, which will blend more easily and create a smoother filling. Fresh strawberries are ideal for this recipe, but if they're out of season, you can use frozen strawberries—just make sure they're thawed and drained well before using. Follow these steps, and you'll have a stunning strawberry cheesecake that will be the highlight of any meal. Additionally, using full-fat cream cheese will enhance the richness and overall flavor of your cheesecake.
Ingredients:
- 1 ½ cups graham cracker crumbs
- ½ cup unsalted butter, melted
- 2 tablespoons granulated sugar
- 16 oz cream cheese, softened
- 1 cup granulated sugar
- 1 teaspoon vanilla extract
- 3 large eggs
- 1 cup sour cream
- 2 cups fresh strawberries, sliced
- ¼ cup strawberry preserves (optional for topping)
To make the strawberry cheesecake, begin by preheating your oven to 325°F (160°C). In a medium bowl, mix the graham cracker crumbs, melted butter, and 2 tablespoons of sugar until well combined. Press this mixture firmly into the bottom of a 9-inch springform pan to form the crust. Set aside.
In a large mixing bowl, beat the softened cream cheese until smooth and creamy. Gradually add 1 cup of sugar and vanilla extract, mixing until fully incorporated. Then, add the eggs one at a time, mixing well after each addition. Finally, fold in the sour cream and half of the sliced strawberries. Pour the cheesecake mixture into the prepared crust and smooth the top.
Bake for 55-60 minutes, until the center is set but slightly jiggly. Allow the cheesecake to cool completely before refrigerating for at least 4 hours, or overnight. Just before serving, top with remaining sliced strawberries and strawberry preserves, if desired.
When making your strawberry cheesecake, keep in mind that the quality of your ingredients can greatly impact the final result. For a richer flavor, opt for full-fat cream cheese and sour cream. Additionally, if you want to avoid cracks in your cheesecake, consider baking it in a water bath by placing the springform pan inside a larger pan filled with hot water during the baking process. This helps maintain a consistent temperature and adds moisture to the oven.
Finally, be careful not to overmix the batter, as this can incorporate too much air and lead to cracks as the cheesecake cools. Enjoy your baking!
Substitution Suggestions
While you might've a specific set of ingredients in mind for your strawberry cheesecake, there are plenty of substitution options that can enhance your dessert or accommodate dietary preferences.
For a lighter version, try cream cheese alternatives like Greek yogurt or mascarpone. If you're looking for a dairy-free option, cashew cream works wonderfully.
When it comes to sweetener options, consider using honey, maple syrup, or stevia to adjust the sweetness to your liking. Additionally, incorporating homemade strawberry cheesecake can elevate the flavor profile of your dessert.
These simple swaps not only cater to different diets but also add unique flavors, making your no-bake strawberry cheesecake even more delightful!
Decorating Ideas
To elevate your strawberry cheesecake and make it truly eye-catching, consider adding vibrant decorations that enhance both its appearance and flavor.
Start by piping swirls of fluffy whipped cream around the edges for a touch of elegance. Top each swirl with fresh berries—strawberries, blueberries, or raspberries—to create a colorful contrast.
For an extra pop, sprinkle some crushed graham crackers or chocolate shavings over the top. You could also add mint leaves for a revitalizing touch. Using fresh, ripe strawberries will enhance the overall flavor profile of your cheesecake.
These simple yet effective decorating ideas won't only beautify your cheesecake but also entice your guests with their delicious appeal. Enjoy your masterpiece!
Serving Suggestions
After you've adorned your strawberry cheesecake with delightful decorations, serving it can enhance the overall experience.
Choose elegant serving plates that complement the vibrant colors of your cheesecake. For a touch of sophistication, consider using glass or ceramic plates.
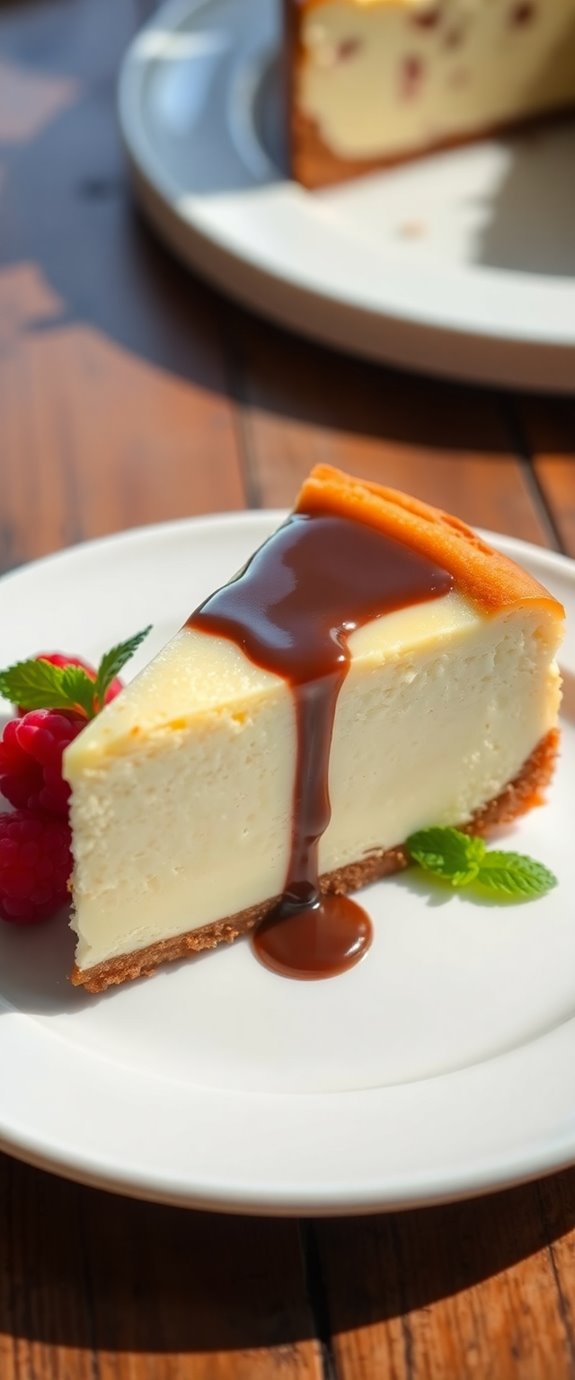
As for garnish options, fresh mint leaves or a drizzle of chocolate sauce can elevate your dessert. You might also sprinkle crushed graham crackers on top for added texture. Additionally, serving your cheesecake with a side of healthy strawberry cheesecake can provide a delicious contrast to the rich flavors.
Don't forget to slice the cheesecake into generous portions, ensuring each piece showcases those luscious strawberries. This attention to detail will make your dessert not only delicious but visually stunning!
Make-Ahead and Storage
Making your strawberry cheesecake ahead of time not only saves you stress on the day of serving but also allows the flavors to meld beautifully.
To make the most of your dessert, consider these make-ahead tips: prepare your cheesecake up to two days in advance and refrigerate it in airtight storage containers. This way, it stays fresh and retains its creamy texture.
When you're ready to serve, simply garnish with fresh strawberries for an eye-catching finish. Additionally, letting the cheesecake chill overnight enhances its creamy texture and overall flavor profile.
How to Store Leftovers
Leftover strawberry cheesecake can be a true delight, but proper storage is key to keeping it fresh and flavorful.
To guarantee ideal cheesecake preservation, cover your leftovers tightly with plastic wrap or transfer them to an airtight container. This prevents air exposure and helps maintain that creamy texture.
Store your cheesecake in the refrigerator, where it'll stay fresh for up to a week. If you need longer storage, consider freezing individual slices. Just wrap them well and place in a freezer-safe container. Additionally, a no-bake cheesecake can often have a different texture when thawed, so take care to store it properly.
When you're ready to indulge again, simply thaw it in the fridge overnight for the best taste.
Nutrition Facts(per serving)
Savoring your homemade strawberry cheesecake isn't just about the flavor; it's also crucial to know what you're treating yourself to.
Each portion typically contains around 300 calories, providing a delightful blend of tastes without overwhelming your diet.
The nutrient breakdown reveals vital components: about 15 grams of fat, 35 grams of carbohydrates, and 5 grams of protein.
You'll also gain from vitamins and minerals from the strawberries, adding a fruity freshness. Delicious Strawberry Cheesecake in a Jar can be a fun and creative way to serve this classic dessert.
Final Thoughts
As you reflect on your culinary journey to create this strawberry cheesecake, you might find that the blend of creamy richness and fruity brightness leaves a lasting impression.
This no-bake dessert isn't only delightful but also versatile. You can explore cheesecake variations by swapping strawberries for blueberries or mangoes, tailoring it to your taste. Additionally, the effortless cheesecake preparation makes it a perfect choice for gatherings or last-minute cravings.
Remember the dessert tips you've learned—chill it well for the perfect texture and consider adding a splash of lemon juice for brightness.
With each slice, you're not just serving a dessert; you're sharing a sweet memory, one that's sure to be cherished by friends and family alike.
Recipe FAQs
Can I Use Frozen Strawberries Instead of Fresh Ones?
You can definitely use frozen strawberries instead of fresh ones. Just keep in mind that frozen strawberries may alter the texture, making it a bit softer, but they'll still deliver delicious flavor in your dish!
How Long Does the Cheesecake Need to Set in the Fridge?
You'll need to chill the cheesecake for at least four hours to achieve the perfect texture. The longer you let it set, the firmer it gets, enhancing that delightful balance of flavors you crave. Enjoy!
Is There a Vegan Version of This Cheesecake?
Yes, you can definitely create a vegan version! Use dairy alternatives like cashew cream or coconut yogurt, and try vegan substitutes like maple syrup or agave for sweetness. You'll enjoy a delicious, cruelty-free cheesecake!
Can I Use a Different Fruit for Topping?
Imagine a garden of vibrant choices; you can absolutely explore fruit variations for your cheesecake topping. Whether it's tangy blueberries or sweet peaches, these alternatives will elevate your dessert into a delightful masterpiece.
What Equipment Do I Need to Make This Cheesecake?
To make this cheesecake, you'll need mixing bowls and an electric mixer. These tools help you blend ingredients smoothly, ensuring a creamy texture. Don't forget a springform pan for easy removal and presentation!