

Did you know that over 80% of couples are opting for unique dessert options at their weddings? Wedding cheesecake cups offer a delightful alternative to traditional cakes, combining rich flavors with stunning presentations. These individual treats cater to various tastes and preferences, making them a hit among guests. Curious about how to create these elegant desserts? Let's explore the recipe and tips to make your wedding dessert table unforgettable.
Recipe Tips and Tricks
- Combine graham cracker crumbs and melted butter to create a crust in serving cups for cheesecake layers.
- Beat cream cheese with powdered sugar and vanilla, then fold in whipped cream for a smooth filling.
- Chill the filled cups for at least 4 hours before serving to set the cheesecake.
- Customize your cheesecake cups with fruit purees, flavored extracts, or alternative ingredients for dietary preferences.
- Garnish with fresh berries or chocolate shavings to enhance presentation for weddings.
How To Make It – Recipe
Wedding cheesecake cups are a delightful and elegant dessert that can add a special touch to any celebration, especially weddings. These individual servings of creamy cheesecake, layered with your choice of toppings, aren't only visually appealing but also easy to serve.
The beauty of cheesecake cups lies in their versatility; you can customize them with different flavors and toppings to suit your theme or personal taste. Whether you prefer classic berry compote, chocolate drizzle, or even a hint of lemon zest, these cheesecake cups are sure to impress your guests.
Making wedding cheesecake cups is simpler than you might think. With a few basic ingredients and some careful layering, you can create a stunning dessert that looks as good as it tastes. The process involves preparing a creamy cheesecake filling, spooning it into individual cups, and then adding your favorite toppings.
This recipe is perfect for both novice and experienced bakers, as it requires no baking—just a little patience while the cups chill in the refrigerator before serving.
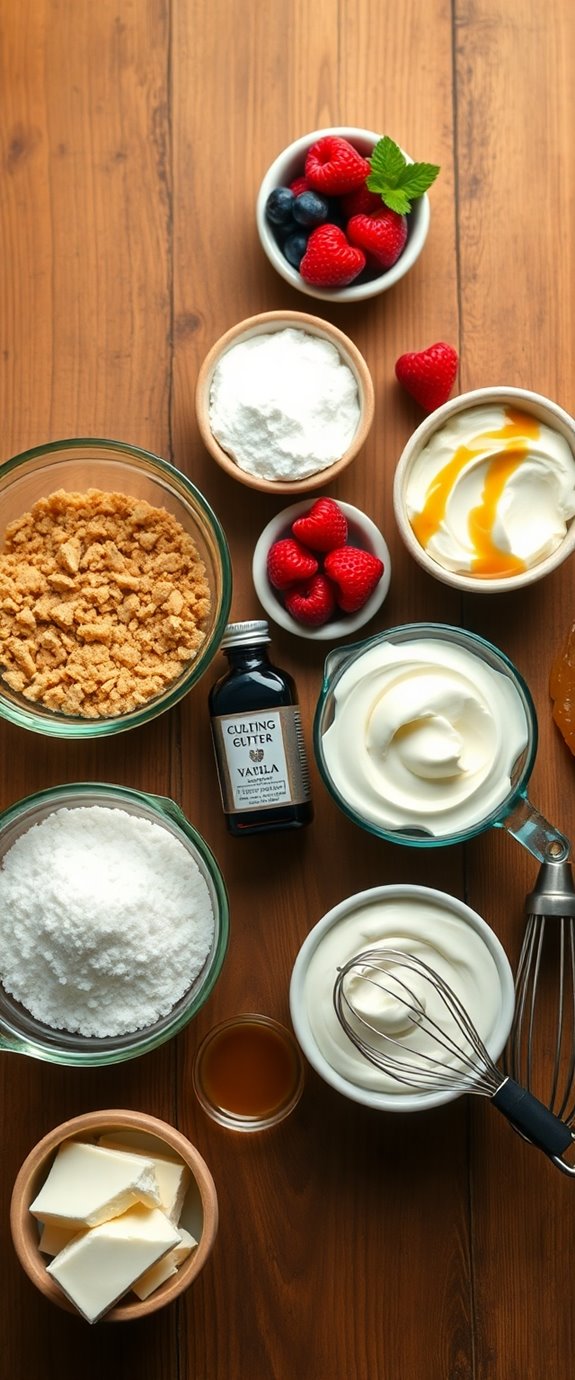
Ingredients:
- 1 cup graham cracker crumbs
- 1/4 cup unsalted butter, melted
- 2 cups cream cheese, softened
- 1 cup powdered sugar
- 1 teaspoon vanilla extract
- 1 cup heavy whipping cream
- Toppings of your choice (fresh berries, chocolate sauce, caramel, etc.)
To prepare the cheesecake cups, start by combining the graham cracker crumbs and melted butter in a bowl until well mixed. Divide this mixture evenly among your serving cups, pressing it down to form a solid crust at the bottom.
In a separate bowl, beat the cream cheese until smooth, then gradually add the powdered sugar and vanilla extract, mixing until well combined. In another bowl, whip the heavy cream until stiff peaks form, then gently fold it into the cream cheese mixture.
Spoon the cheesecake filling over the crust in each cup, filling them to the top. Allow the cups to chill in the refrigerator for at least 4 hours, or until set. Before serving, add your desired toppings for a finishing touch.
For best results, make your cheesecake cups a day in advance to allow the flavors to meld and the cheesecake to set properly. When selecting toppings, consider seasonal fruits or flavors that match your wedding theme for an extra personal touch.
You can also experiment with different flavored extracts, like almond or lemon, to give your cheesecake a unique twist. Finally, if you want to make them even more special, consider garnishing with edible flowers for an elegant presentation.
Enjoy your delicious wedding cheesecake cups!
Substitution Suggestions
If you're looking to customize your wedding cheesecake cups, there are plenty of substitution options that can enhance both flavor and texture.
For a creamy vegan alternative, consider using cashew cream or silken tofu blended with your favorite sweetener. If you want gluten-free options, swap traditional graham crackers for almond flour cookies or crushed gluten-free biscuits.
You can also experiment with different sweeteners like maple syrup or agave nectar for a unique taste. Adding fruit purees, like raspberry or mango, can elevate the flavor while keeping it fresh and vibrant. Additionally, incorporating easy vegan cheesecake recipes can provide inspiration for more creative combinations.
These substitutions make your cheesecake cups enjoyable for everyone!
Decorating Ideas
To create a stunning presentation for your cheesecake cups, consider incorporating a variety of decorative elements that not only enhance the visual appeal but also complement the flavors.
For wedding themes, use elegant garnishes like fresh berries, edible flowers, or chocolate shavings to match your color palette. Place your cups on a beautifully arranged dessert table, using tiered stands for height and dimension.
Add personalized touches, such as custom labels or place cards, to make each cup feel special. These decorative elements can greatly enhance the overall wedding dessert experience for your guests.
Finally, draping soft fabrics or twinkling lights around the display can elevate the ambiance and create a romantic atmosphere for your celebration.
Serving Suggestions
Serving cheesecake cups at your celebration can be both delightful and practical. These individual portions fit beautifully into various wedding themes, from rustic to elegant.
Consider displaying them on tiered stands for an eye-catching centerpiece. Pair your cheesecake cups with fresh fruit, chocolate shavings, or a drizzle of caramel to enhance flavors. For a whimsical touch, add mini sparklers or edible flowers. Complement the dessert with a signature cocktail or coffee station, creating a well-rounded experience.
Incorporating a wedding cheesecake bar allows guests to customize their desserts, making it even more enjoyable. Guests will appreciate the convenience, and you'll love how these sweet treats add a personal touch to your special day. Enjoy every delicious moment!
Make-Ahead and Storage
Planning ahead for your wedding dessert can make all the difference, especially when it comes to cheesecake cups.
Enjoy the make-ahead benefits by preparing these delightful treats a day or two in advance. Simply layer your crust, cheesecake filling, and toppings in individual storage containers, sealing them tightly. This not only saves you time on the big day but also allows the flavors to meld beautifully. Additionally, using a no bake vegan cheesecake recipe ensures that your desserts are both easy to prepare and delicious.
Plus, you won't be stressed about last-minute messes. Keep your cheesecake cups chilled in the fridge until you're ready to serve, ensuring they remain fresh and delicious for your special celebration.
How to Store Leftovers
Even after your wedding celebration, those delicious cheesecake cups can be savored for days to come.
To guarantee ideal cheesecake preservation, store your leftovers in airtight containers. This prevents moisture and odors from ruining their flavor.
Place them in the fridge, where they'll stay fresh for up to a week. If you want to keep them longer, consider freezing them.
Just wrap each cup tightly in plastic wrap, then seal in a freezer bag. When you're ready to enjoy them again, let them thaw in the fridge overnight.
For extra flavor, you can top your cheesecake cups with No Bake Cherry Cheesecake to enhance their taste before serving.
Nutrition Facts(per serving)
After enjoying those delightful cheesecake cups, you might wonder about their nutritional value. Each serving contains approximately 250 calories, making it a sweet yet indulgent treat.
The ingredient breakdown showcases a mix of cream cheese, sugar, and a hint of vanilla, contributing to the rich flavor. You'll also find a crumbly graham cracker crust that adds texture and a few extra calories.
With a balance of creaminess and crunch, these cups deliver not just flavor but a satisfying experience. Additionally, the rich flavor profile is reminiscent of deliciously creamy pumpkin cheesecake, which is a popular dessert during fall festivities. Keep in mind the portion size to enjoy this dessert while staying mindful of your daily caloric content.
Final Thoughts
As you savor the last bite of your wedding cheesecake cups, it's clear that these little desserts are more than just a sweet treat; they embody celebration and joy. Embracing current wedding trends, these cups offer a modern twist on a classic favorite, making them a stunning addition to any dessert table. Their versatility allows for delightful dessert pairings, whether with fresh berries or a drizzle of chocolate.
By incorporating these cheesecake cups, you're not only satisfying taste buds but also adding a touch of elegance. Delicious wedding cheesecake bites can be customized to suit your theme, ensuring they harmonize beautifully with your overall celebration.
Celebrate love and togetherness with these delightful bites that guests will remember long after the big day.
Recipe FAQs
Can I Use a Different Type of Crust for the Cheesecake Cups?
Like a painter with a fresh canvas, you can absolutely use different crusts for your cheesecake cups. Cookie crusts or nut crusts both add unique flavors and textures, making your dessert even more delightful.
What Size Cups Are Best for Serving Cheesecake?
For serving cheesecake, mini dessert cups around 4 to 6 ounces are perfect. They're just the right size for bite-sized indulgence, allowing you to showcase various flavors and textures, enhancing your guests' experience with delightful serving suggestions.
How Long Do These Cheesecake Cups Last at Room Temperature?
If you leave your cheesecake cups out at room temperature, they typically last about two hours. After that, their shelf life decreases considerably, so it's best to refrigerate them for freshness and safety.
Can I Freeze the Cheesecake Cups for Later Use?
Yes, you can freeze the cheesecake cups! Use proper freezing techniques, like airtight containers. For best results, thaw them in the fridge overnight, allowing their creamy texture to return before enjoying your delicious treat.
Are There Gluten-Free Options for This Cheesecake Recipe?
Yes, you can definitely make gluten-free cheesecake cups! Use gluten-free crusts made from almond flour or crushed gluten-free cookies, and consider alternative sweeteners like stevia or erythritol to keep it delicious and guilt-free. Enjoy!


