It's funny how a simple craving for something sweet can lead you to discover the perfect holiday recipe. Red velvet brownies not only satisfy your chocolate desires but also bring a splash of festive color to your table. With their luscious texture and creamy topping, they're bound to impress. Curious about how to whip up these decadent treats? Let's explore the steps to create this delightful Christmas dessert.
Recipe Tips and Tricks
- Combine wet ingredients like butter, sugar, eggs, and red food coloring to create a rich red velvet base for the brownies.
- Mix dry ingredients including flour, cocoa powder, baking powder, and salt before gradually incorporating them into the wet mixture.
- Bake at 350°F (175°C) in a greased 9×13 inch pan until a toothpick inserted comes out clean for perfectly moist brownies.
- For festive flair, decorate with cream cheese frosting and holiday-themed toppings or serve alongside vanilla ice cream.
- Store brownies in an airtight container to retain moisture, and freeze extras for later enjoyment during the holiday season.
How To Make It – Recipe

Red Velvet Brownies are the perfect indulgence for those who love the rich, velvety taste of red velvet cake combined with the fudgy texture of brownies. These delightful treats aren't only visually stunning, thanks to their vibrant red color, but they also deliver a deliciously unique flavor profile. The combination of cocoa powder, buttermilk, and vanilla creates a rich, moist brownie that will leave you wanting more.
Making Red Velvet Brownies is a simple process that requires just a handful of ingredients, most of which you likely already have in your pantry. Whether you're baking for a special occasion, a holiday gathering, or simply to satisfy your sweet tooth, these brownies are sure to impress. Follow this easy recipe to whip up a batch of these delectable treats that everyone will love.
Additionally, indulging in decadent treats like Red Velvet Brownies can make your holiday celebrations even more special.
Ingredients:
- 1 cup (2 sticks) unsalted butter
- 2 cups granulated sugar
- 4 large eggs
- 1 teaspoon vanilla extract
- 1 tablespoon red food coloring
- 2 cups all-purpose flour
- 1/2 cup unsweetened cocoa powder
- 1 teaspoon baking powder
- 1/2 teaspoon salt
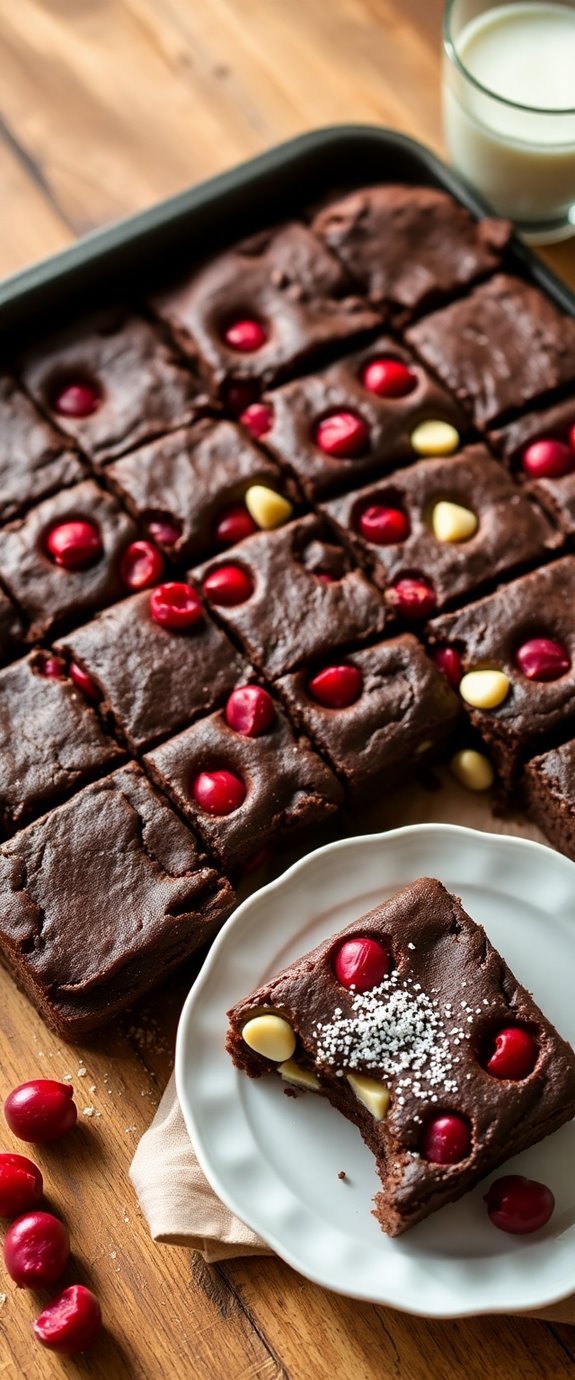
- 1 cup chocolate chips (optional)
To make the brownies, preheat your oven to 350°F (175°C) and grease a 9×13 inch baking pan. In a medium saucepan, melt the butter over low heat. Once melted, remove from heat and stir in the granulated sugar, mixing until well combined.
Allow the mixture to cool slightly before whisking in the eggs, vanilla extract, and red food coloring until smooth. In a separate bowl, combine the flour, cocoa powder, baking powder, and salt. Gradually add the dry ingredients to the wet mixture, stirring until just combined. If desired, fold in the chocolate chips.
Pour the batter into the prepared baking pan and spread it evenly. Bake for 25-30 minutes or until a toothpick inserted into the center comes out with a few moist crumbs. Allow to cool before slicing into squares.
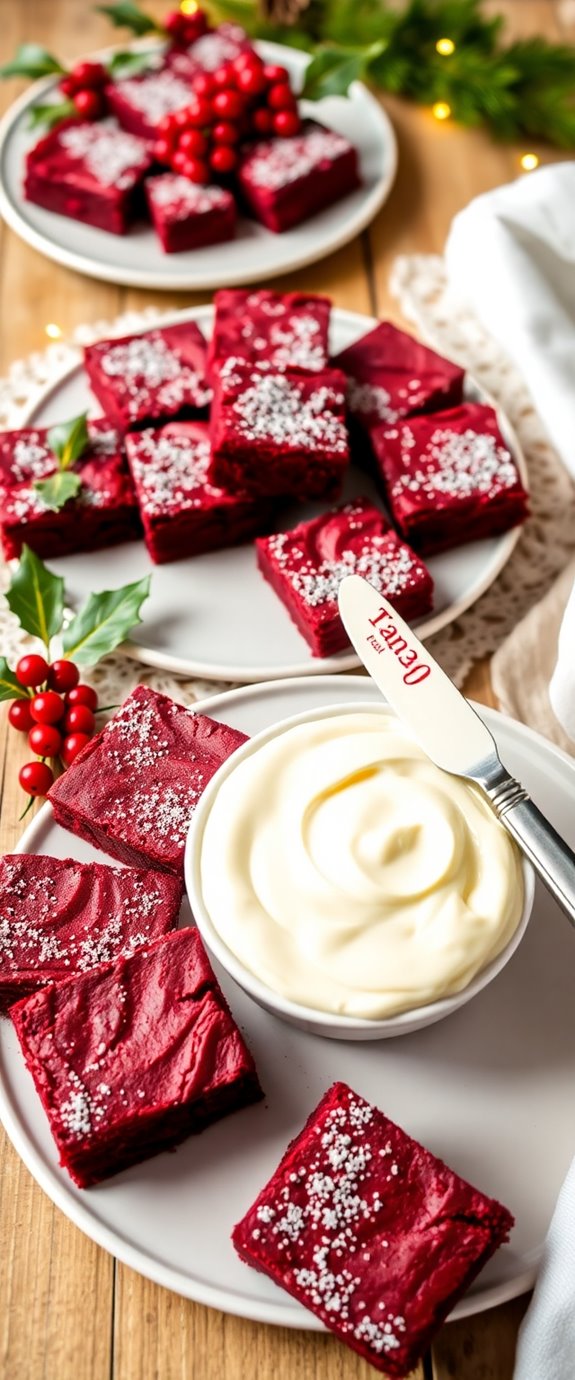
For the best results, remember to measure your ingredients accurately and mix the batter gently to avoid overmixing, which can lead to tough brownies. If you want to elevate the flavor, consider adding a cream cheese frosting on top for a classic red velvet experience.
Additionally, storing the brownies in an airtight container will help maintain their moist texture, and they can be kept at room temperature for up to three days or refrigerated for longer freshness. Enjoy your delicious Red Velvet Brownies!
Substitution Suggestions
If you find yourself missing a key ingredient for your Red Velvet Brownies or simply want to make some adjustments, don't worry—there are plenty of substitutions that can still yield delicious results.
For a vegan alternative, swap eggs with applesauce or flaxseed meal mixed with water.
If you're looking for gluten-free options, replace regular flour with almond flour or a gluten-free baking blend.
You can also use coconut oil instead of butter for a dairy-free twist.
Additionally, incorporating decadent homemade brownies can elevate your dessert experience even further.
With these simple changes, you'll create a scrumptious batch of brownies that everyone can enjoy, regardless of dietary preferences!
Decorating Ideas
Once you've perfected your Red Velvet Brownies, it's time to elevate them with some creative decorating ideas that will impress your guests.
Start by drizzling a rich cream cheese frosting over the top, then sprinkle festive toppings like crushed peppermint, colorful sprinkles, or edible glitter for that holiday sparkle.
You can also cut the brownies into fun shapes using cookie cutters, adding a playful touch.
For an elegant finish, consider placing a dollop of whipped cream or a dusting of cocoa powder on each square. Adding decadent flavors through various toppings can enhance the overall taste and presentation.
These creative embellishments will transform your brownies into a festive centerpiece and delight everyone at your gathering!
Serving Suggestions
While you might be tempted to dive straight into those delicious Red Velvet Brownies, presenting them in an appealing way can enhance the overall experience.
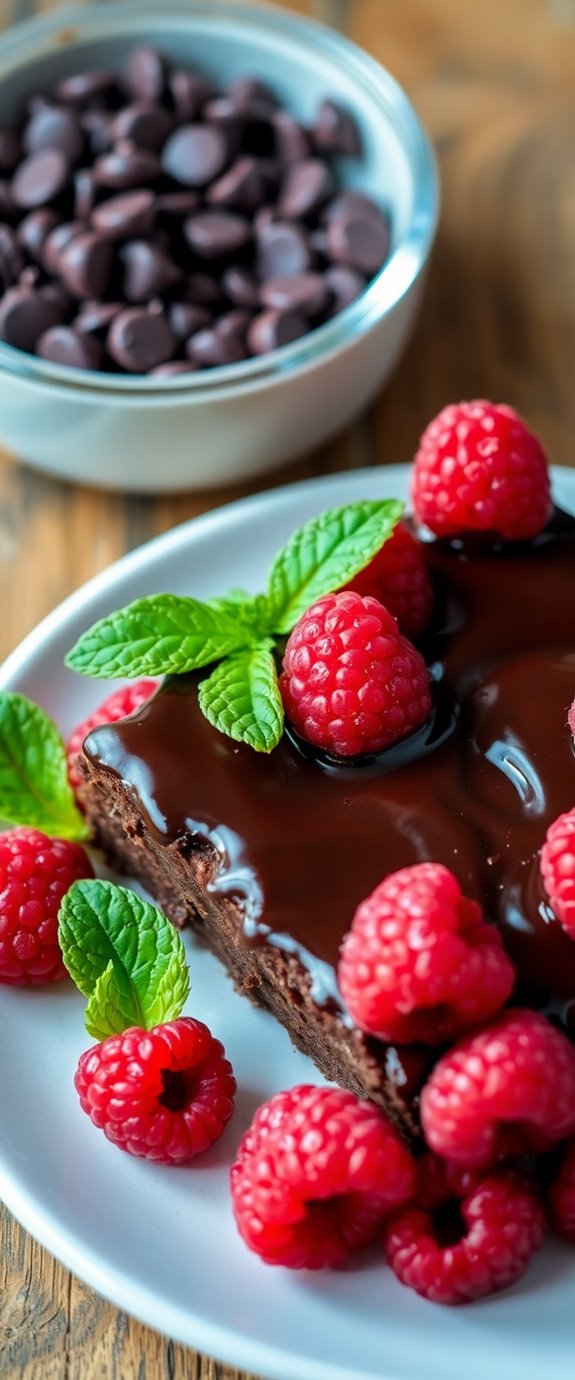
For a festive presentation, consider placing the brownies on a decorative platter, perhaps garnished with fresh raspberries or a dusting of powdered sugar. You could also cut them into holiday-themed shapes using cookie cutters for fun serving ideas.
Pair them with a scoop of vanilla ice cream or a drizzle of cream cheese frosting for extra indulgence. These brownies are particularly delightful because they are made with almond flour, which adds a unique flavor and texture.
Don't forget to add festive napkins and twinkling lights nearby to create that warm holiday atmosphere everyone loves!
Make-Ahead and Storage
After impressing your guests with beautifully presented Red Velvet Brownies, you might wonder how to keep that delightful experience going.
With some make-ahead tips, you can simplify your holiday baking. Prepare your ingredients—like mixing the dry ingredients and chilling the batter—up to a day in advance. When you're ready to bake, just combine the wet and dry components.
You can also bake the brownies ahead of time and let them cool completely before serving. This way, you can enjoy the festivities without the last-minute stress, ensuring your brownies are always a hit at any gathering. Additionally, you can enhance the flavor by adding Keto-friendly ingredients that complement the rich red velvet taste.
How to Store Leftovers
To keep your delicious Red Velvet Brownies fresh and tempting, it's essential to store any leftovers properly.
First, let the brownies cool completely before transferring them to an airtight container. This prevents moisture buildup and keeps them fudgy.
For best leftover storage, layer parchment paper between the brownies to avoid sticking.
If you've got more than you can eat, consider freezing tips! Cut them into squares, wrap each piece tightly in plastic wrap, and place them in a freezer-safe bag.
They'll stay fresh for up to three months, ready to satisfy your sweet cravings whenever you want! Additionally, these brownies can be made with low carb ingredients to ensure you enjoy a guilt-free treat.
Nutrition Facts(per serving)
Red Velvet Brownies aren't just a treat for the eyes; they also pack a flavorful punch accompanied by a satisfying nutritional profile. Each serving size typically contains around 200 calories, making them a delightful indulgence without overwhelming your daily intake.
You'll find a balance of carbohydrates, fats, and a touch of protein, which can keep you satisfied. The rich cocoa and cream cheese components add essential nutrients, while the vibrant red hue comes from natural ingredients. In fact, the addition of rich cocoa brings antioxidants that can benefit your overall health.
Final Thoughts
As you indulge in these Red Velvet Brownies, it's clear that this dessert is more than just a feast for the eyes; it's a celebration of flavor and texture.
Perfect for holiday baking, these brownies bring a rich, velvety taste that embodies the spirit of festive desserts. Whether you're sharing them at a holiday gathering or enjoying them by the fireplace, they add a touch of joy to any occasion.
The combination of chocolate and cream cheese frosting creates a delightful balance, making each bite memorable. Additionally, these brownies are enhanced by the irresistible Red Velvet Oreo Truffle elements that elevate the classic recipe to new heights.
Recipe FAQs
Can I Use a Different Type of Cocoa Powder?
Imagine rich, dark chocolate swirling in your baking bowl. You can definitely use different cocoa powder types, but remember, each brings unique flavors. Adjust your baking substitutions accordingly to achieve the taste you desire.
What Is the Best Way to Cut Brownies Neatly?
To cut brownies neatly, use a sharp knife or a bench scraper. Dip the cutting tool in warm water before each cut for clean edges. Employ gentle, straight down movements to maintain the perfect shape.
Can I Use Gluten-Free Flour for This Recipe?
Absolutely, you can use gluten-free flour! The texture might change slightly, but it'll still be delicious. Just make certain you choose a good blend to maintain that rich, fudgy consistency you crave. Enjoy your gluten-free adventure!
How Do I Know When the Brownies Are Fully Baked?
To check if your brownies are fully baked, use the doneness test. Insert a toothpick in the center; if it comes out with a few moist crumbs, they're perfect. Remember, baking tips lead to delicious results!
Can I Add Nuts or Chocolate Chips to the Batter?
Adding nuts or chocolate chips to the batter is like giving your brownies a cozy blanket of flavor. These nutty variations and chocolate enhancements can elevate your treat, making each bite richer and more delightful!