Did you know that red velvet brownies blend the elegance of red velvet cake with the rich indulgence of brownies? This recipe not only offers a stunning visual appeal but also a unique flavor profile that can captivate any dessert lover. By combining simple ingredients in just the right way, you can create a treat that's perfect for any occasion. Curious about how to achieve that perfect fudgy texture and vibrant color? Let's explore the details together.
Recipe Tips and Tricks
- Combine melted unsalted butter and granulated sugar, then whisk in eggs and vanilla extract for a rich base.
- Mix together all-purpose flour, cocoa powder, baking powder, and salt before gradually adding to the wet ingredients.
- For enhanced flavor, consider adding a hint of espresso or using dark cocoa powder for a deeper chocolate taste.
- Bake at the correct temperature and allow cooling time to enhance the flavors and texture of the brownies.
- Customize with optional ingredients like white chocolate chips, nuts, or cream cheese frosting for added sweetness and decoration.
How To Make It – Recipe
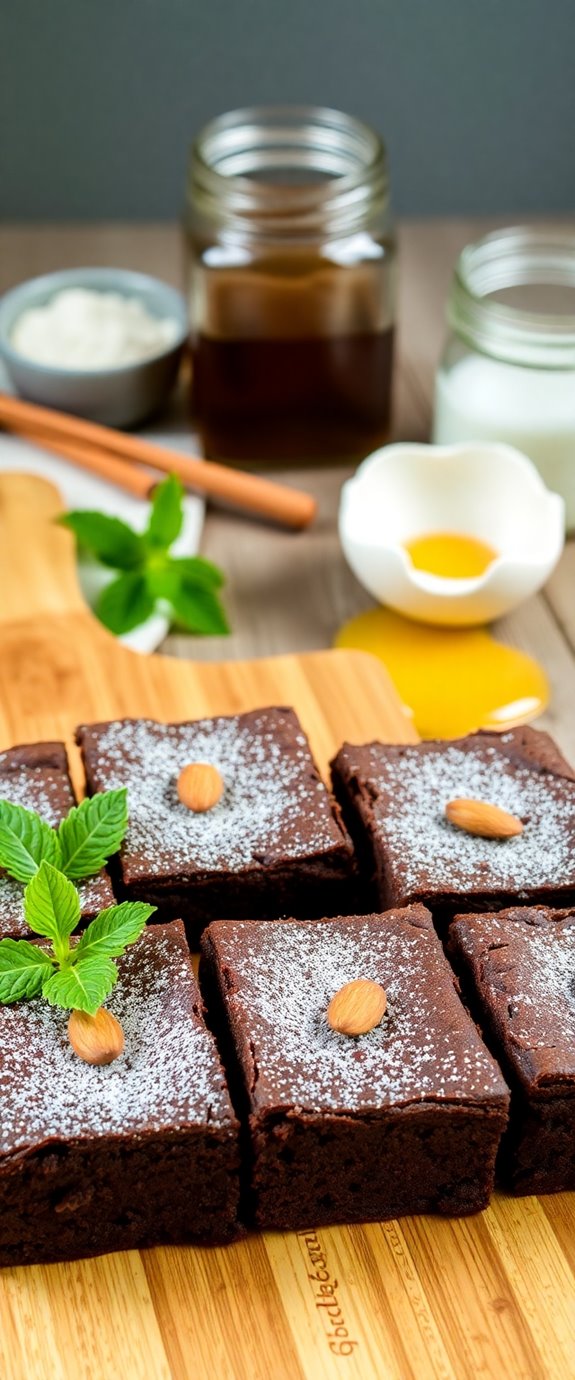
To create the ultimate red velvet brownies, you'll want to gather a few essential ingredients that will give your dessert its signature flavor and color. These brownies blend the rich, velvety texture of traditional red velvet cake with the fudgy goodness of brownies, making them a deliciously indulgent treat. Perfect for special occasions or just a cozy night in, they're sure to impress everyone who tries them. Additionally, these brownies make for a festive holiday treat that brings joy to any gathering.
Before you begin, make sure your kitchen is prepped and ready. You'll need to have your baking dish lined with parchment paper for easy removal and a few bowls for mixing. The key to achieving that perfect red hue lies in the quality of the cocoa powder and food coloring you choose, so opt for high-quality products to enhance the taste and appearance of your brownies.
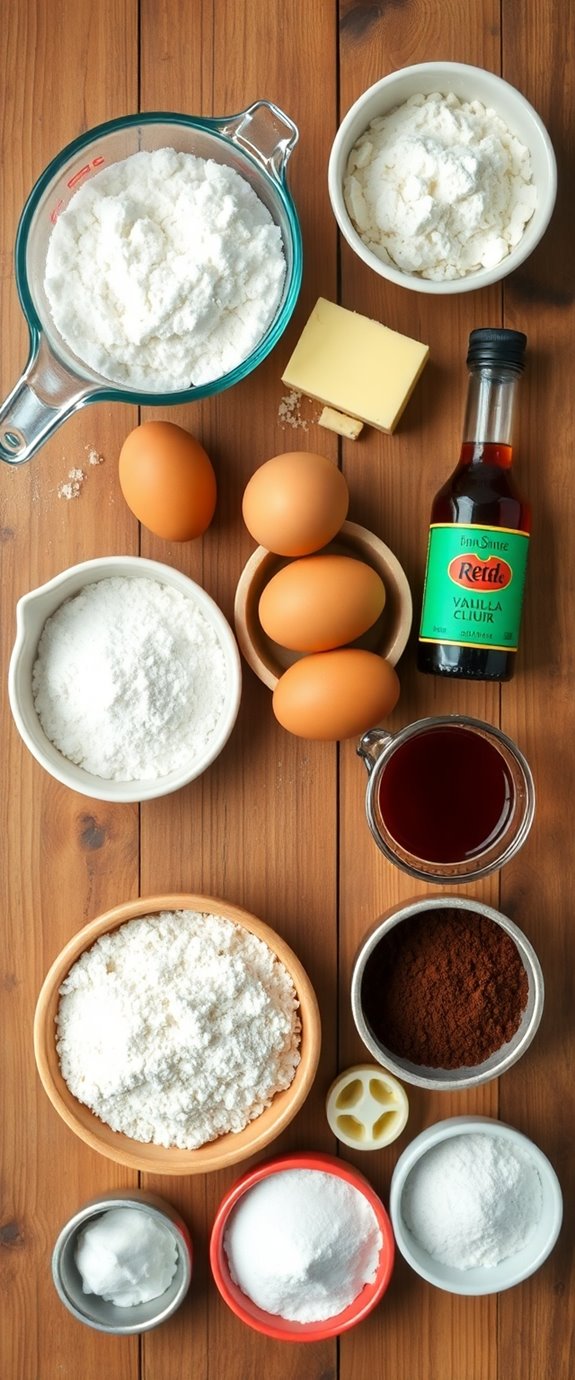
Ingredients:
- 1 cup unsalted butter
- 1 ½ cups granulated sugar
- 4 large eggs
- 1 teaspoon vanilla extract
- 2 cups all-purpose flour
- ½ cup unsweetened cocoa powder
- 1 teaspoon baking powder
- ½ teaspoon salt
- 1 tablespoon red food coloring
- 1 cup white chocolate chips (optional)
In a large mixing bowl, melt the butter and then whisk in the granulated sugar until well combined. Add the eggs, one at a time, followed by the vanilla extract and red food coloring.
In a separate bowl, combine the flour, cocoa powder, baking powder, and salt. Gradually add the dry ingredients to the wet mixture, stirring until just combined. Fold in the white chocolate chips if you're using them.
Pour the brownie batter into the prepared baking dish and spread it evenly. Bake in a preheated oven at 350°F (175°C) for 25-30 minutes or until a toothpick inserted into the center comes out with a few moist crumbs.
When making red velvet brownies, it's important to not overmix the batter, as this can lead to dense brownies instead of the desired fudgy texture. Additionally, allowing the brownies to cool completely before cutting them will help them hold their shape better.
If you're feeling adventurous, consider topping your brownies with a cream cheese frosting for an extra layer of flavor that complements the red velvet theme. Enjoy your baking!
Substitution Suggestions
While you've got your red velvet brownie batter prepped and ready to go, it's good to know that there are several ways to customize your recipe based on what you have on hand or personal preferences.
For flour alternatives, consider using almond flour or coconut flour for a gluten-free option; just adjust the liquid to maintain the right consistency.
If you want to enhance the chocolate flavor, swap in dark cocoa powder instead of regular cocoa powder.
Additionally, incorporating decadent homemade red velvet brownies can elevate the richness and overall texture of your brownies.
These substitutions not only keep your brownies delicious but also let you cater to dietary needs or flavor preferences without sacrificing that classic red velvet experience.
Decorating Ideas
Once your red velvet brownies are baked and cooled, it's time to elevate their visual appeal and flavor with some fun decorating ideas.
Start by slathering on your favorite frosting options, like cream cheese or whipped chocolate, for a creamy finish. Add festive toppings such as crushed nuts, colorful sprinkles, or even edible glitter to make them pop.
For an extra twist, drizzle some melted white chocolate over the top or place a dollop of whipped cream beside each brownie. You can also consider using Keto-friendly ingredients to ensure your decorations align with a low-carb lifestyle.
These simple yet delicious enhancements will turn your brownies into a show-stopping dessert perfect for any occasion!
Serving Suggestions
For an indulgent treat, serve them warm with a scoop of vanilla ice cream on top, allowing the cream to melt into the rich brownie. Drizzle chocolate or cream cheese frosting for an extra touch. You can elevate the flavor experience by incorporating decadent red velvet elements, which enhance the overall taste profile. Pairing ideas include fresh berries, like raspberries or strawberries, which add a tart contrast to the sweetness. Consider a side of whipped cream or a dollop of mascarpone for a gourmet twist.
With these serving suggestions, your brownies won't only taste fantastic but also look irresistible on any dessert table.
Make-Ahead and Storage
If you want to enjoy your red velvet brownies at a later time, they're easy to make ahead and store.
Start by baking your brownies a day or two in advance; this allows the flavors to deepen.
Once cooled, cut them into squares for easy serving.
For storage solutions, wrap each brownie tightly in plastic wrap, then place them in an airtight container. This will keep them fresh for up to a week at room temperature.
If you want to extend their life, freeze them! Just remember to use these make ahead tips for the best results. Additionally, adding frosting or cream cheese on top before storing can enhance their flavor even more.
Enjoy your delicious treats!
How to Store Leftovers
Leftover red velvet brownies can be a delightful treat, but proper storage is key to maintaining their rich flavor and texture.
To keep your leftover brownies fresh, place them in an airtight container at room temperature for up to four days. If you need to store them longer, wrap each brownie individually in plastic wrap and then place them in a freezer-safe bag. This method prevents freezer burn, allowing you to enjoy your brownies later without sacrificing taste.
For even better results, consider using almond flour in your brownie recipe, as it enhances both texture and flavor.
Remember these storage tips, and you'll savor those luscious treats long after baking! Enjoy every decadent bite!
Nutrition Facts(per serving)
When you indulge in a rich red velvet brownie, you might wonder about the nutrition packed into each delicious piece. Each serving typically contains around 200 calories, offering a satisfying treat without overwhelming your diet.
You'll find essential ingredients like cocoa powder, which provides antioxidants, and buttermilk, contributing to calcium intake. The nutritional benefits don't stop there—these brownies also include healthy fats from butter and eggs. Additionally, using low carb ingredients allows you to enjoy a guilt-free dessert option.
With a balanced calorie breakdown, you can enjoy a sweet delight while still being mindful of your nutritional choices. So, go ahead, savor that brownie; it's more than just a dessert!
Final Thoughts
As you take a moment to reflect on your red velvet brownie experience, it's clear that these delightful treats are more than just a dessert; they're a celebration of flavor and creativity.
Remember the baking tips you learned along the way—like not overmixing to guarantee a fudgy texture.
Don't hesitate to experiment with flavor variations, such as adding white chocolate chips or a hint of espresso for an extra kick. Red Velvet Oreo Truffle Brownies are a fun twist on this classic that can elevate your dessert game even further.
Each bite invites you to indulge in a rich, velvety experience.
Recipe FAQs
Can I Use a Different Type of Cocoa Powder?
You can definitely use different cocoa powder types! Just remember, the type you choose affects the chocolate flavor. Dutch-processed gives a milder taste, while natural cocoa adds a rich, intense chocolate profile to your dish.
How Do I Know When Brownies Are Fully Baked?
Brownie baking basics: When you're nearing the baking time, use the toothpick test. Insert a toothpick in the center; it should come out with a few moist crumbs, signaling your brownies are perfectly baked!
Can I Make These Brownies Gluten-Free?
Absolutely, you can make these brownies gluten-free! Just swap regular flour for alternative flours like almond or coconut flour. Be sure to use gluten-free substitutions to guarantee your brownies turn out delicious and satisfying.
What Is the Origin of Red Velvet Desserts?
Red velvet desserts trace their origins to the early 20th century, emerging from the desire for unique flavors. The red velvet history intertwines with classic cocoa, creating a rich, visually striking treat that captivates taste buds everywhere.
Are Red Velvet Brownies Suitable for Special Diets?
Red velvet brownies can fit various special diets. You can whip up vegan alternatives using plant-based ingredients, ensuring they meet dietary restrictions. Everyone can enjoy these decadent treats without compromising their needs or preferences!